
This article explains how to invite members or teams to your workspace, manage their roles, and remove them when needed.
Invite Members to Workspace
- Click Invite Members in the workspace sidebar to open the Members page.
- Click Add Members to open Invite to Workspace .
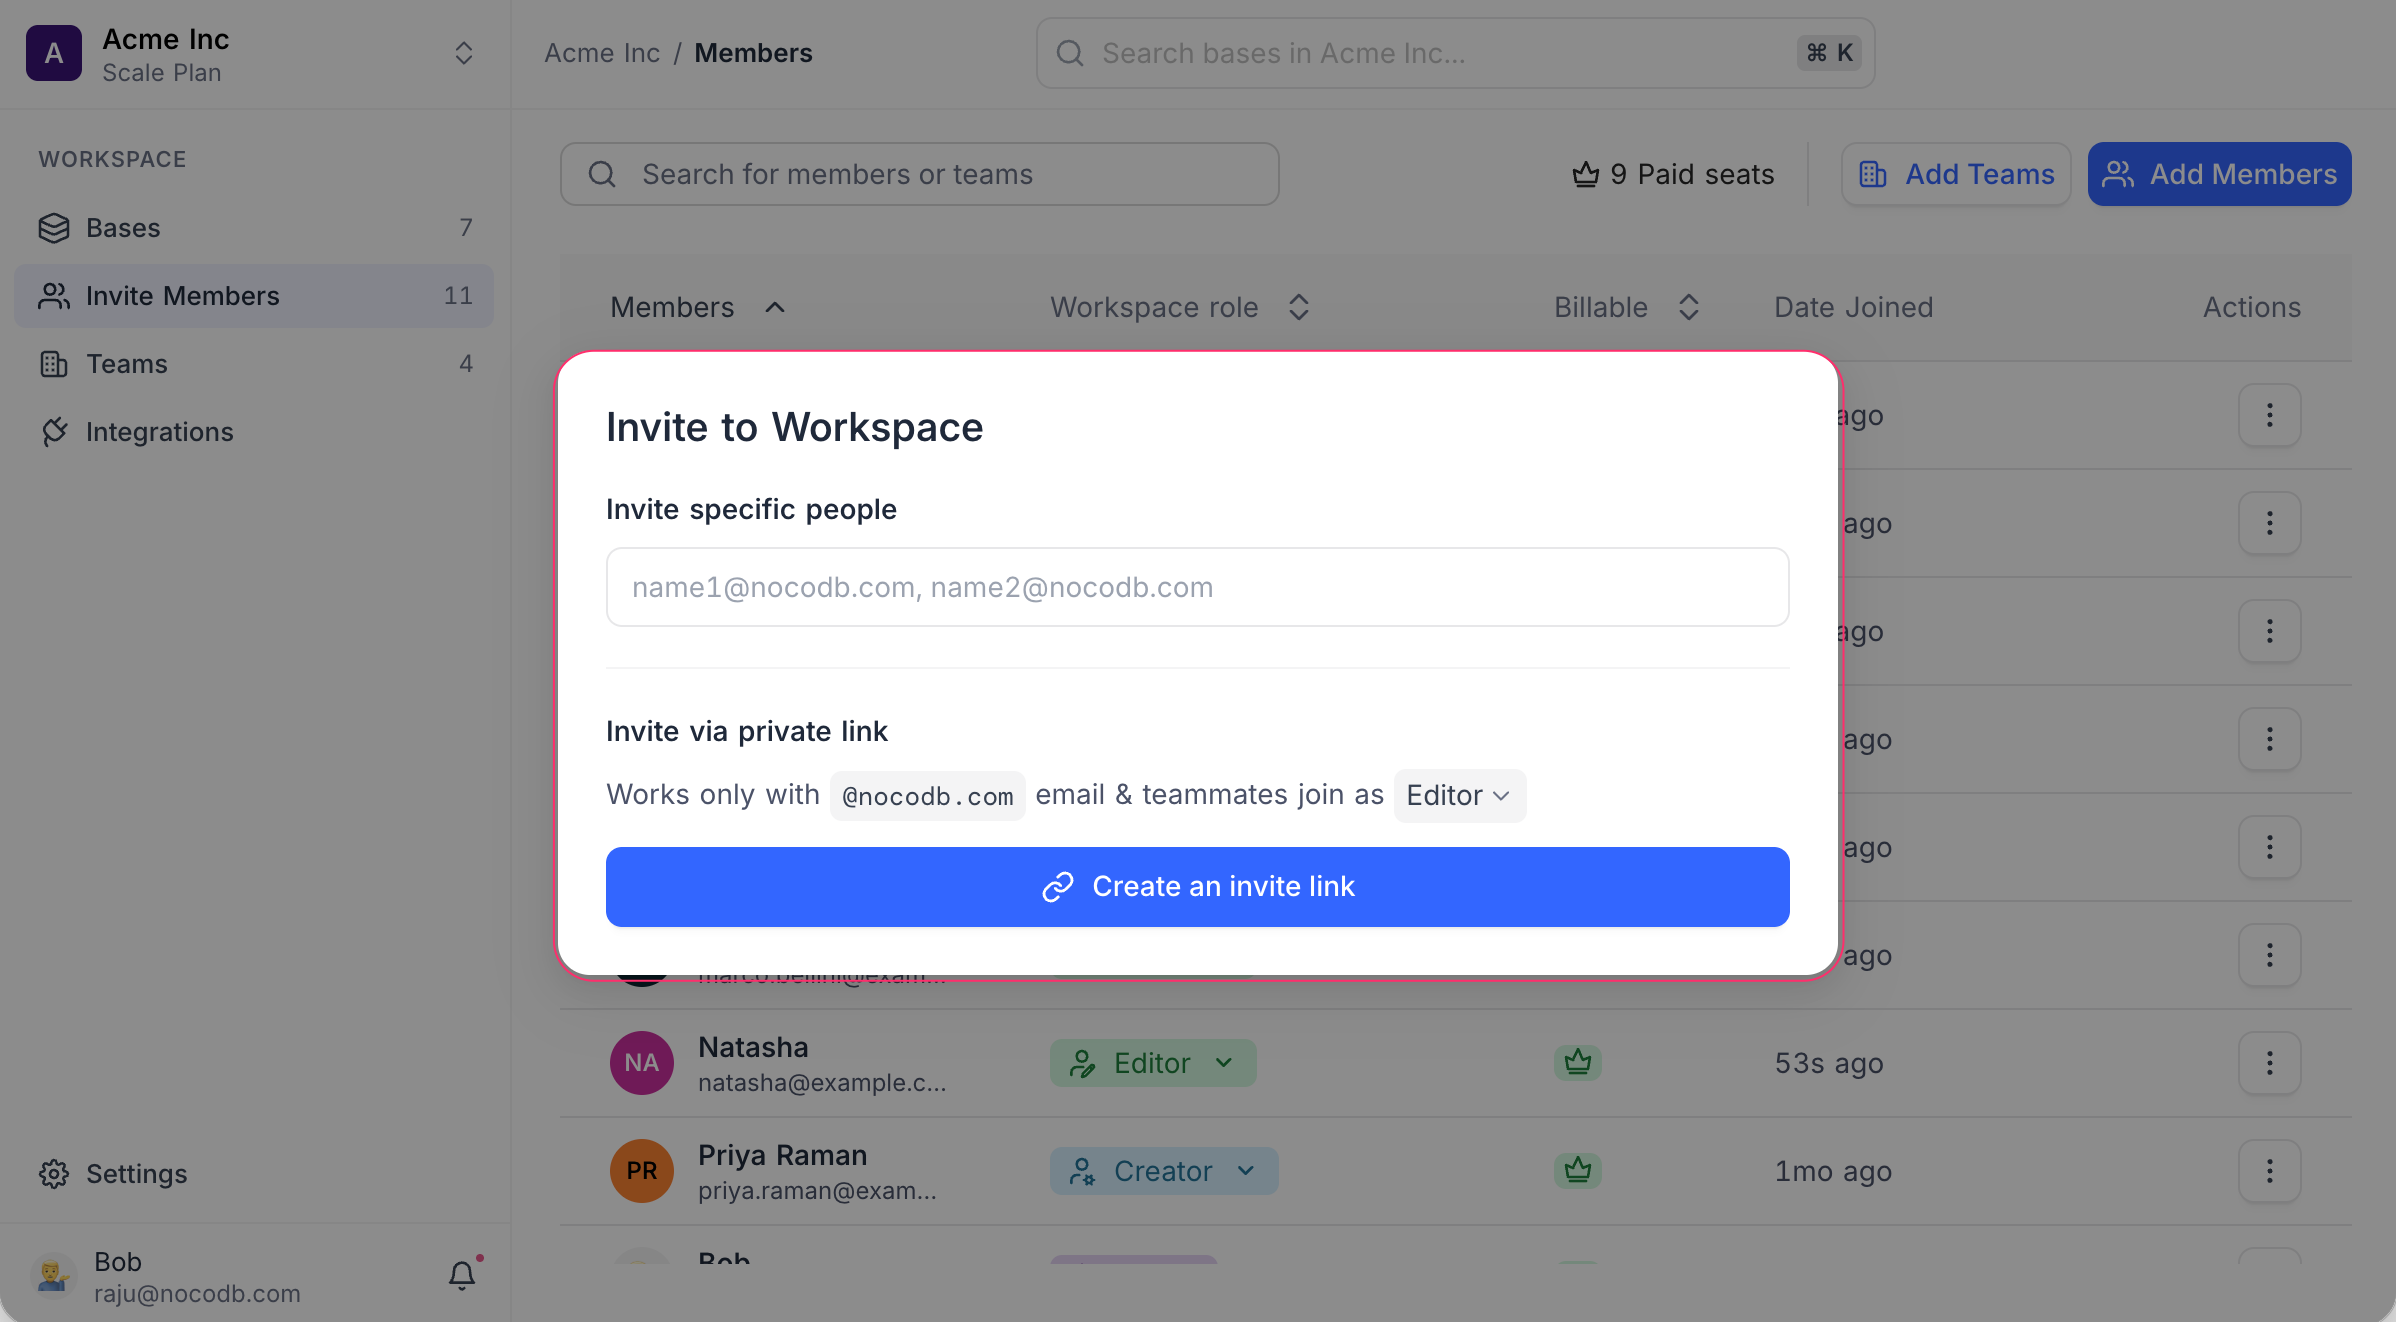
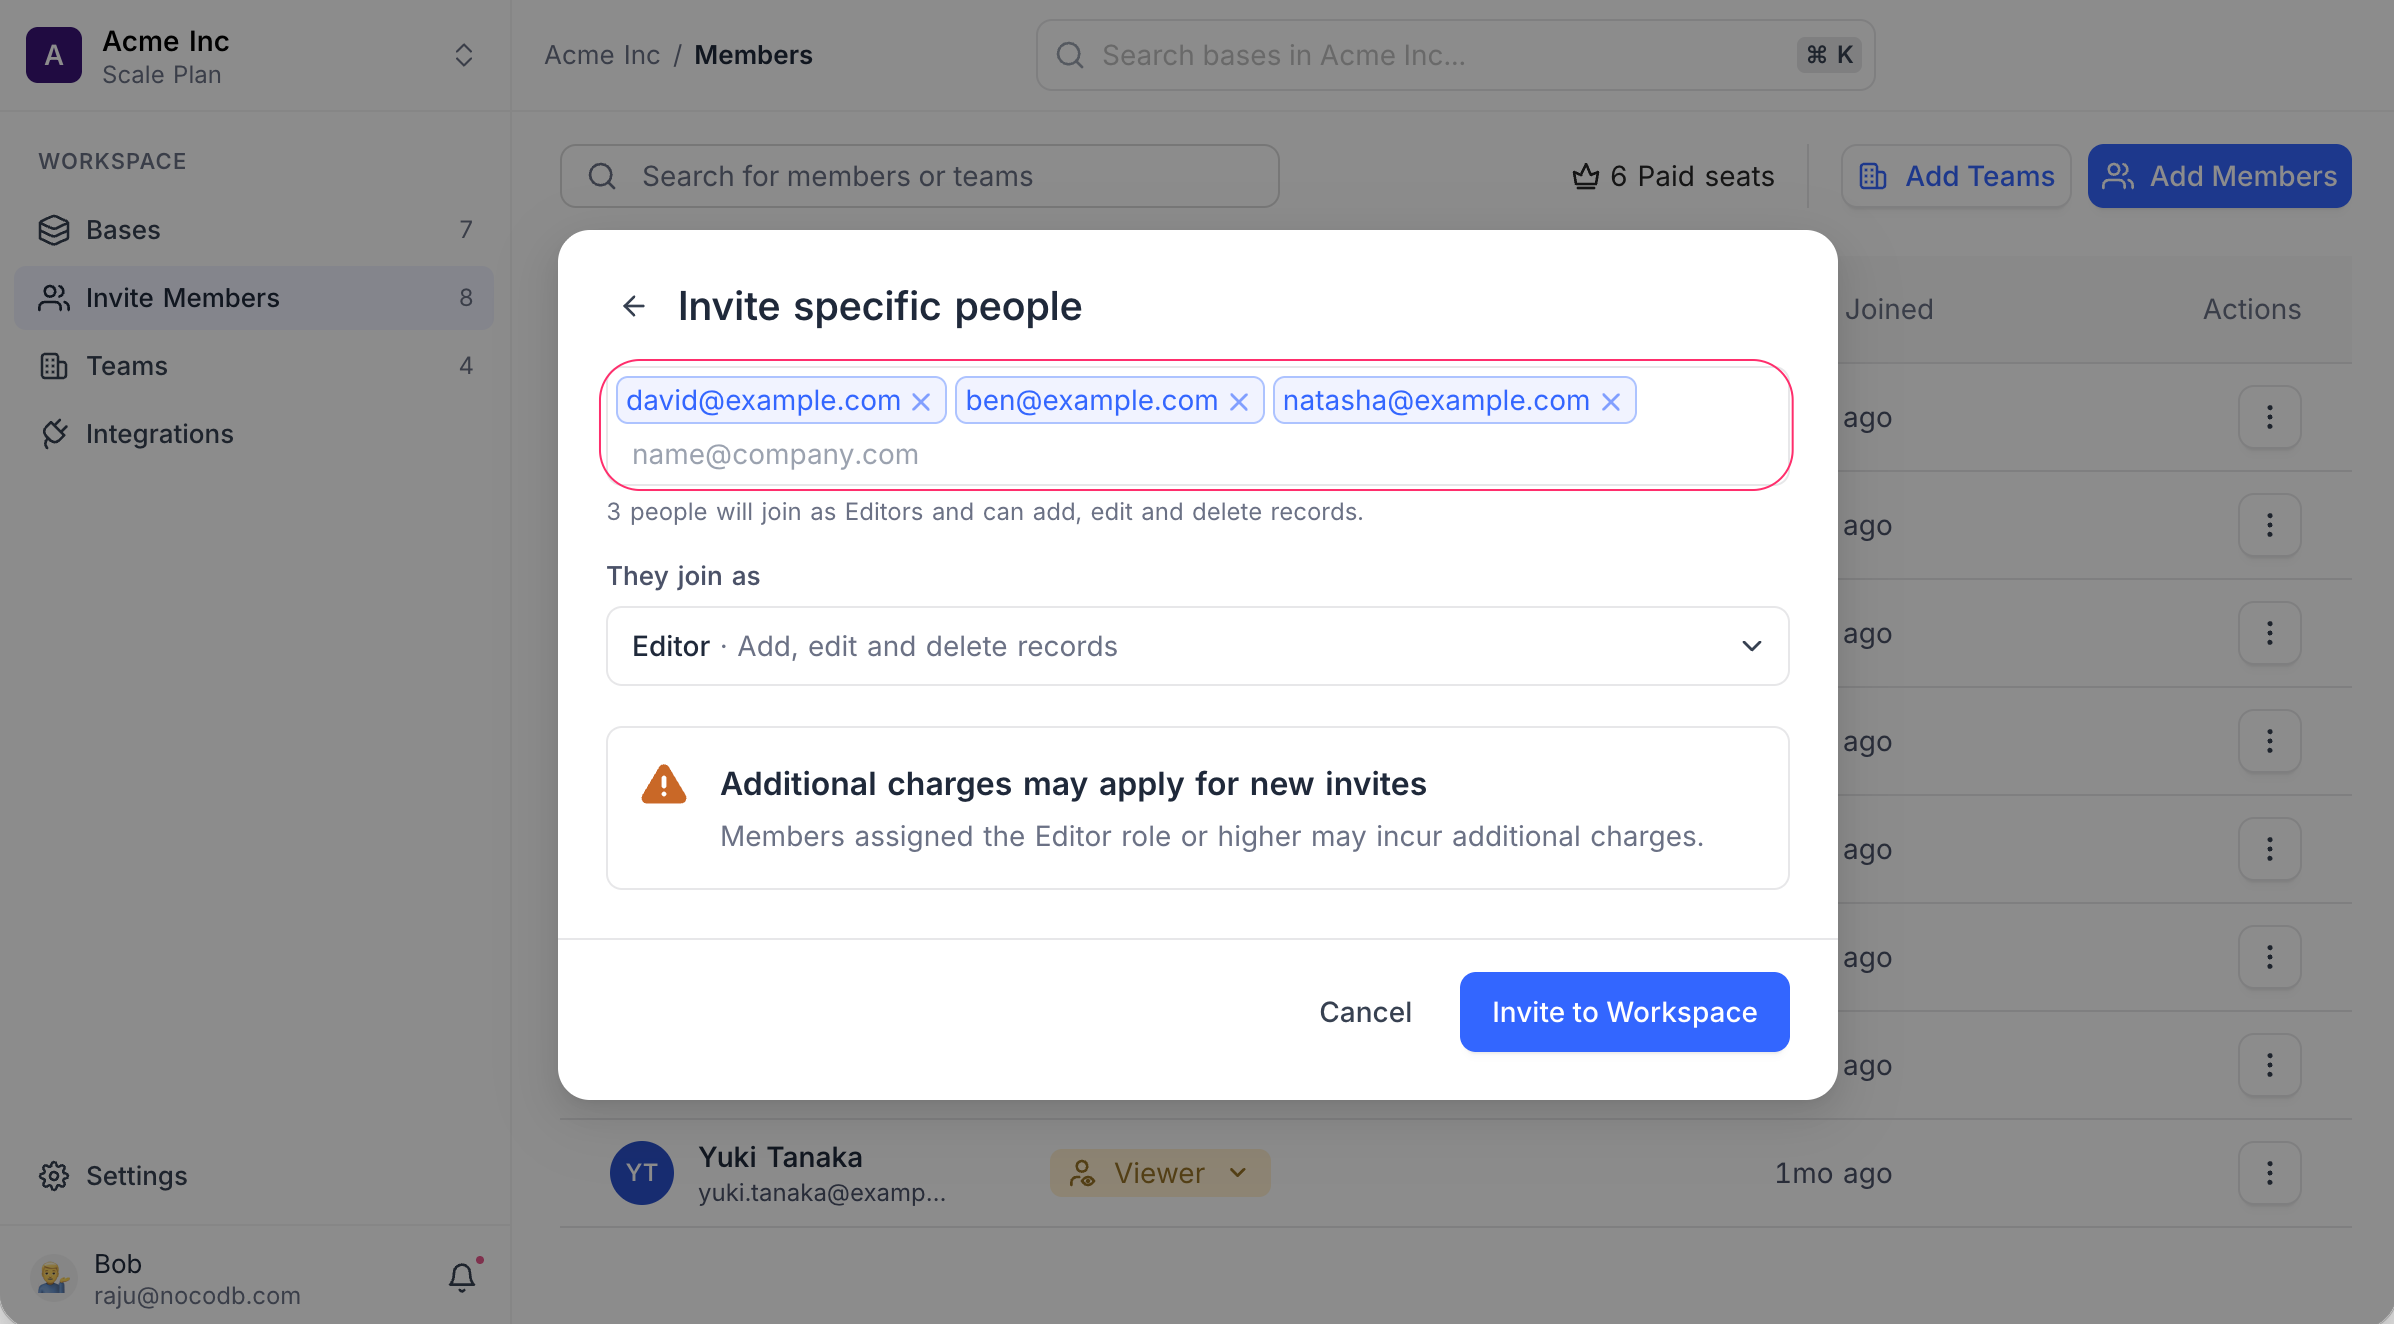
- Click the field under Invite specific people and enter one or more email addresses.
- Under They join as , choose the role everyone in this invite receives.
- Click Invite to Workspace .
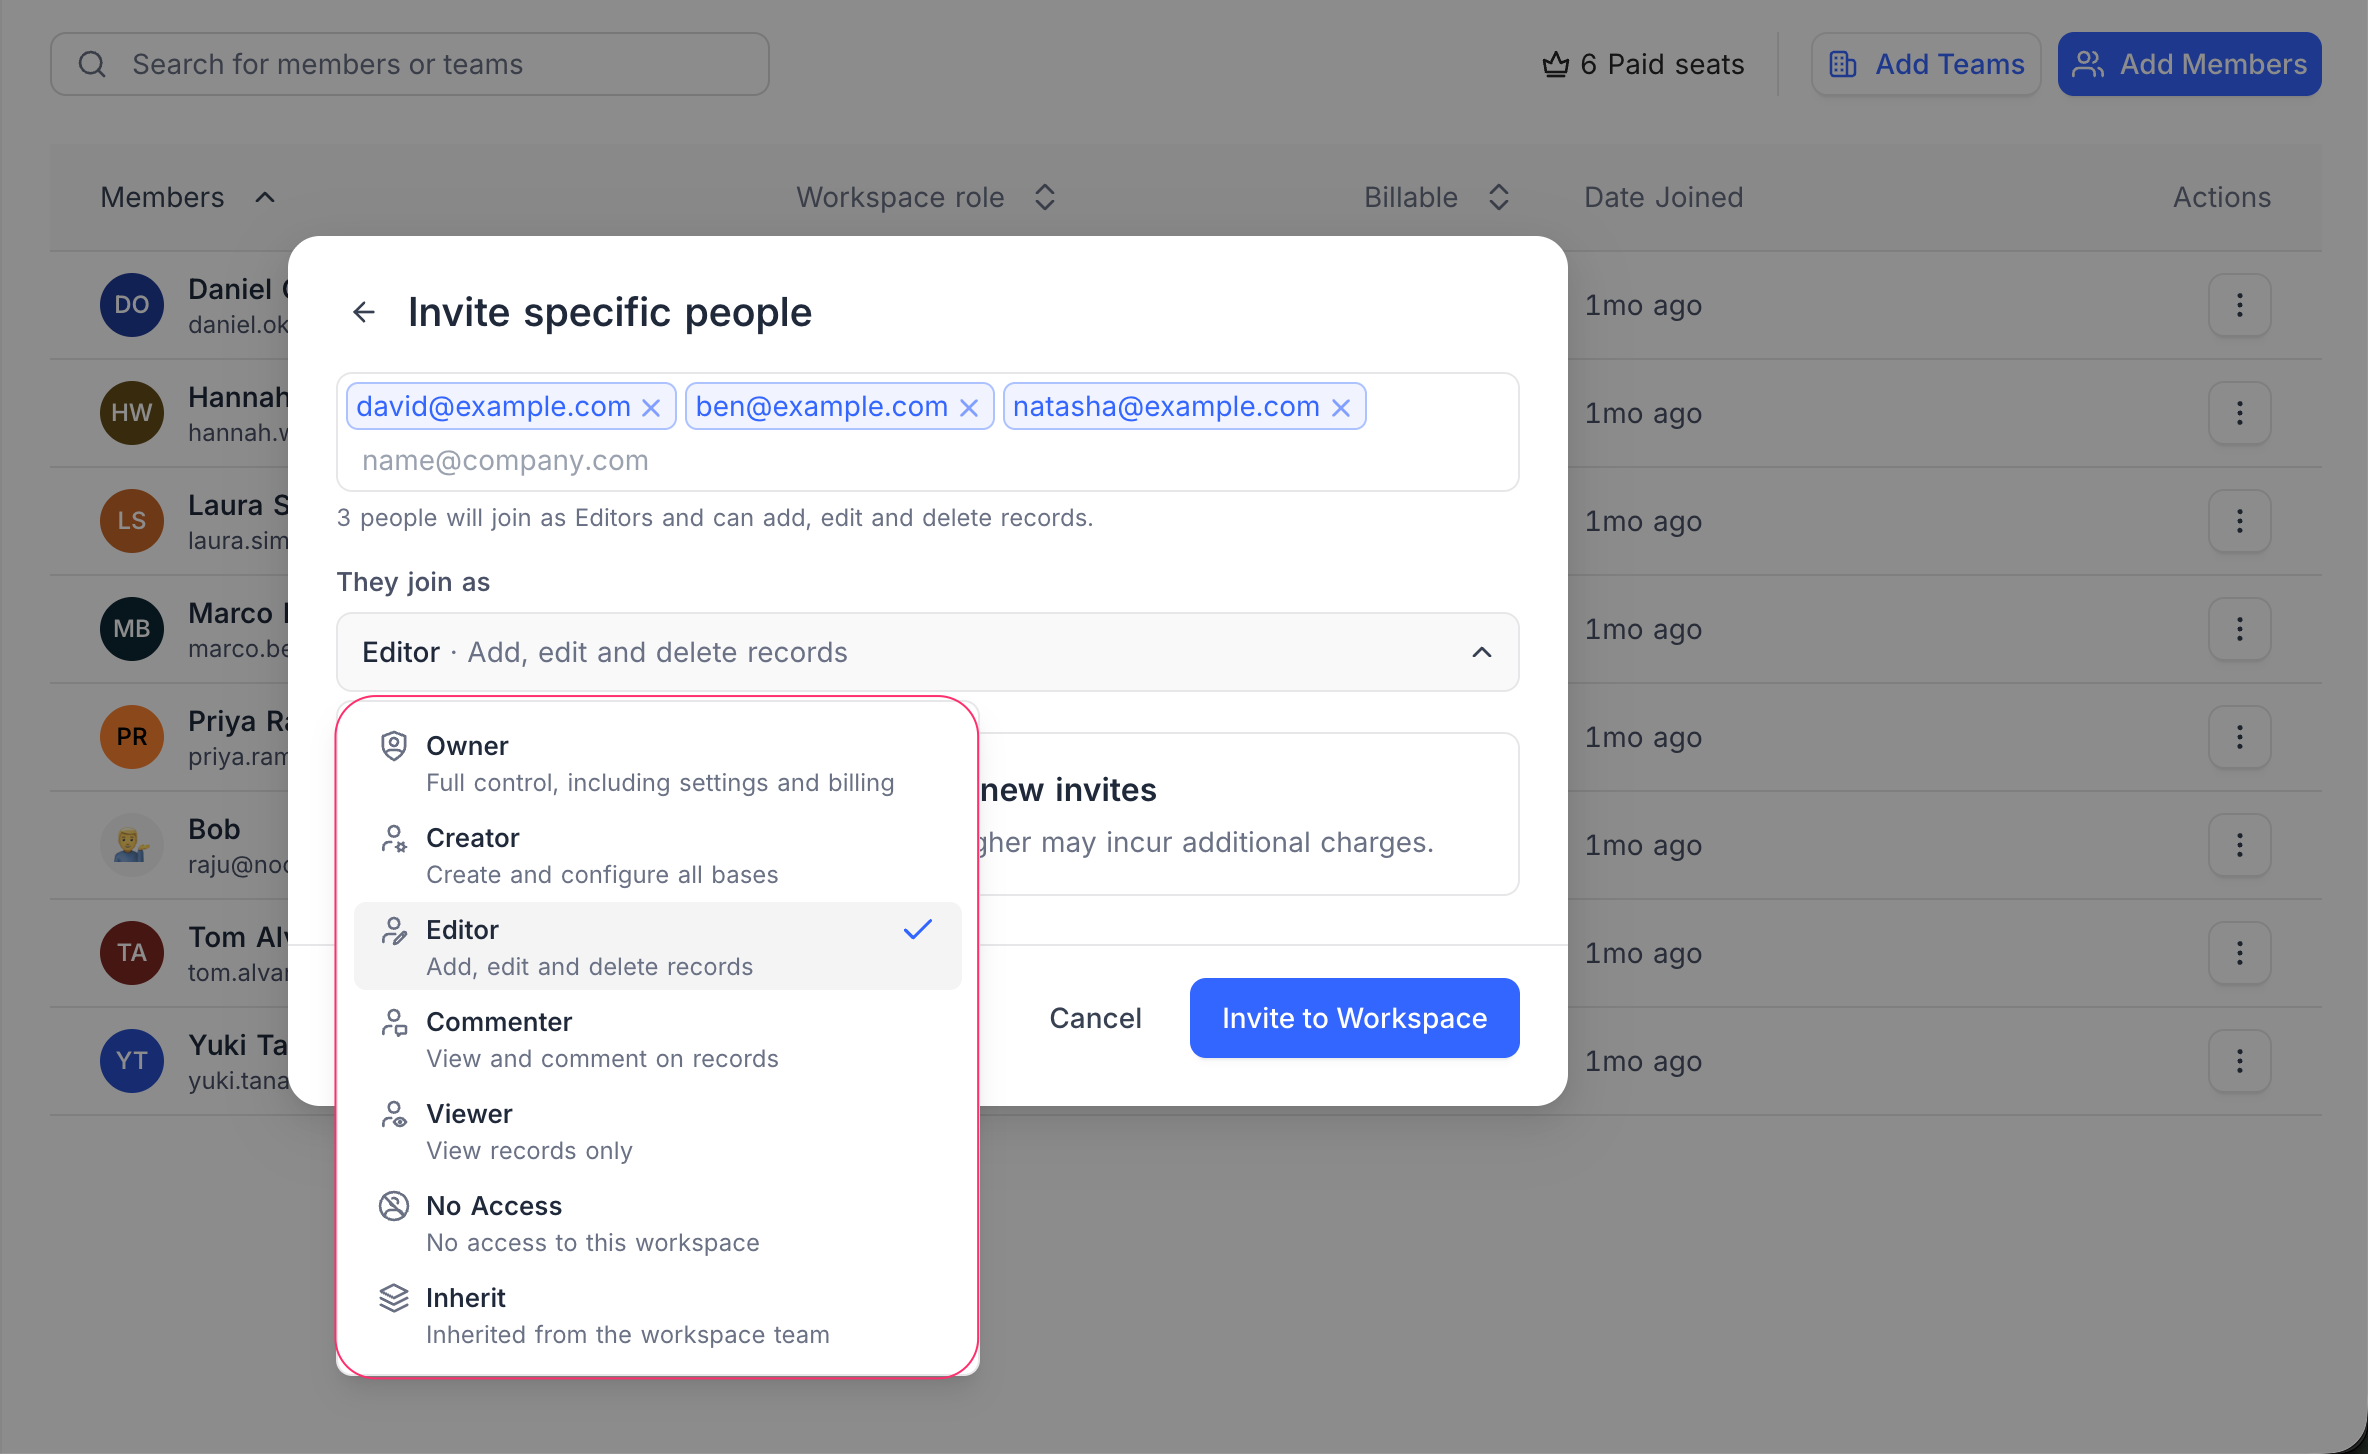
หมายเหตุ: Any user can invite members to the workspace, but they can only assign a role that is at most equal to their own role.
หมายเหตุ: On paid plans, Editor and above consume a paid seat, and the dialog warns you with Additional charges may apply for new invites before you confirm. Commenter , Viewer and No Access do not.
The dialog also offers Invite via private link , which creates a link anyone can redeem rather than inviting one address at a time. See invite links .
Invite Teams to Workspace ☁
Teams can be invited to a workspace for simplified collaboration, with a workspace-level role assigned to all team members.
- Click Invite Members in the workspace sidebar to open the Members page.
- Click Add Teams to open Add Teams to Workspace .
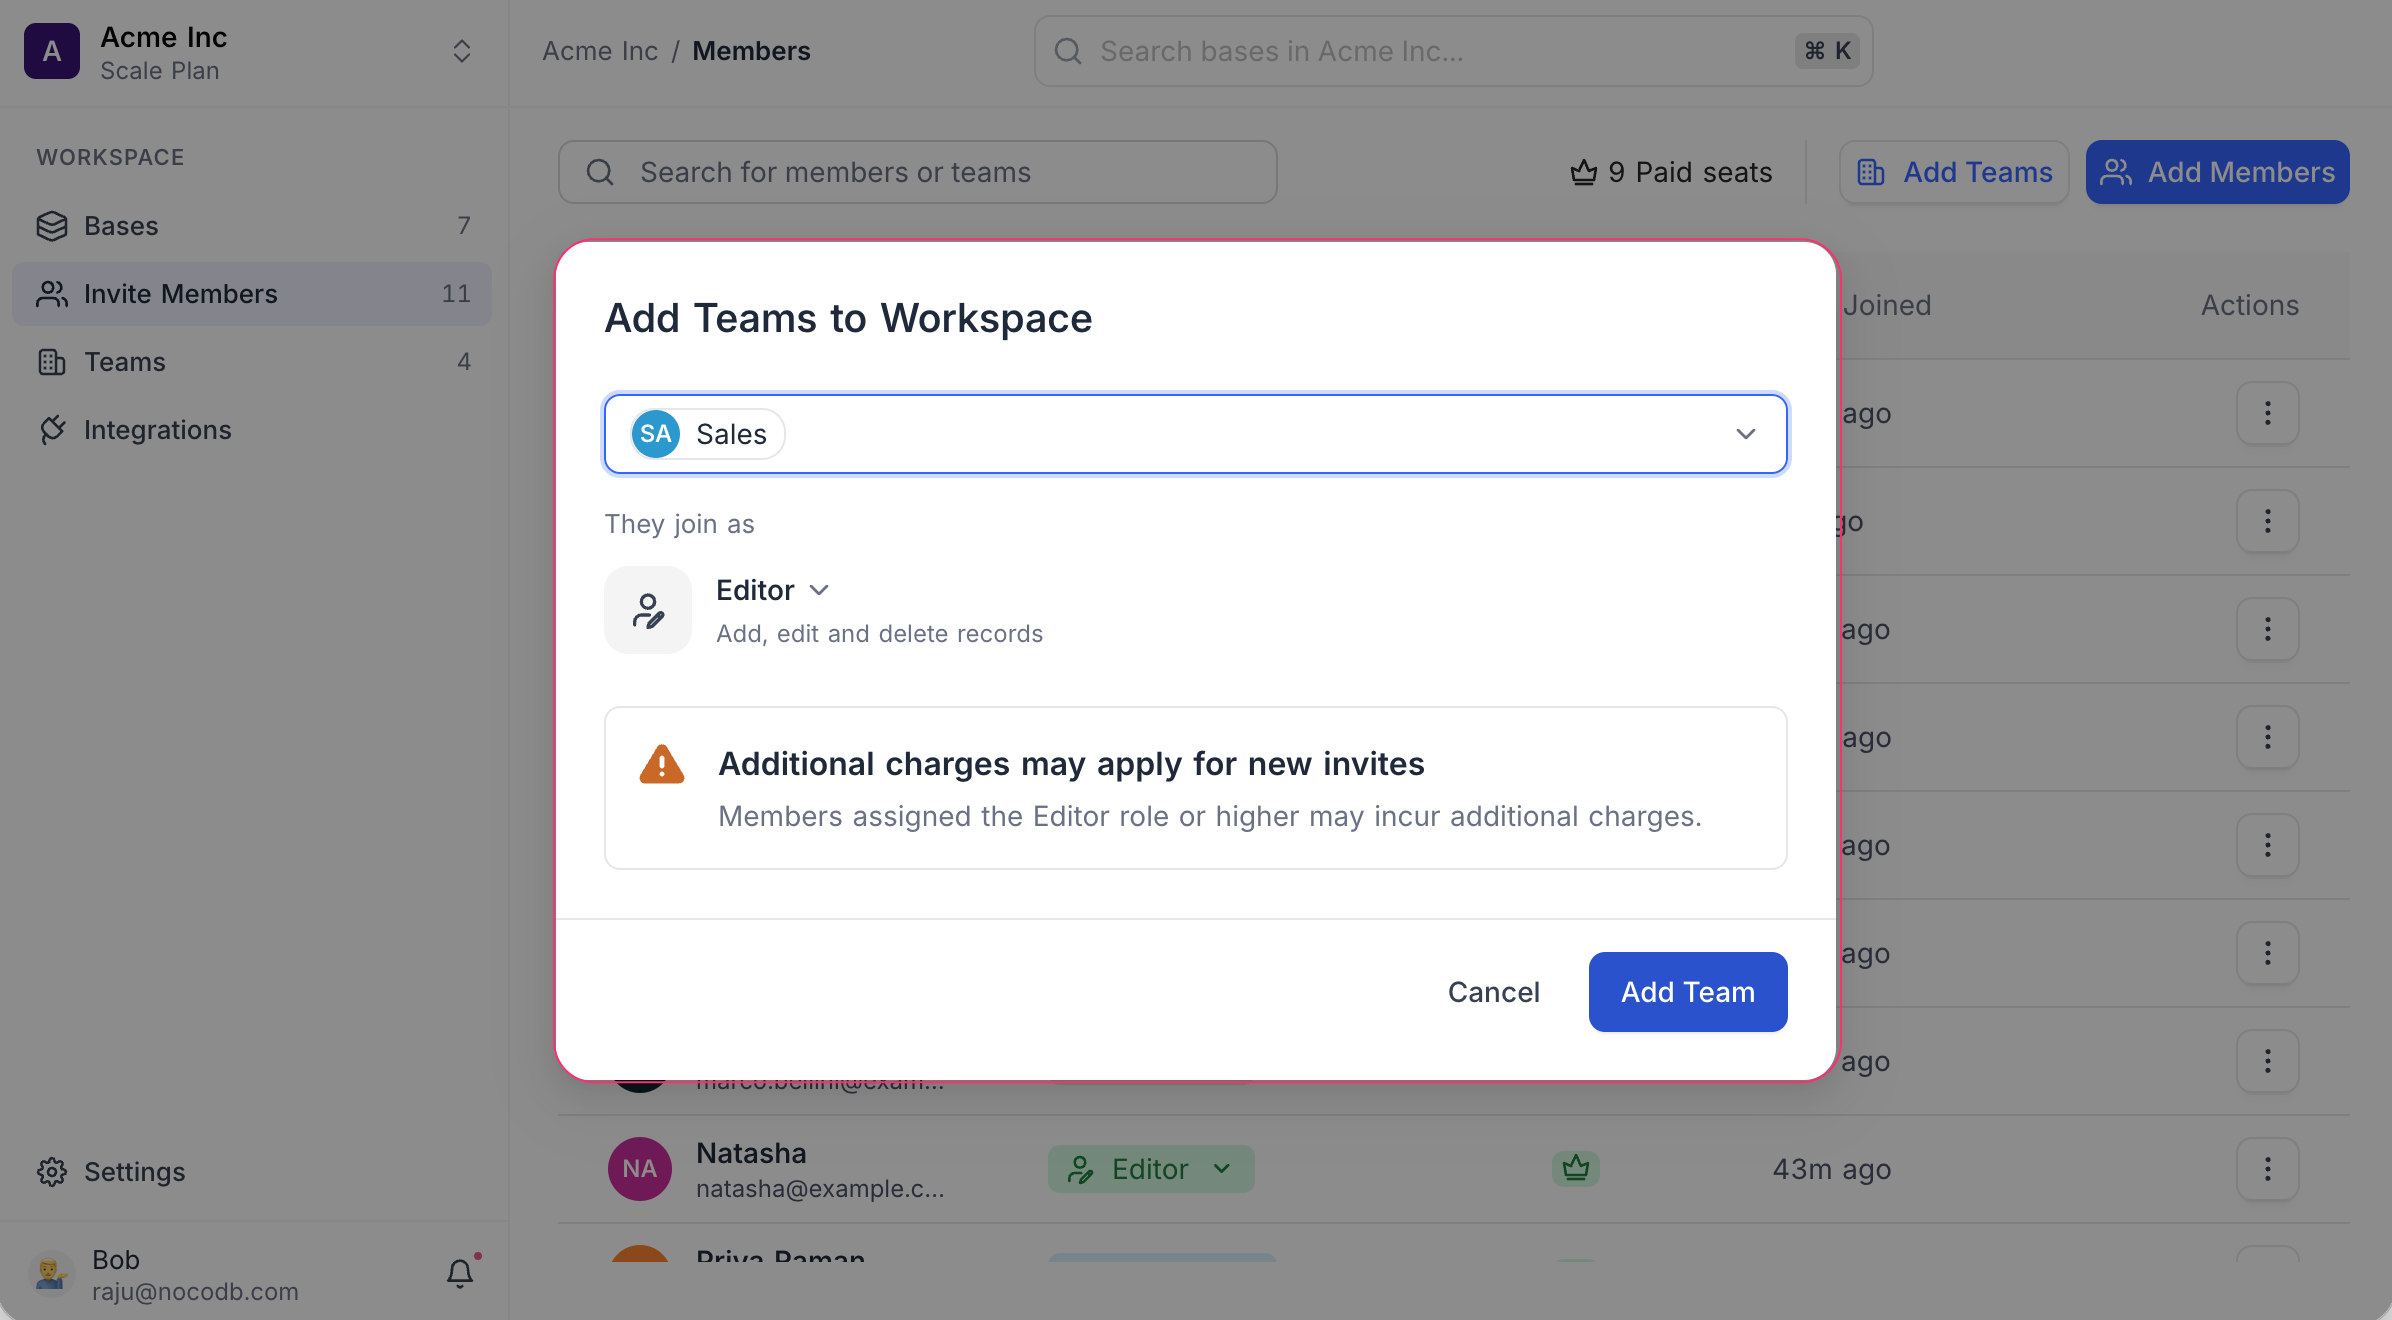
- Select one or more teams from the dropdown. Each is listed with its member count.
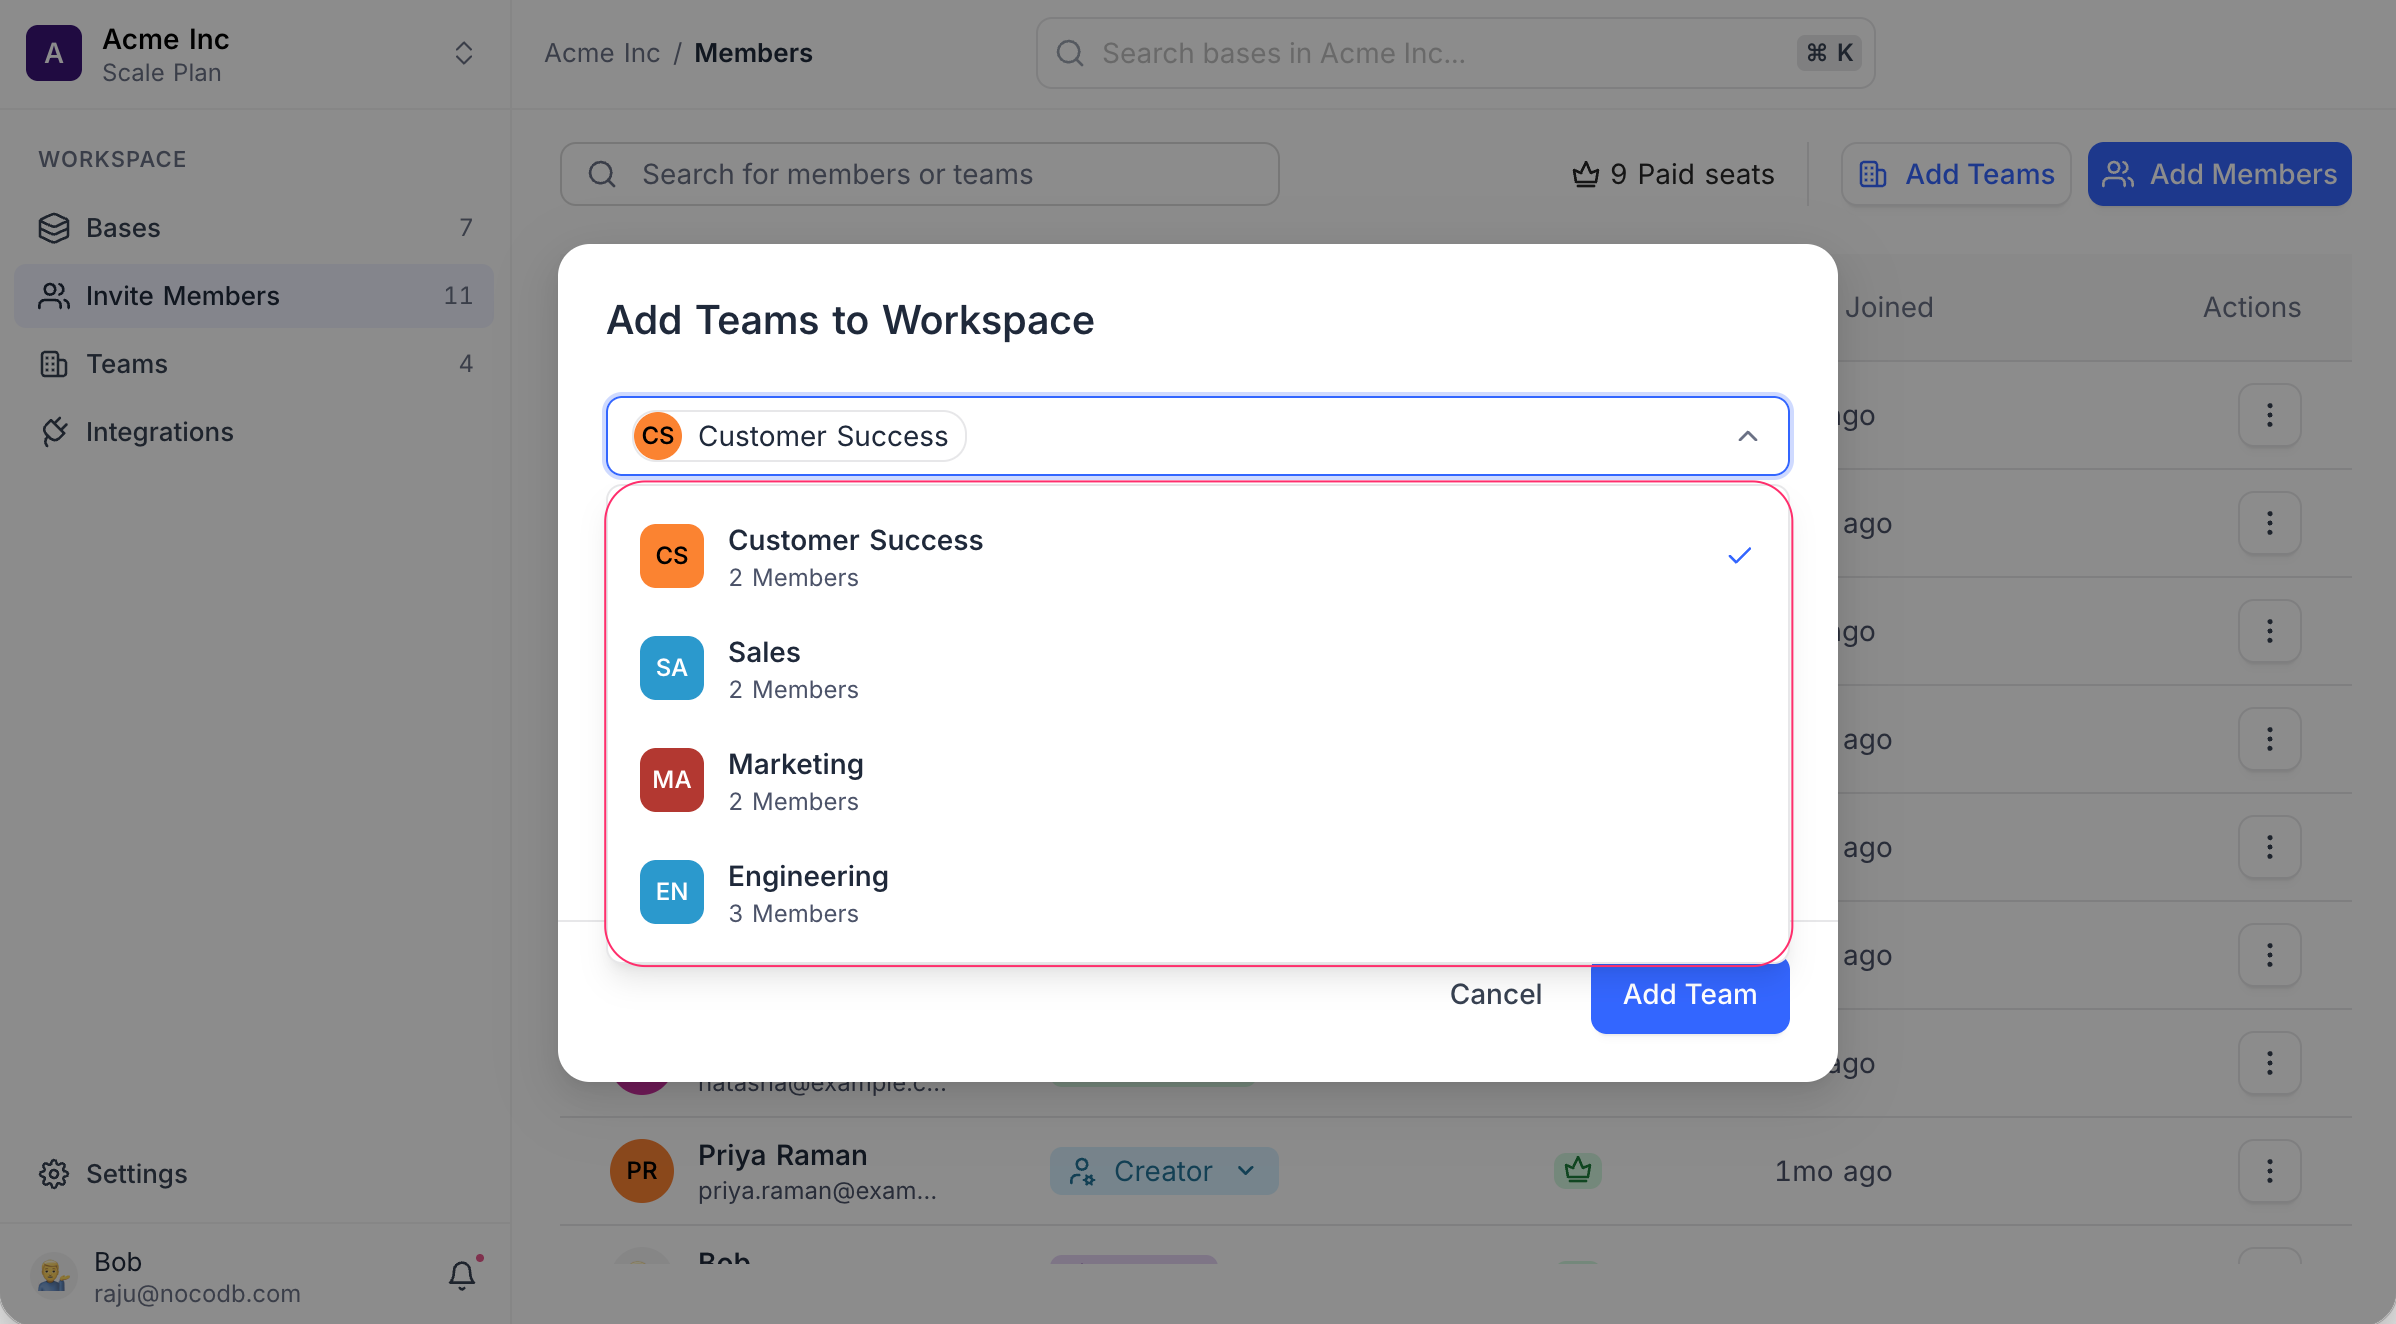
- Under They join as , choose the role the selected teams receive.
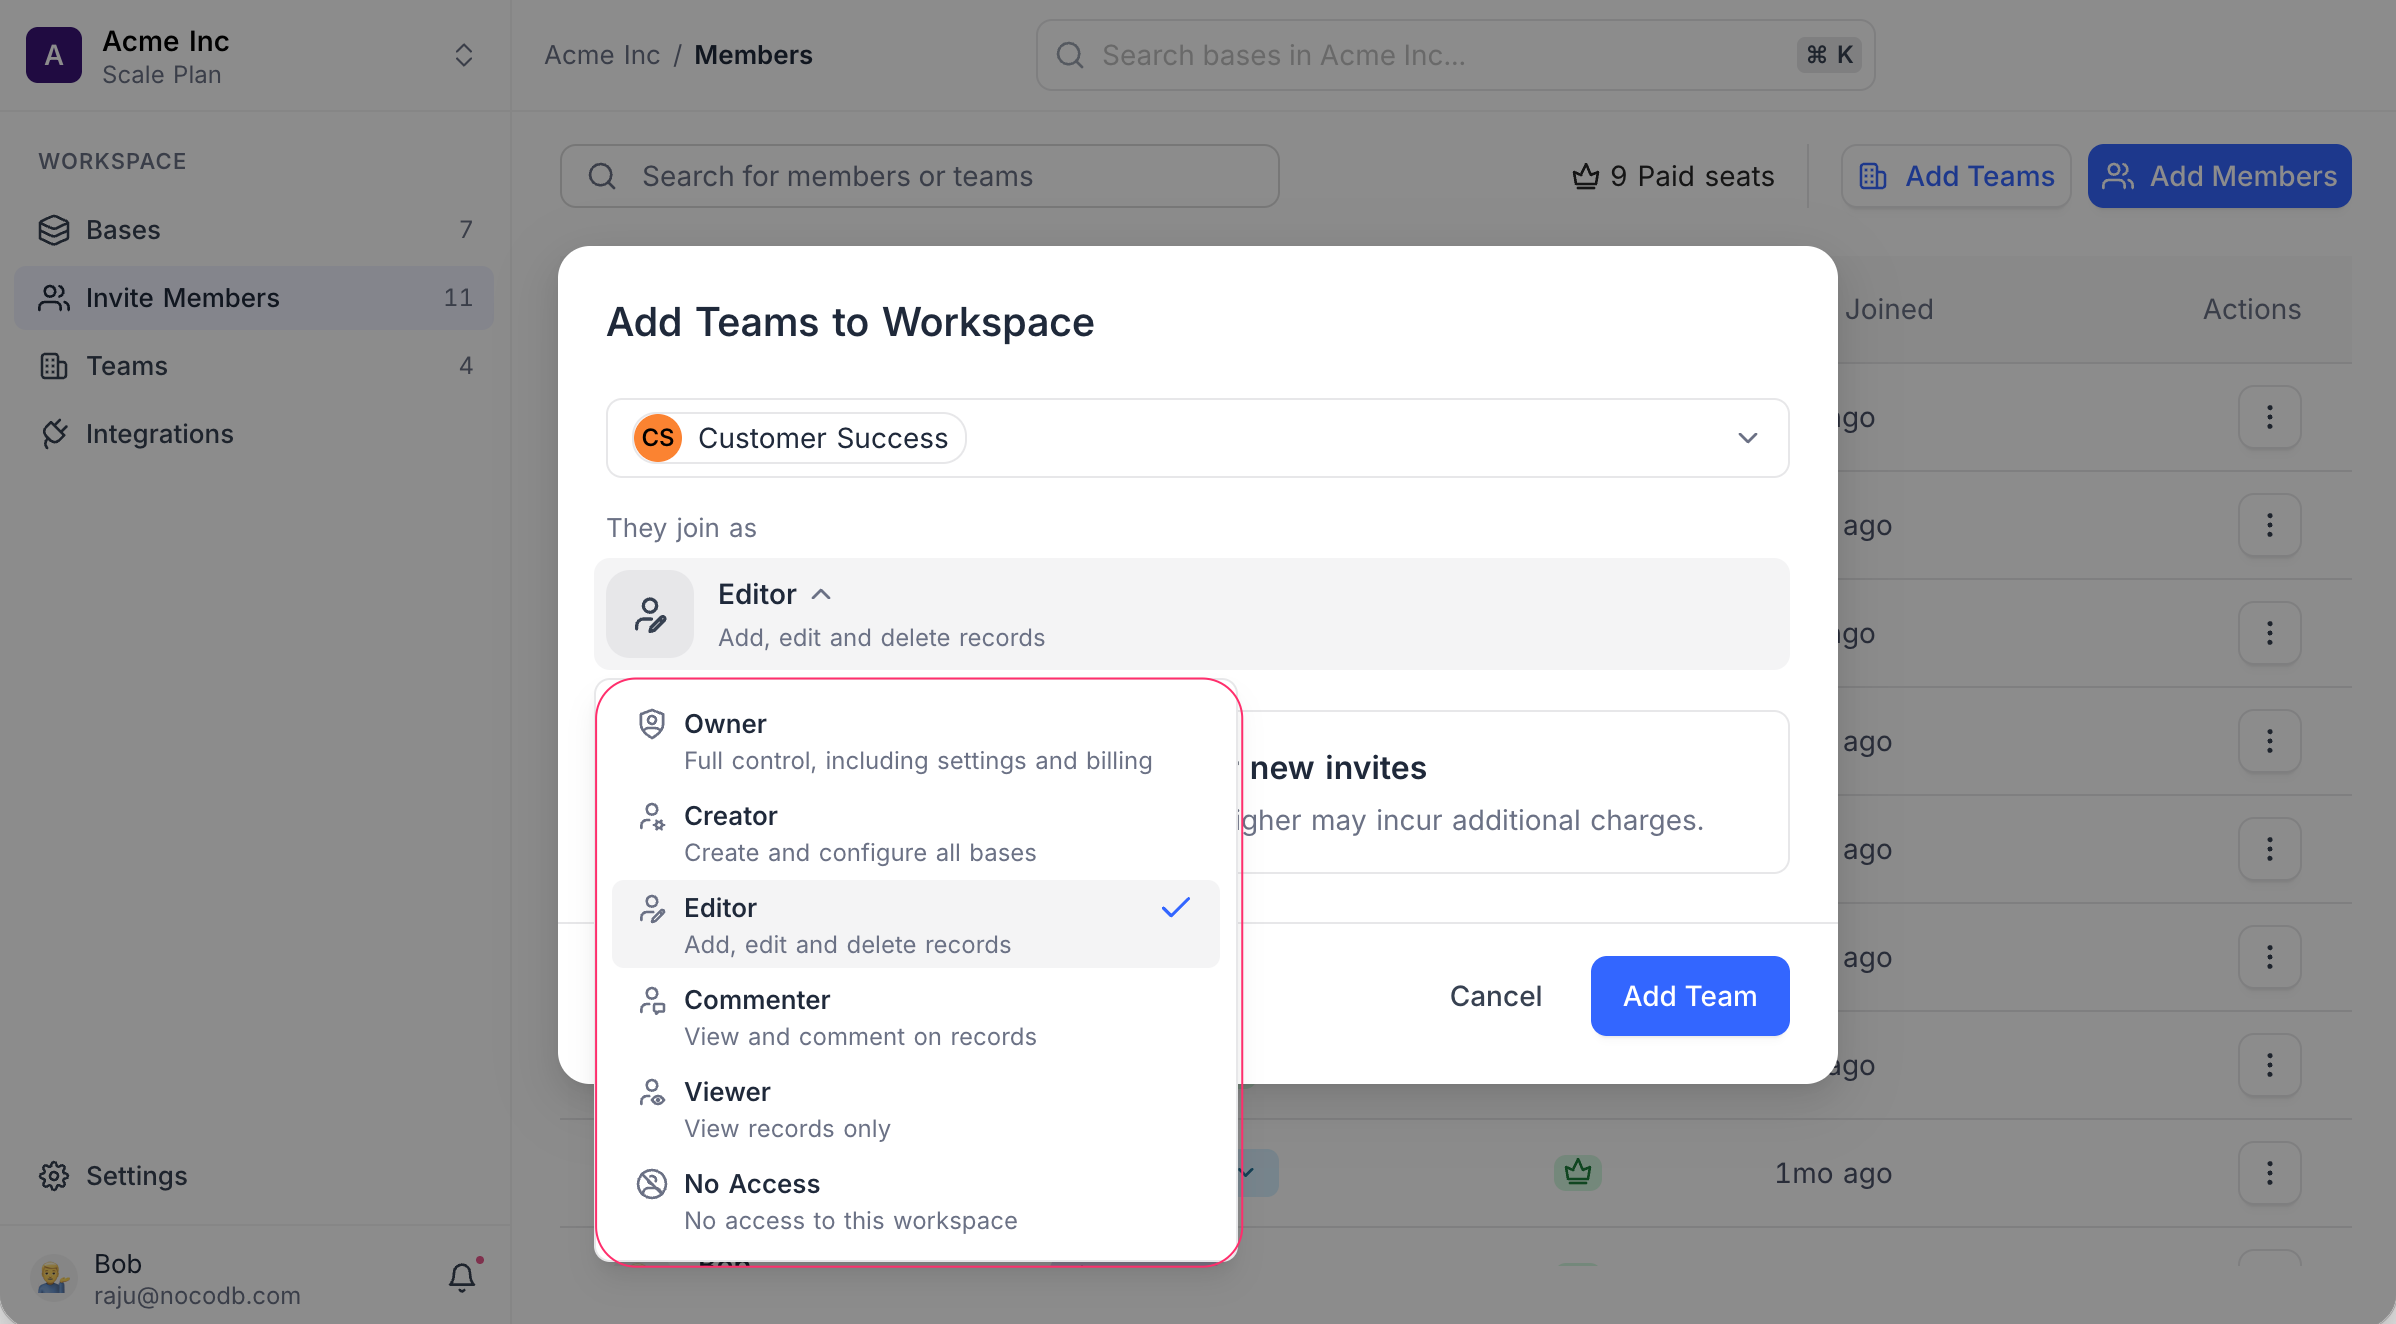
- Click Add Team , or Add Teams when more than one is selected.
หมายเหตุ: Owner is listed but cannot be picked for a team, and Inherit is not offered. You can only assign roles that are at most equal to your own role.
หมายเหตุ: When a team is invited, all users under that team inherit the assigned workspace-level role unless overridden by an explicit workspace role or base-level role.
To learn more about creating and managing teams, refer to the Teams documentation .
List Workspace Members and Teams
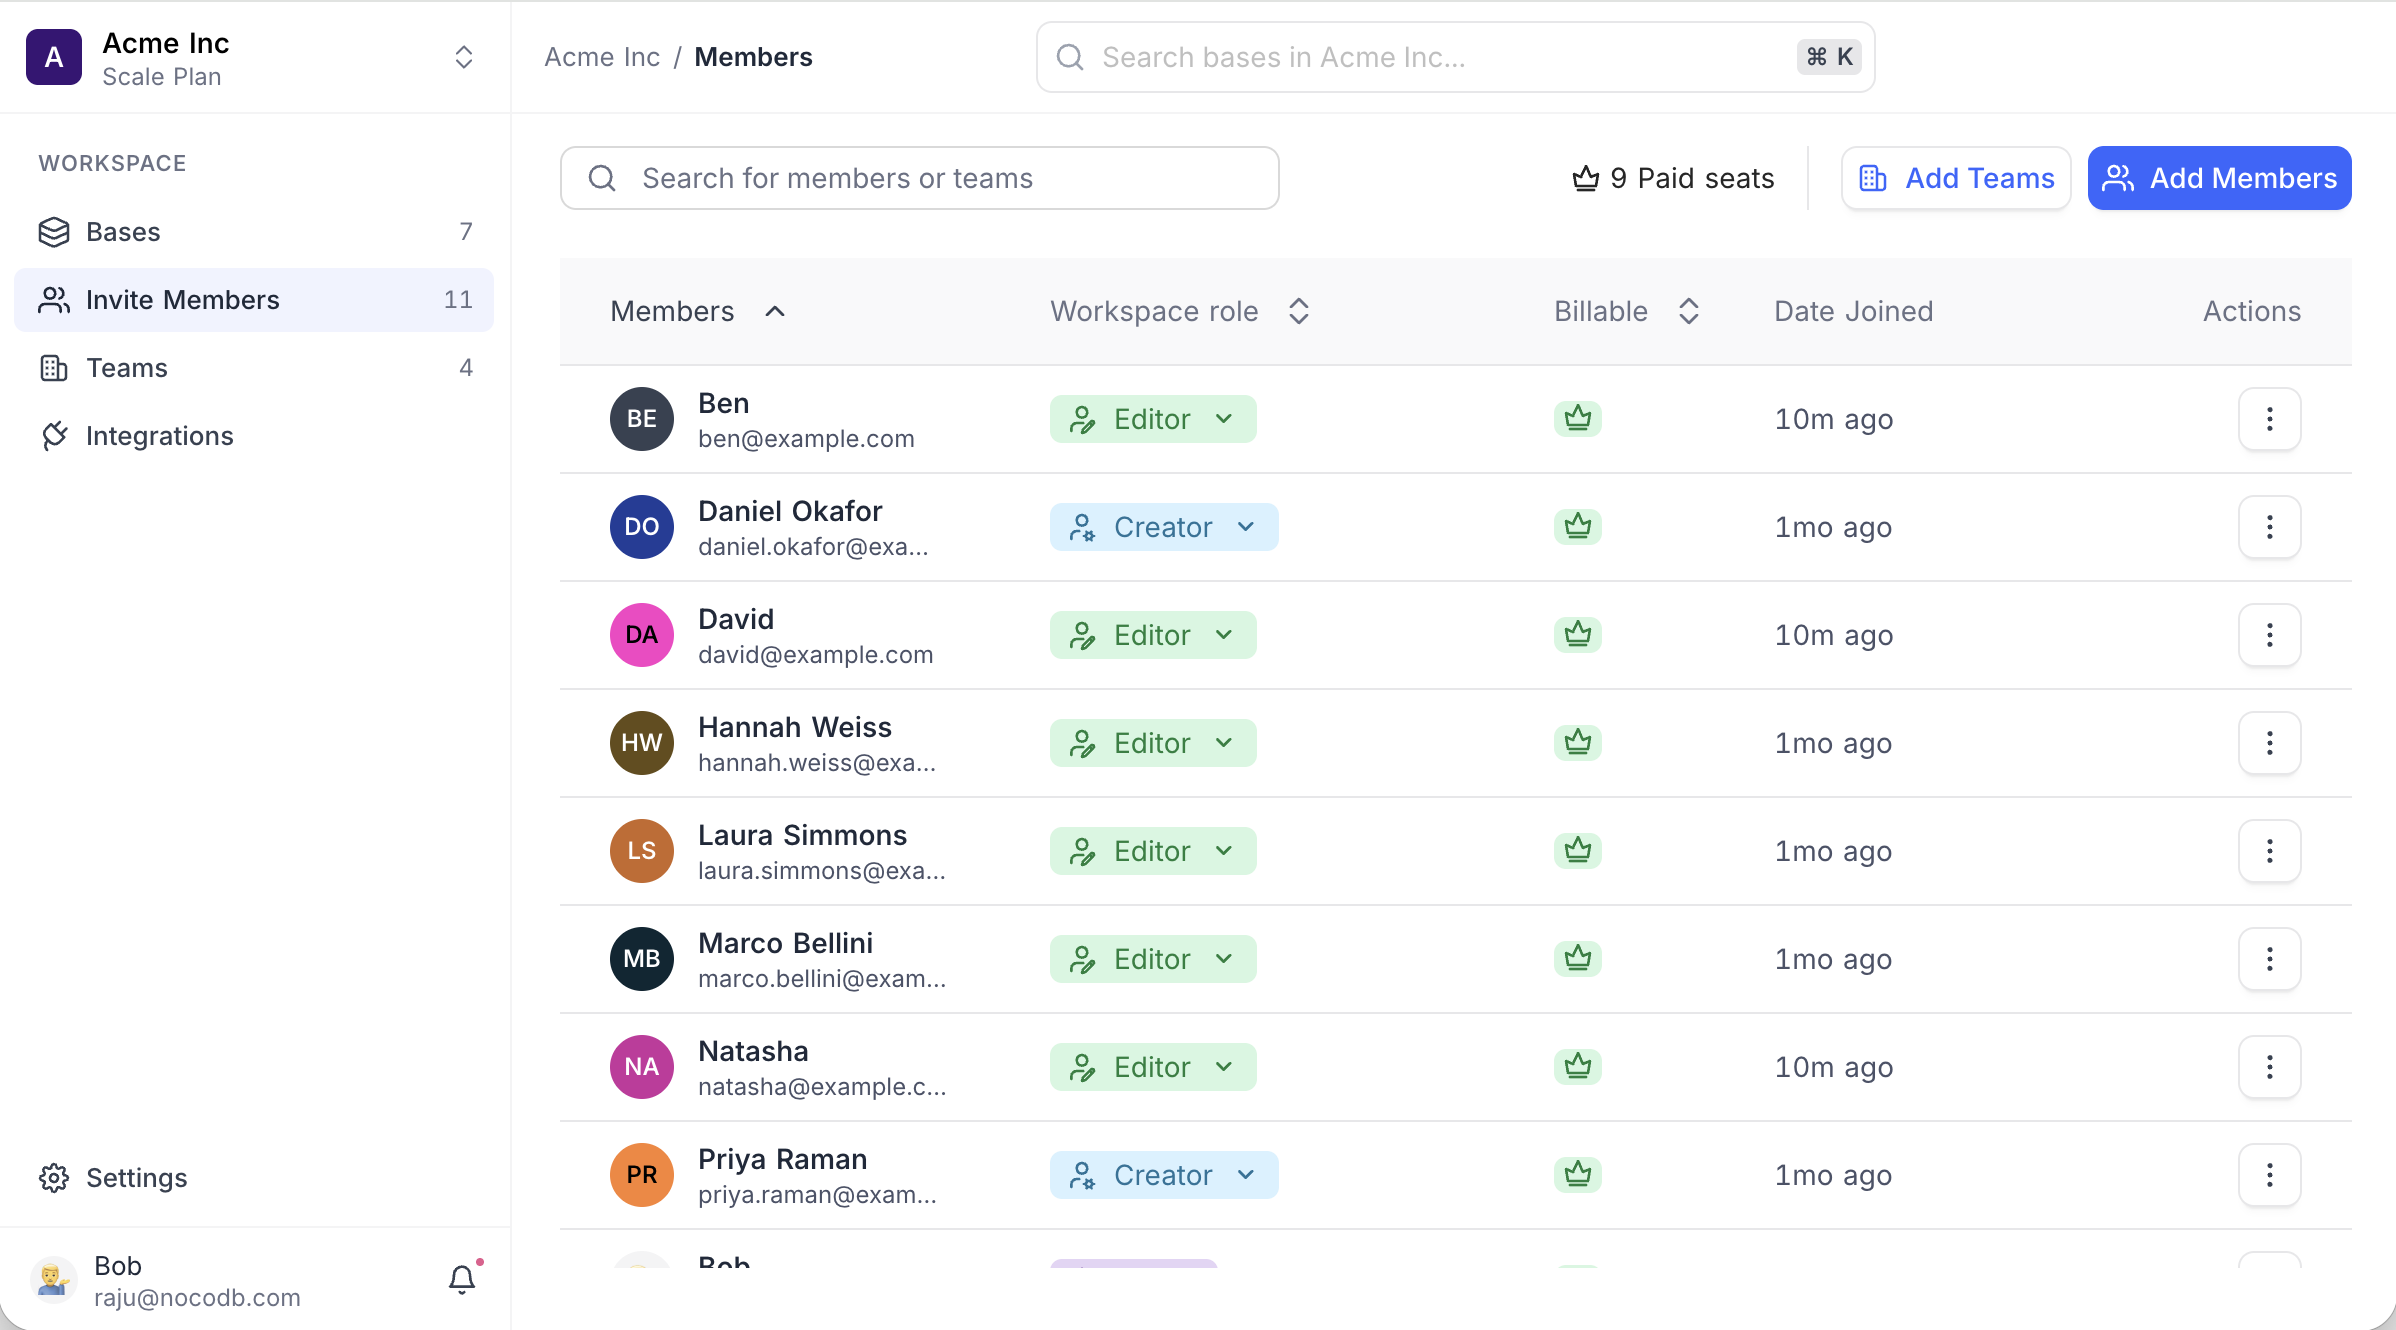
The Members page displays all users and teams that have access to the workspace.
- Individual members appear with their name, email, role, and date joined.
- Teams are listed with their name, member count, and assigned role.
The columns are Members , Workspace role , Billable , Date Joined and Actions , and the header shows how many paid seats the workspace is using. On Community Edition and unlicensed self-hosted deployments the column and the count read Editor seat instead.
หมายเหตุ: The members list is accessible to all workspace members.
Why a member is billable
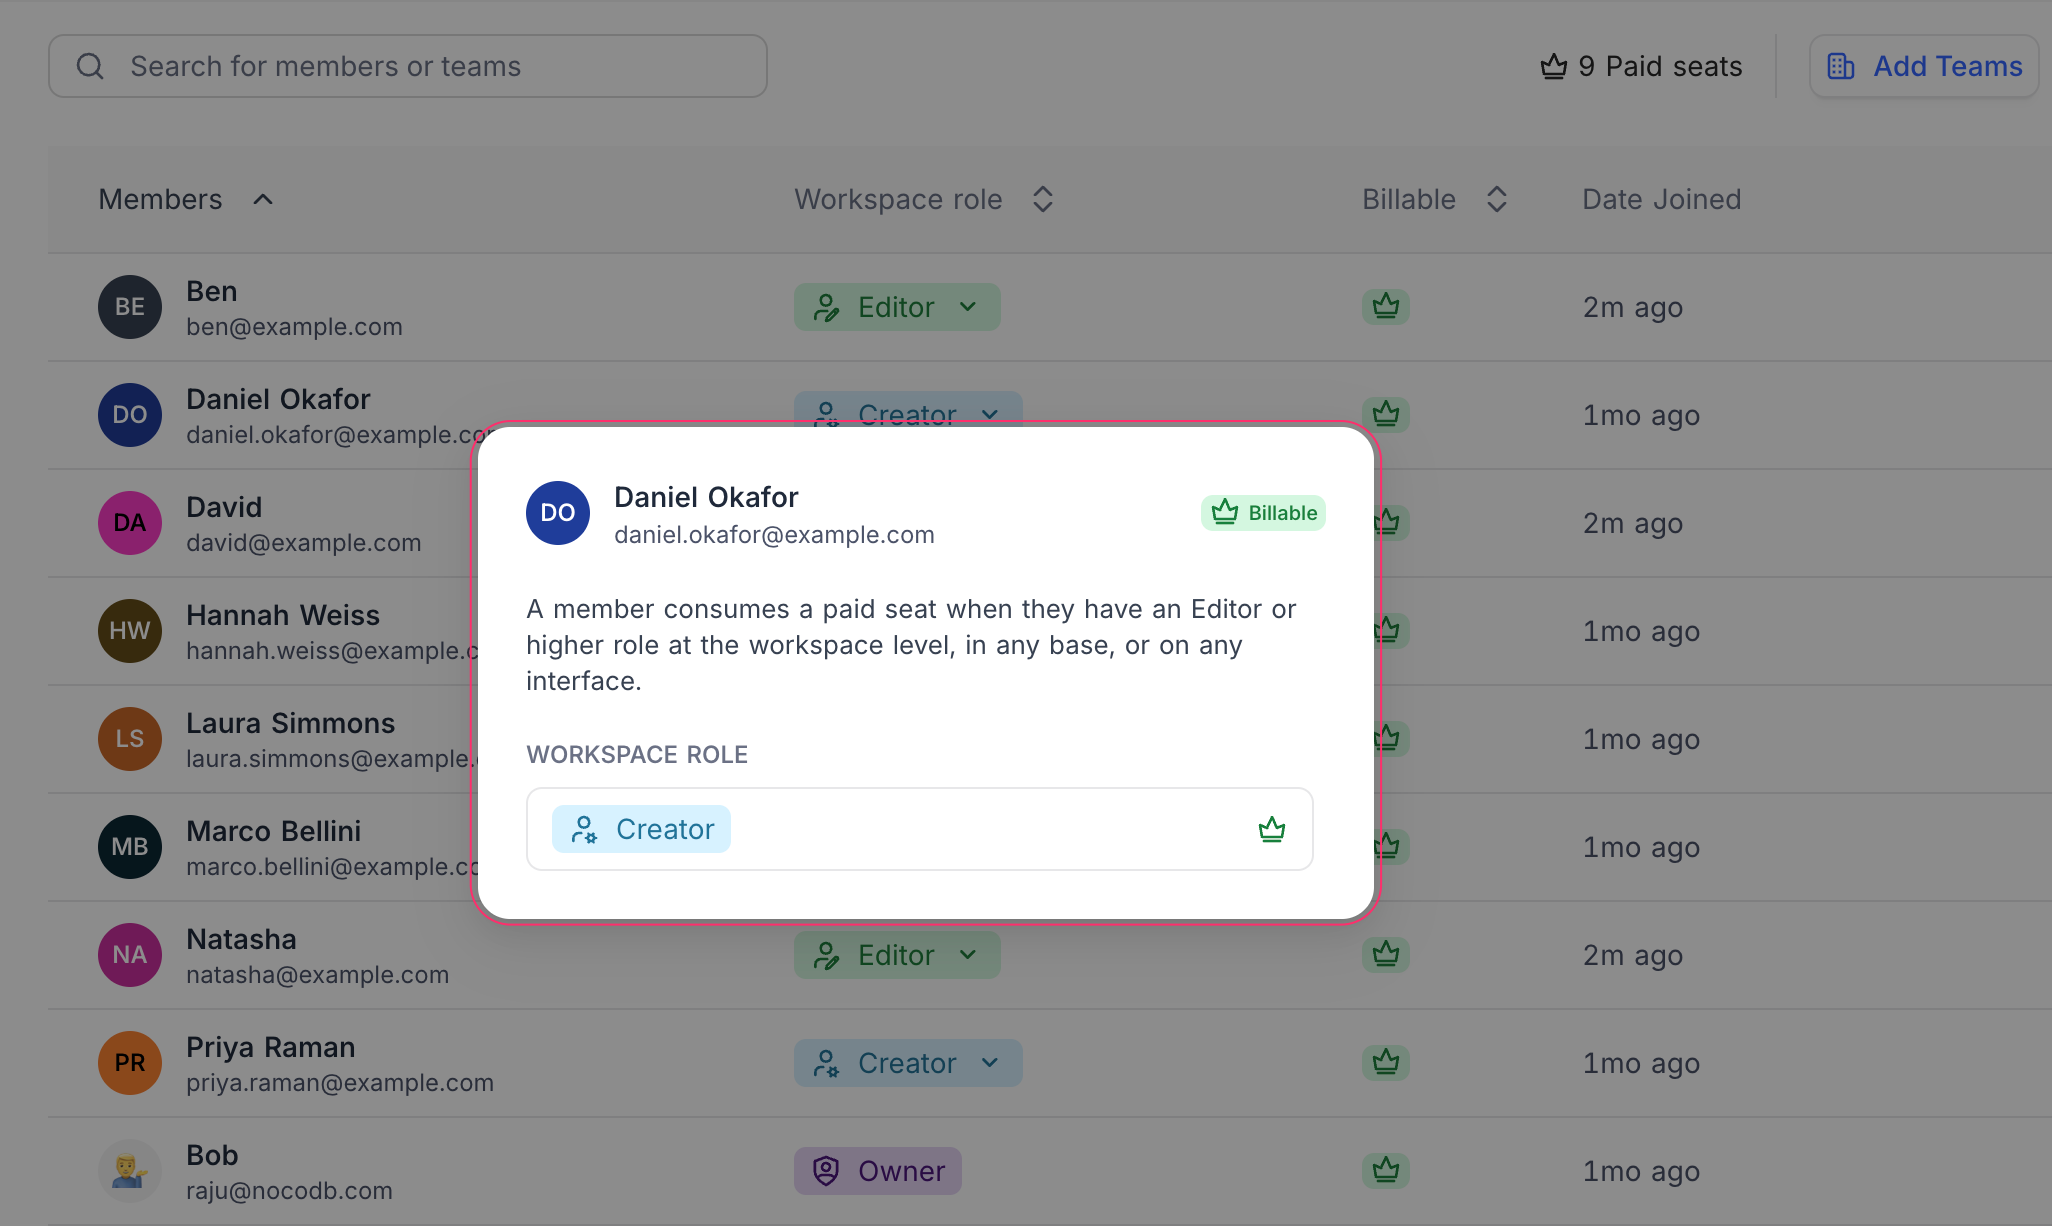
A crown in the Billable column marks a member who consumes a paid seat. Click it to see which assignment is responsible: their workspace role, any base, or any interface. A member consumes a seat when they hold Editor or higher in any one of those places, so someone who is Viewer at the workspace level can still be billable through a single base.
Modify Roles for Members or Teams
Access permissions for both members and teams can be updated from the Members page.
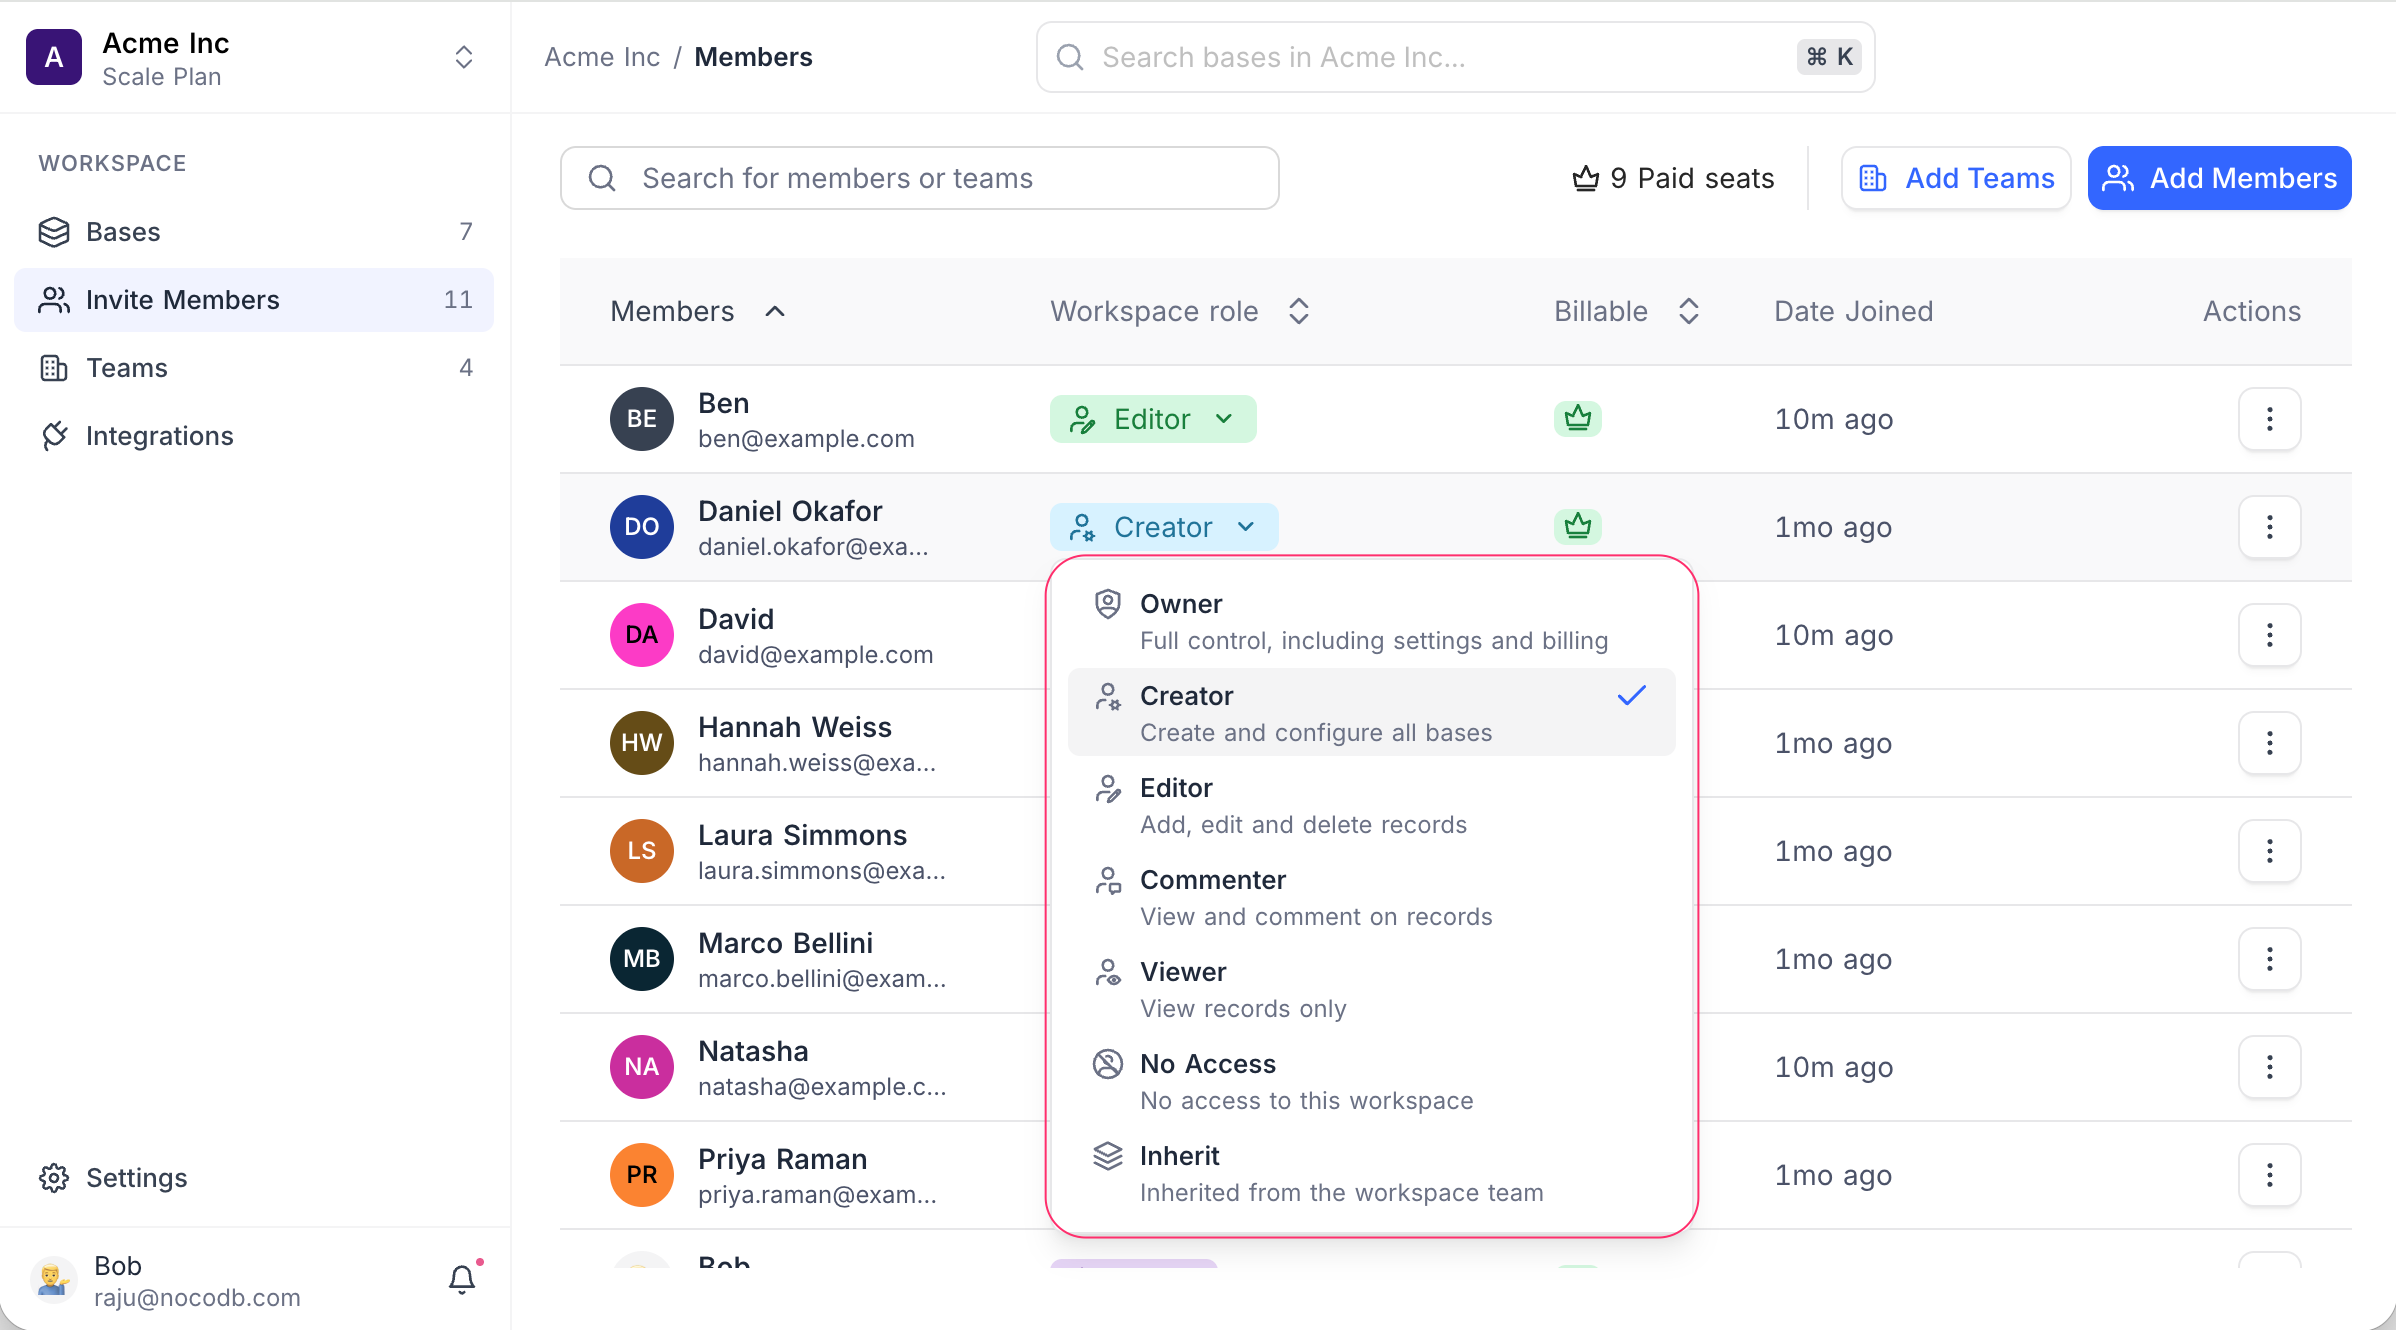
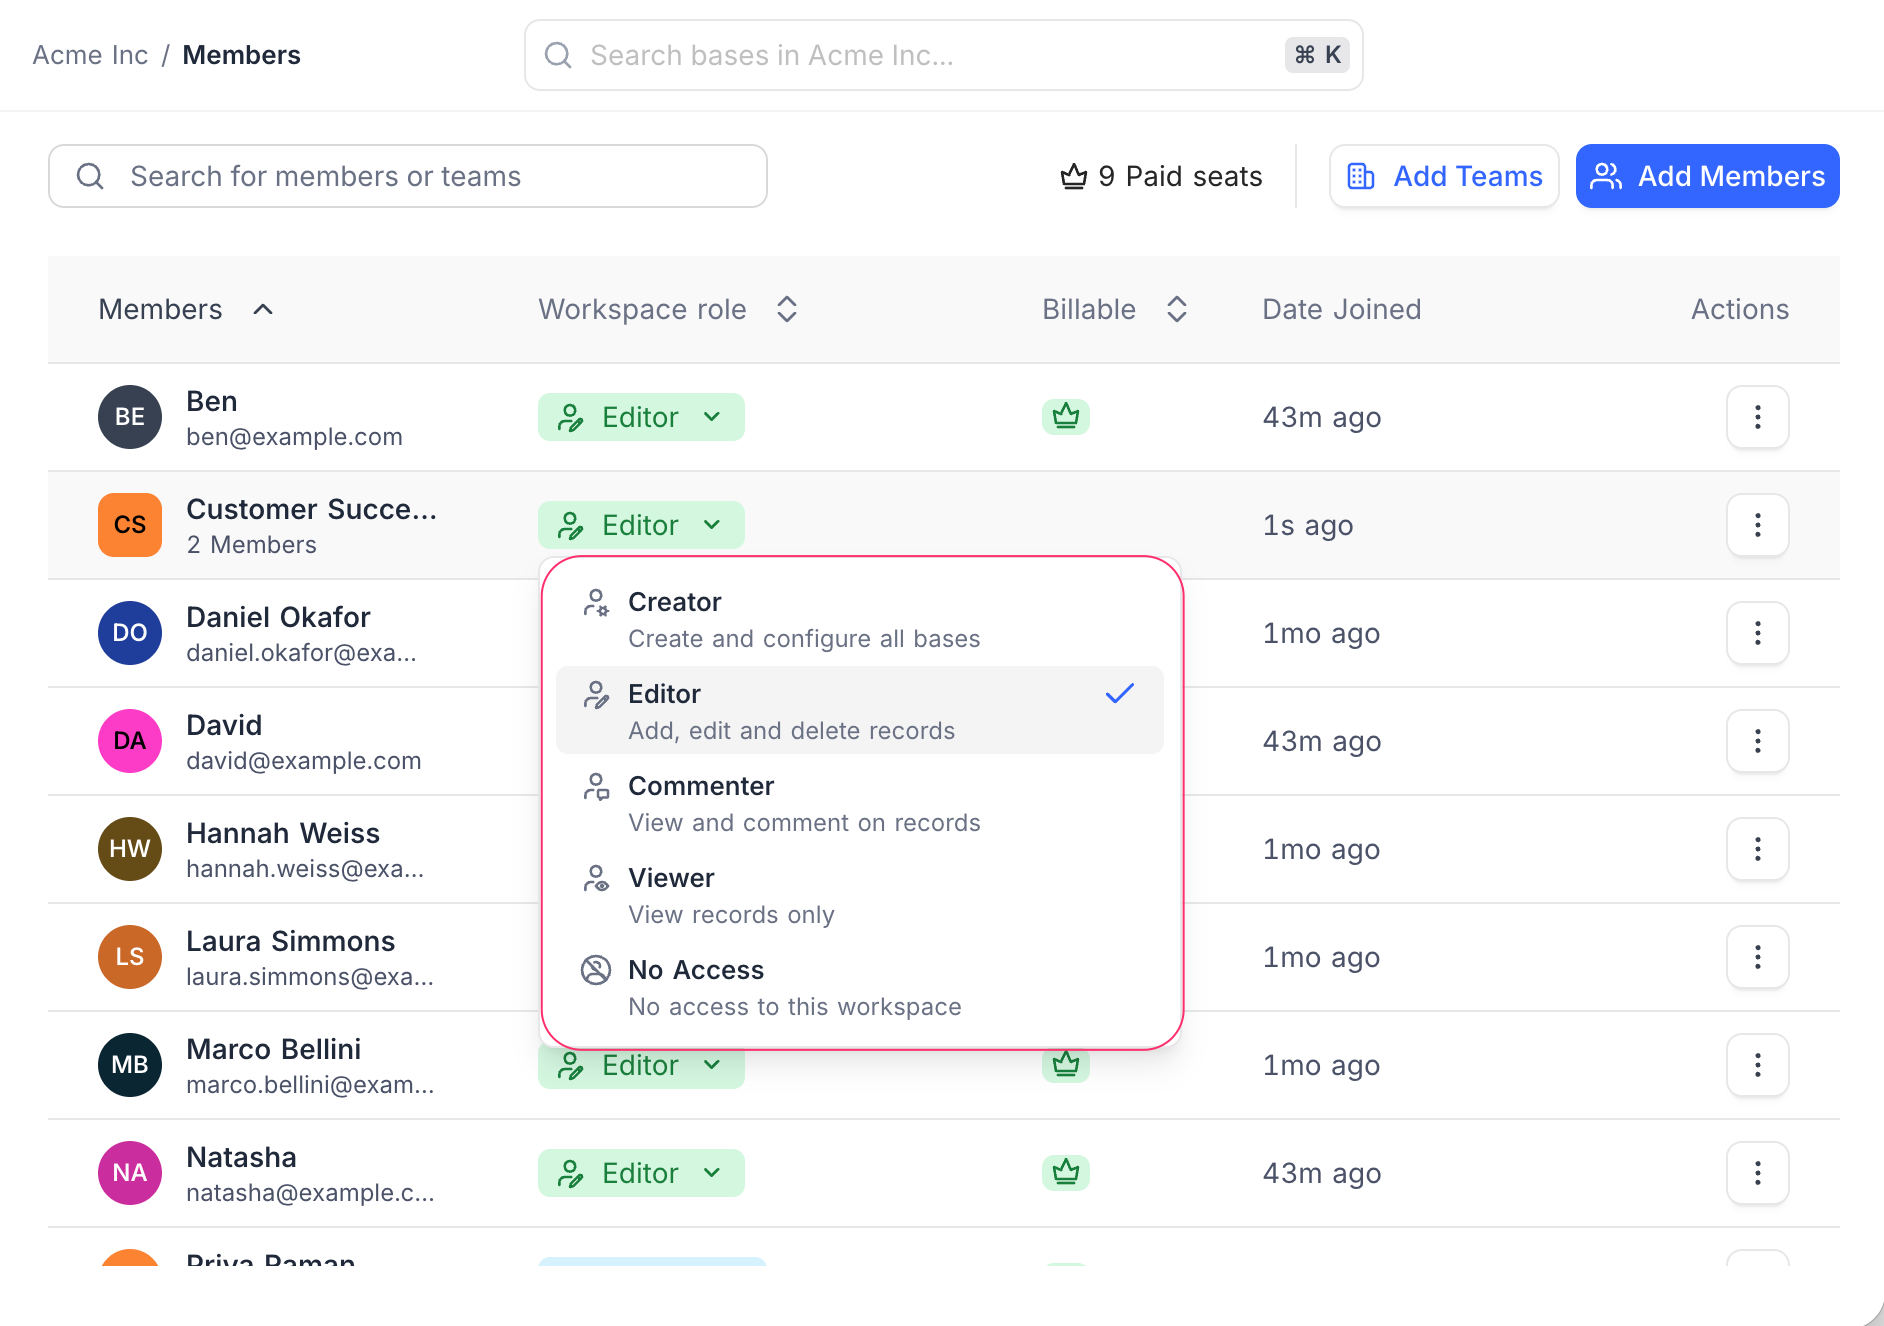
- Click the role dropdown in the Workspace role column beside the member or team.
- Select a new role. Each option carries a one-line description, and the one in force is ticked.
หมายเหตุ: You can only assign roles that are at most equal to your own role in the workspace. A team cannot be set to Owner or Inherit .
Role Precedence
When a user has multiple role assignments through both team and individual access, NocoDB resolves the final permission using a clear precedence order.
- Individual explicit role takes precedence over team-assigned role.
- Base-level roles override workspace-level roles.
- In case of multiple team roles, the highest permission applies.
หมายเหตุ: This ensures users always retain the most permissive access assigned at their lowest configured level.
To learn more about effective role resolution, refer to the Teams effective role resolution documentation .
Remove Members or Teams from Workspace
You can remove both members and teams from the workspace using the actions menu.
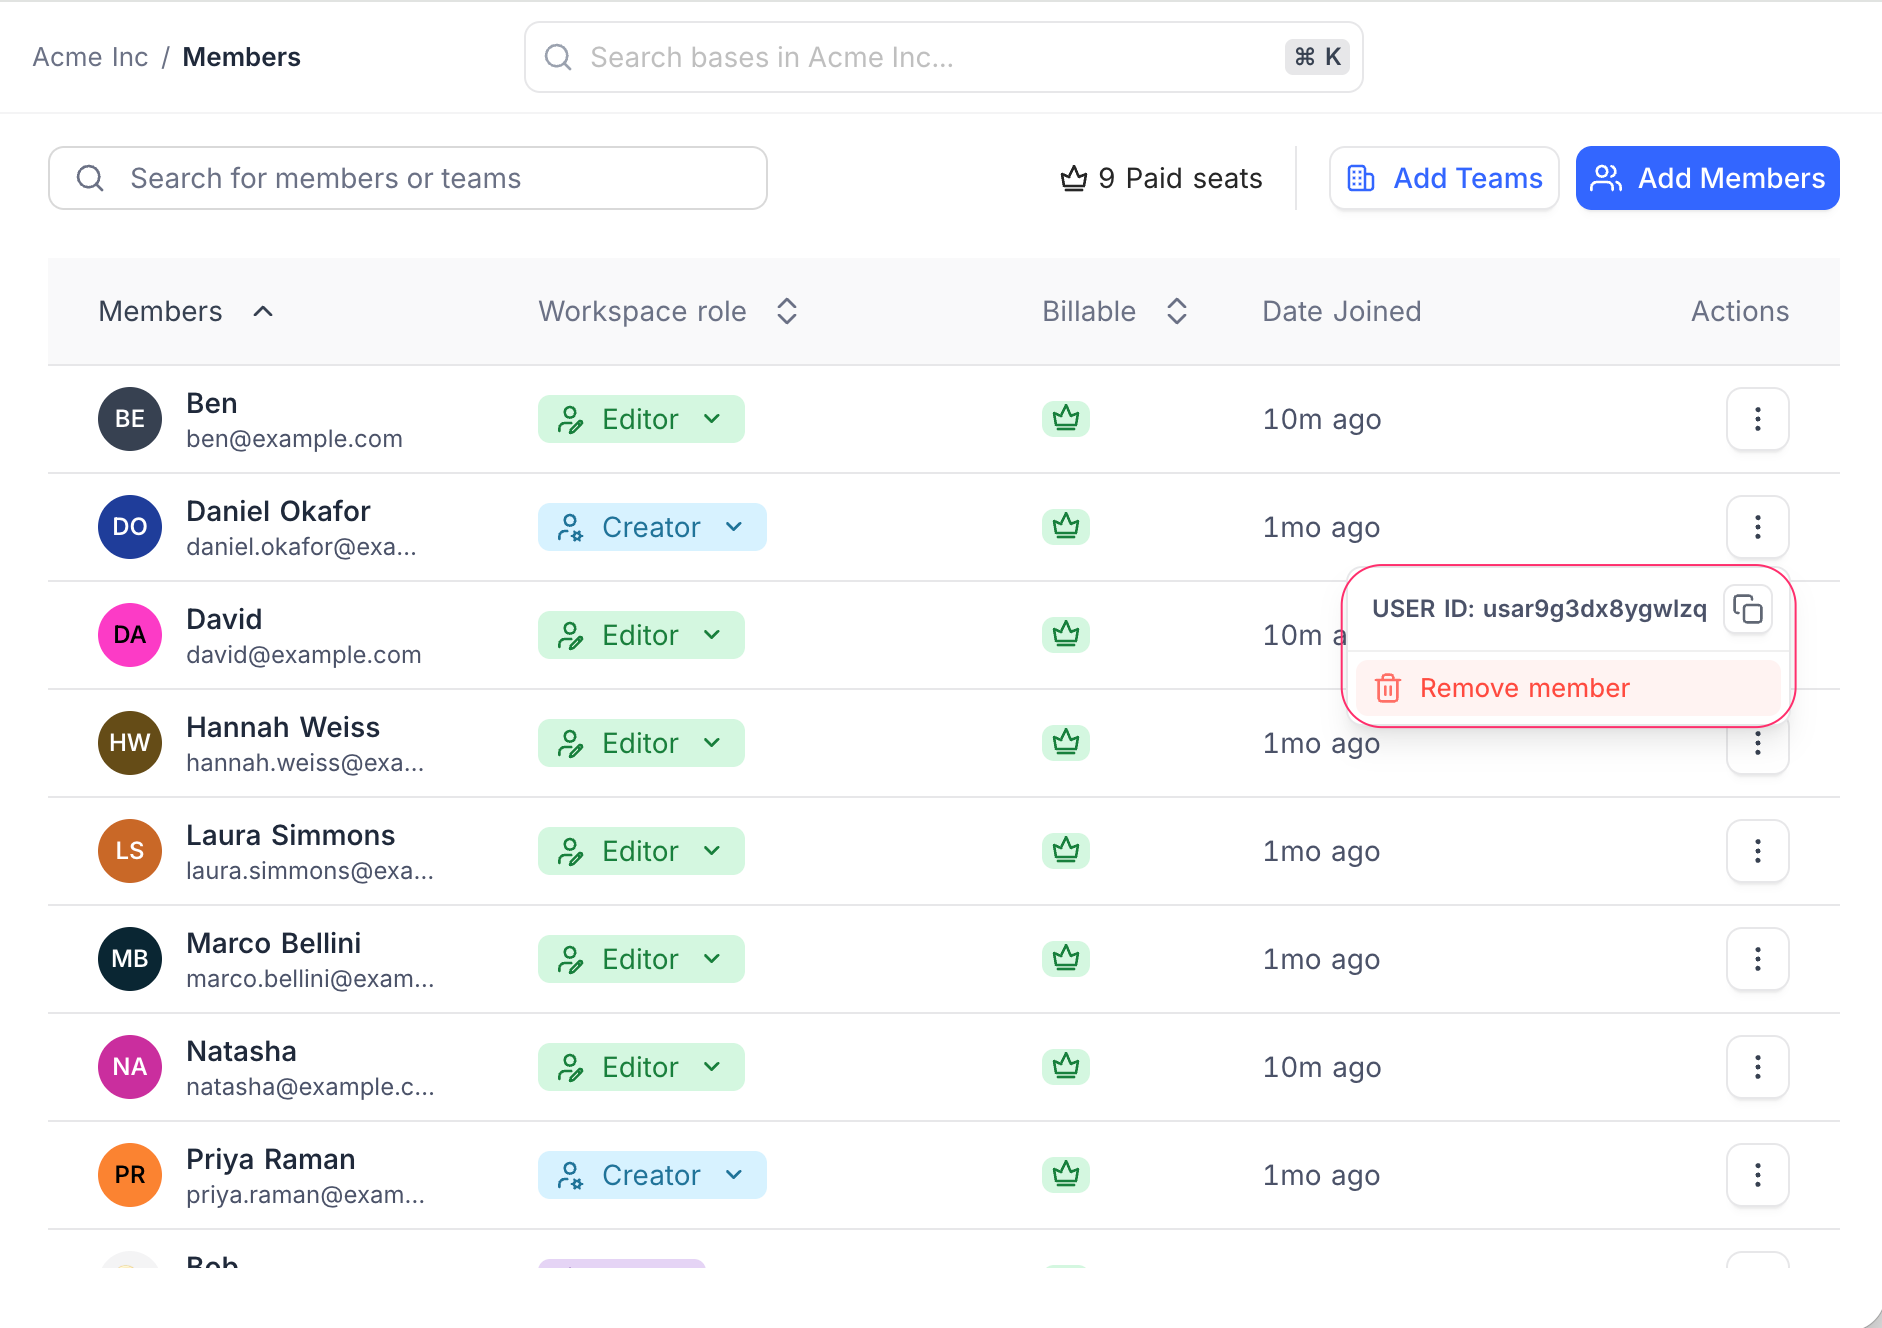
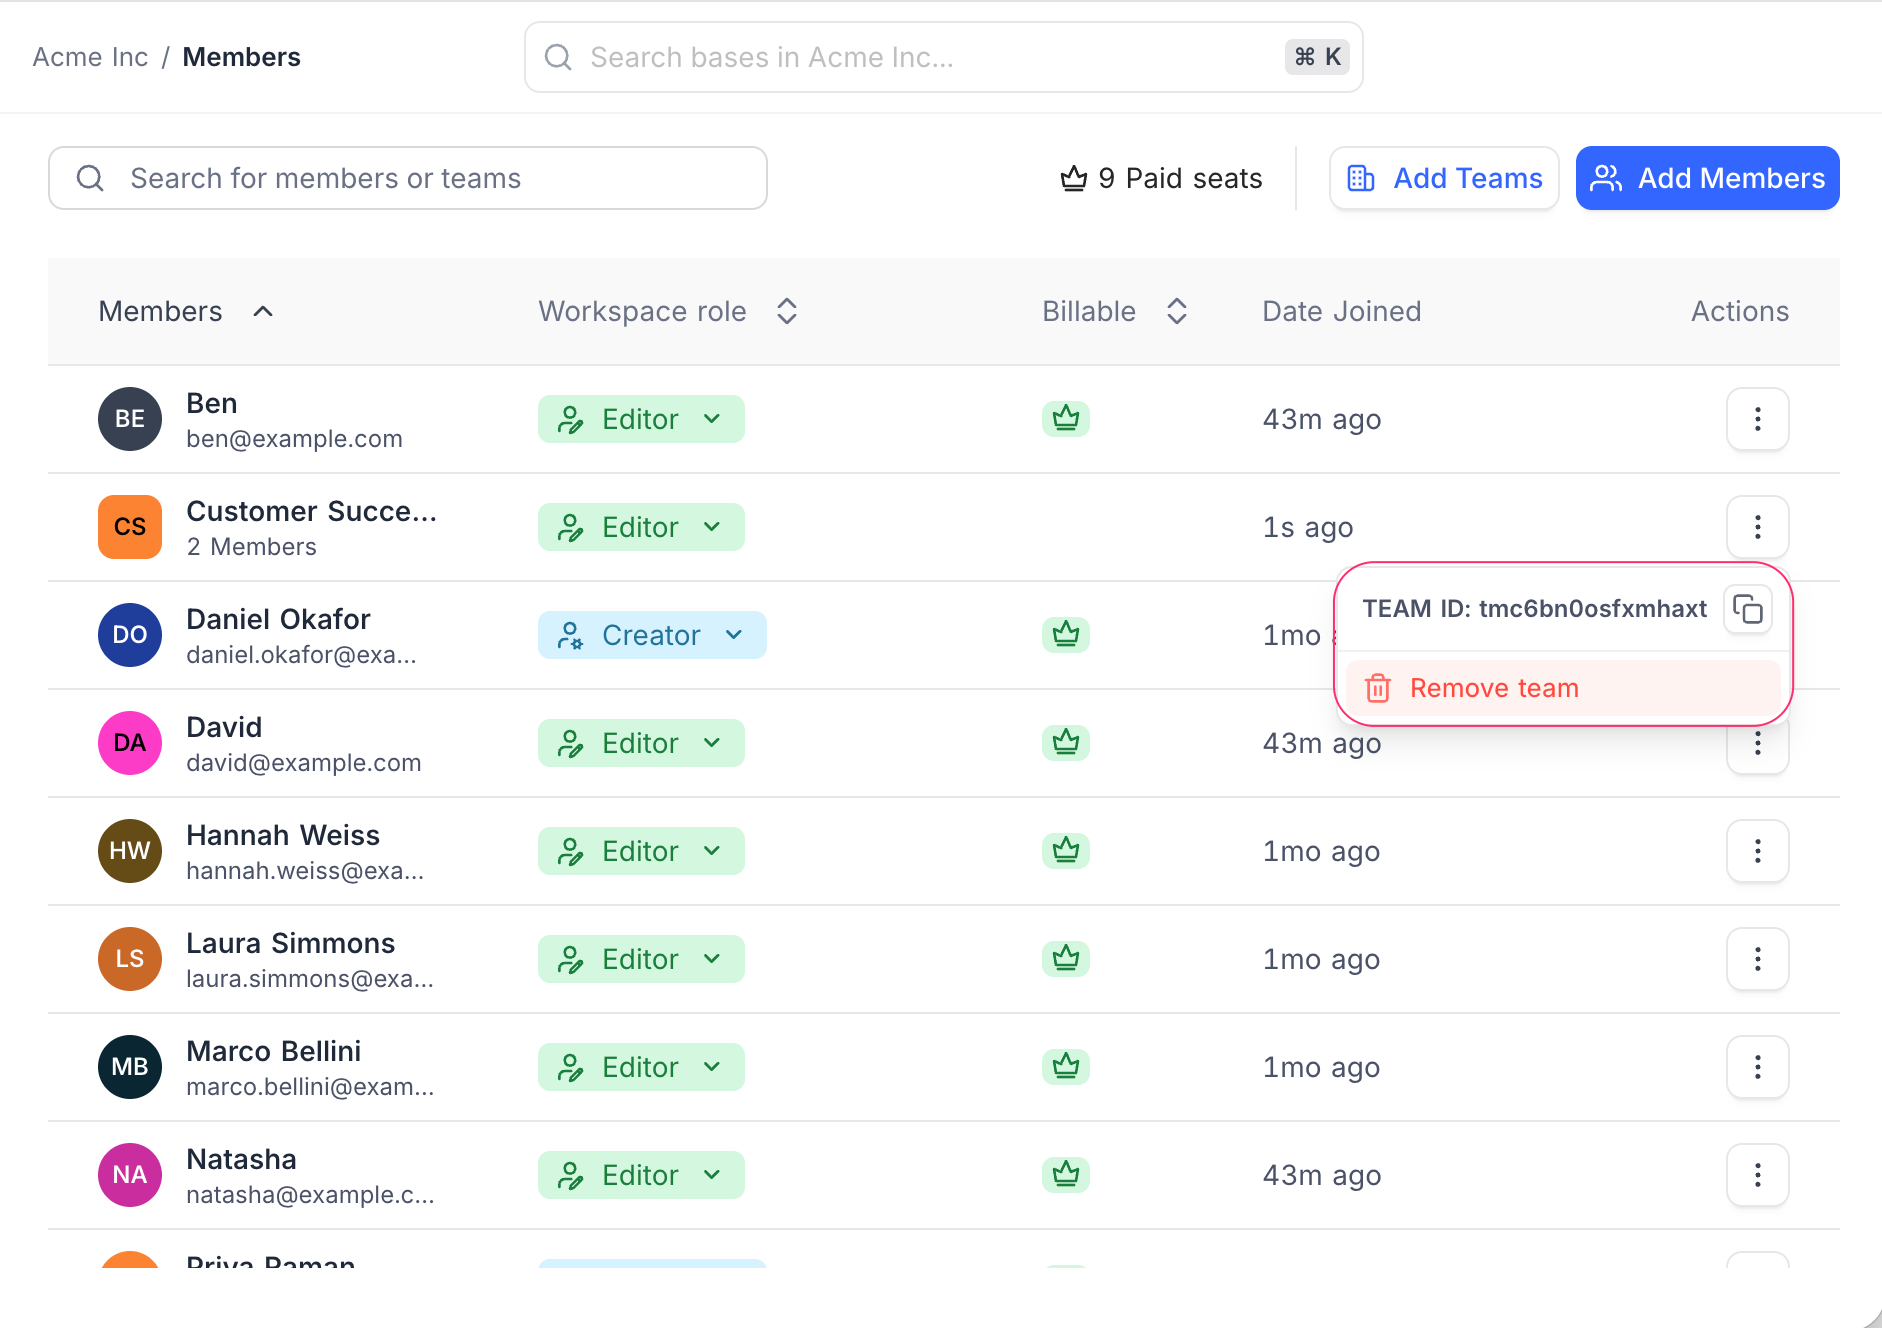
- Click on the vertical ellipsis
⋮in the Actions column beside the member or team. - Select Remove member or Remove team .
The menu also shows the member's user ID or the team's ID, with a button to copy it for use with the API.
หมายเหตุ: Only the workspace owner or creator can remove members or teams from the workspace.
Best Practice
- Invite all users to the workspace first with the Inherit role. This will allow them to access workspaces based on their team or base-level roles.
- Use teams for departments or functional groups to manage roles efficiently.
- Adjust team-level permissions instead of managing roles individually for large workspaces.
Learn more here .
Availability
- The Teams feature is available on NocoDB Cloud (Business plan and above) and licensed self-hosted deployments (Scale plan and above).
Related
Related pages
- Create Workspace : Learn how to create a workspace in NocoDB
- Actions on Workspace : Learn how to rename, secure, or delete a workspace in NocoDB.
- Workspace Audit Logs : Learn how to access and use audit logs to track workspace activity in NocoDB.
- Subscription & Billing : Manage your NocoDB subscription, change plans, and access billing information easily.
- Credits : Understand NocoDB credits: monthly plan allowances, what consumes credits, how credits are spent, and how to buy more.