
This article explains how to create and work with API Tokens, including fine-grained tokens with scoped permissions.
NocoDB supports two types of API tokens:
- Fine-grained tokens — Scoped to specific bases with granular permission categories. Recommended for all new integrations.
- Legacy tokens — Org-wide tokens that inherit the creator's full role permissions.
Fine-Grained API Tokens
Fine-grained API tokens give you precise control over what external integrations, scripts, and CI/CD pipelines can do in NocoDB. Unlike legacy tokens, fine-grained tokens let you restrict access to specific bases with granular permission categories.
หมายเหตุ: Granular scope and permission controls (base selection, permission categories, token expiration) are available on all NocoDB Cloud plans and licensed self-hosted deployments (Business plan and above). On Community Edition and unlicensed self-hosted deployments, tokens default to all-resources access and never expire.
Key Concepts
- Intersection model — A token can only restrict what your role already allows. It never grants additional permissions beyond your role.
- Deny by default — Only permission categories you explicitly add are granted. Everything else is denied.
- Show-once token — The token string is displayed only at creation time and cannot be retrieved later. The token is stored as a SHA-256 hash — the plaintext is never persisted.
Create a Fine-Grained Token
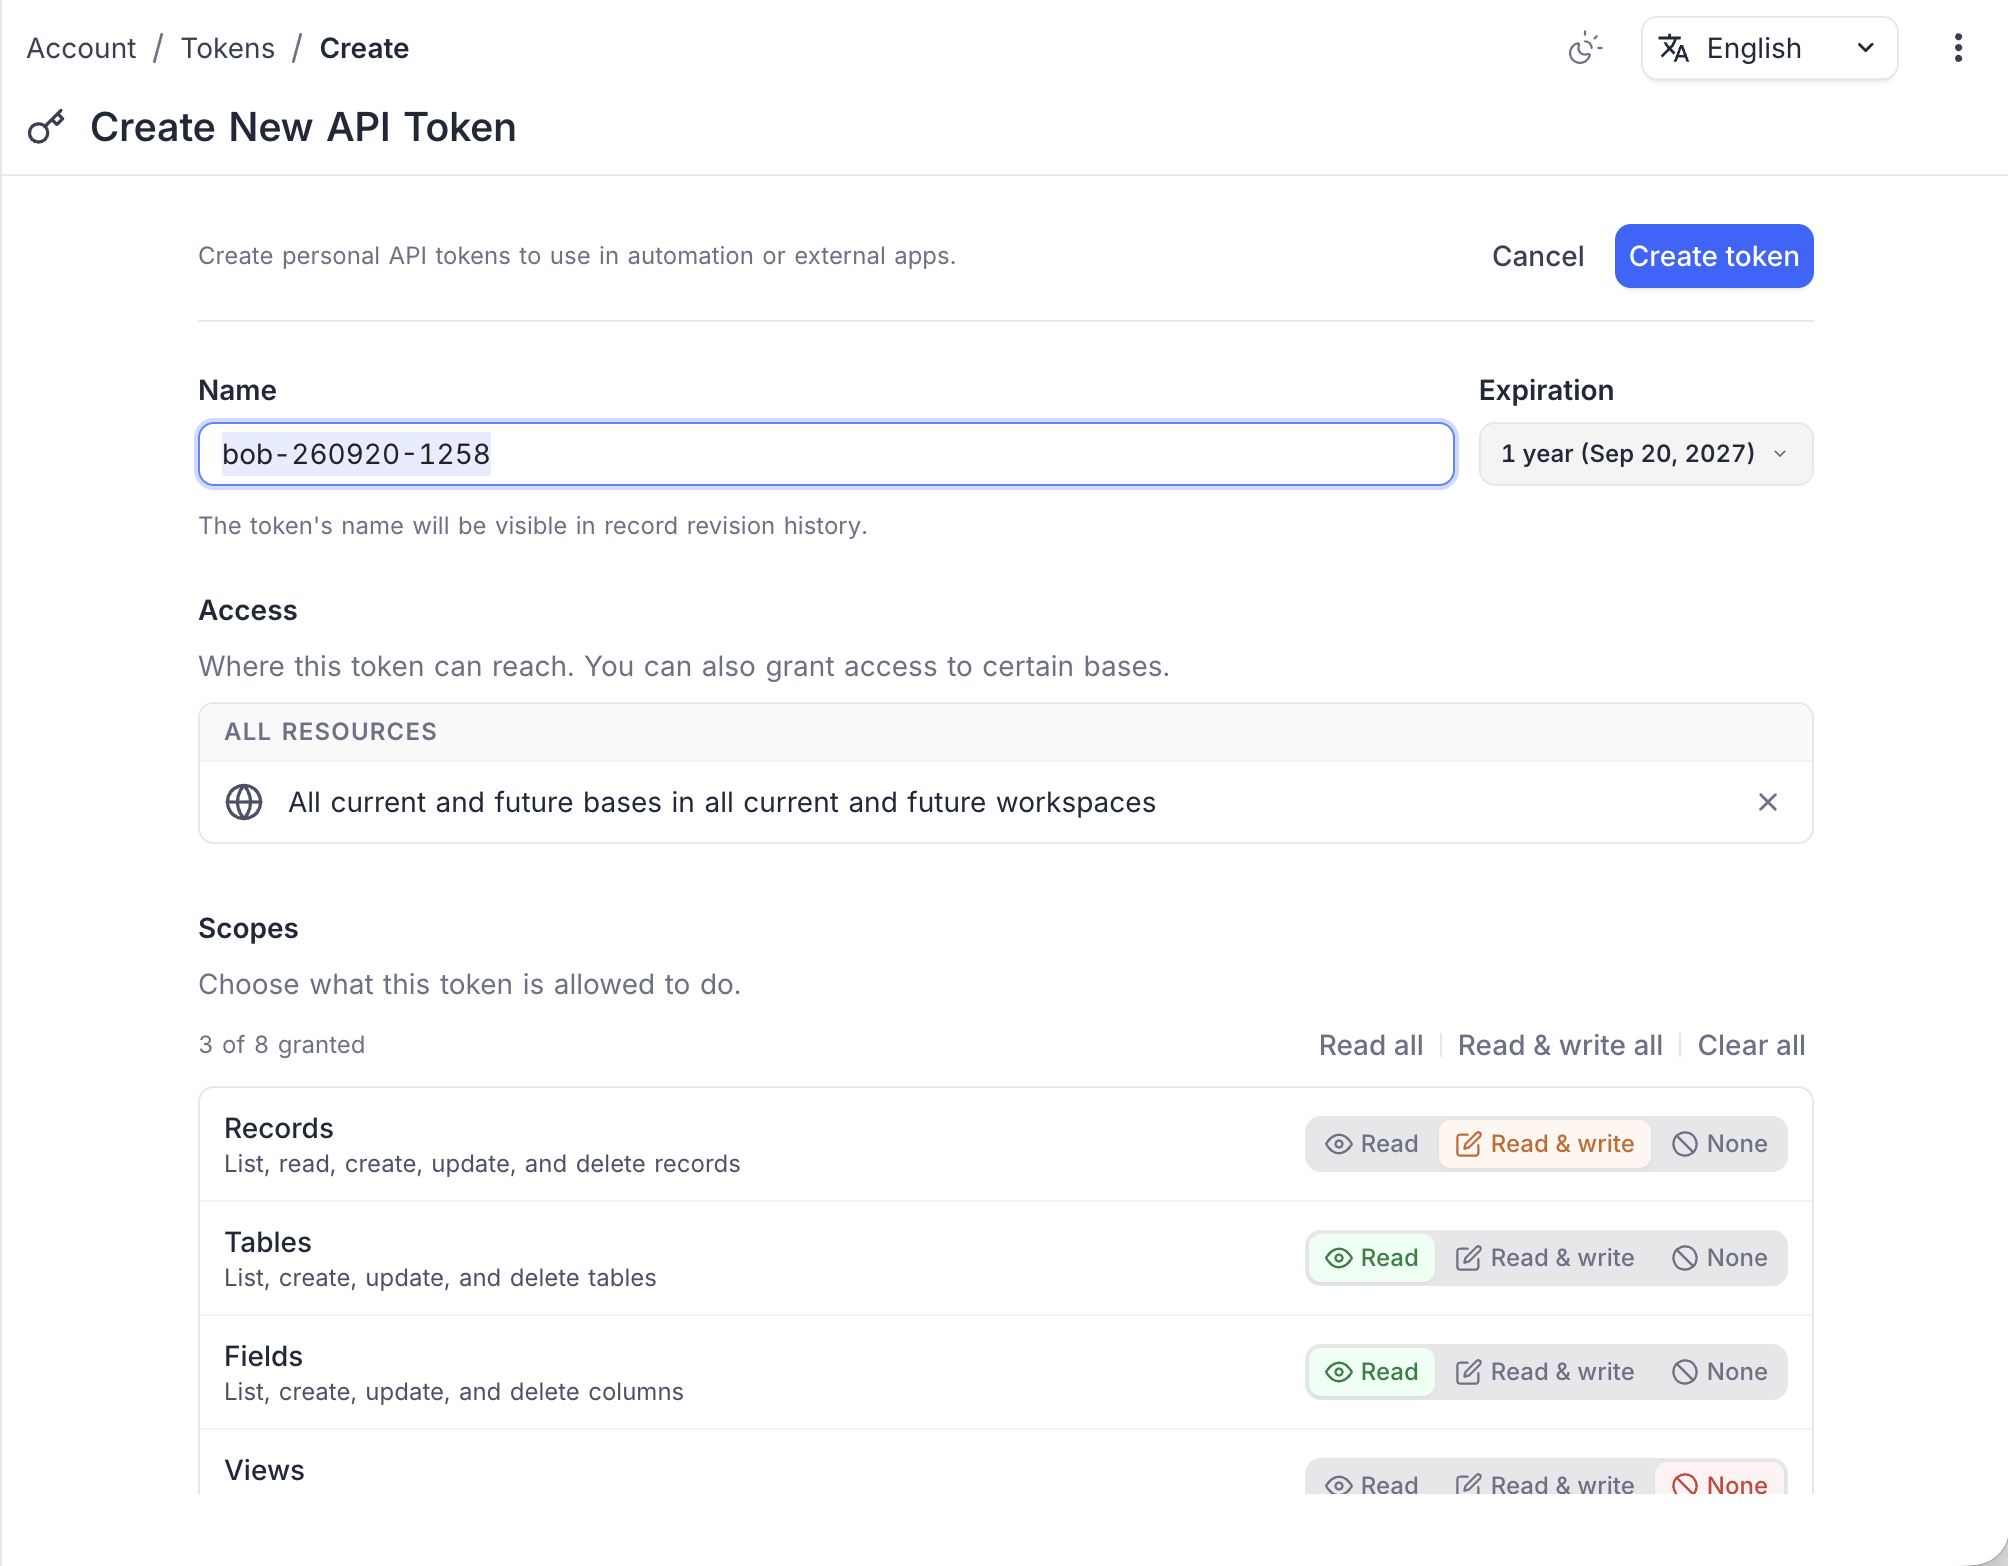
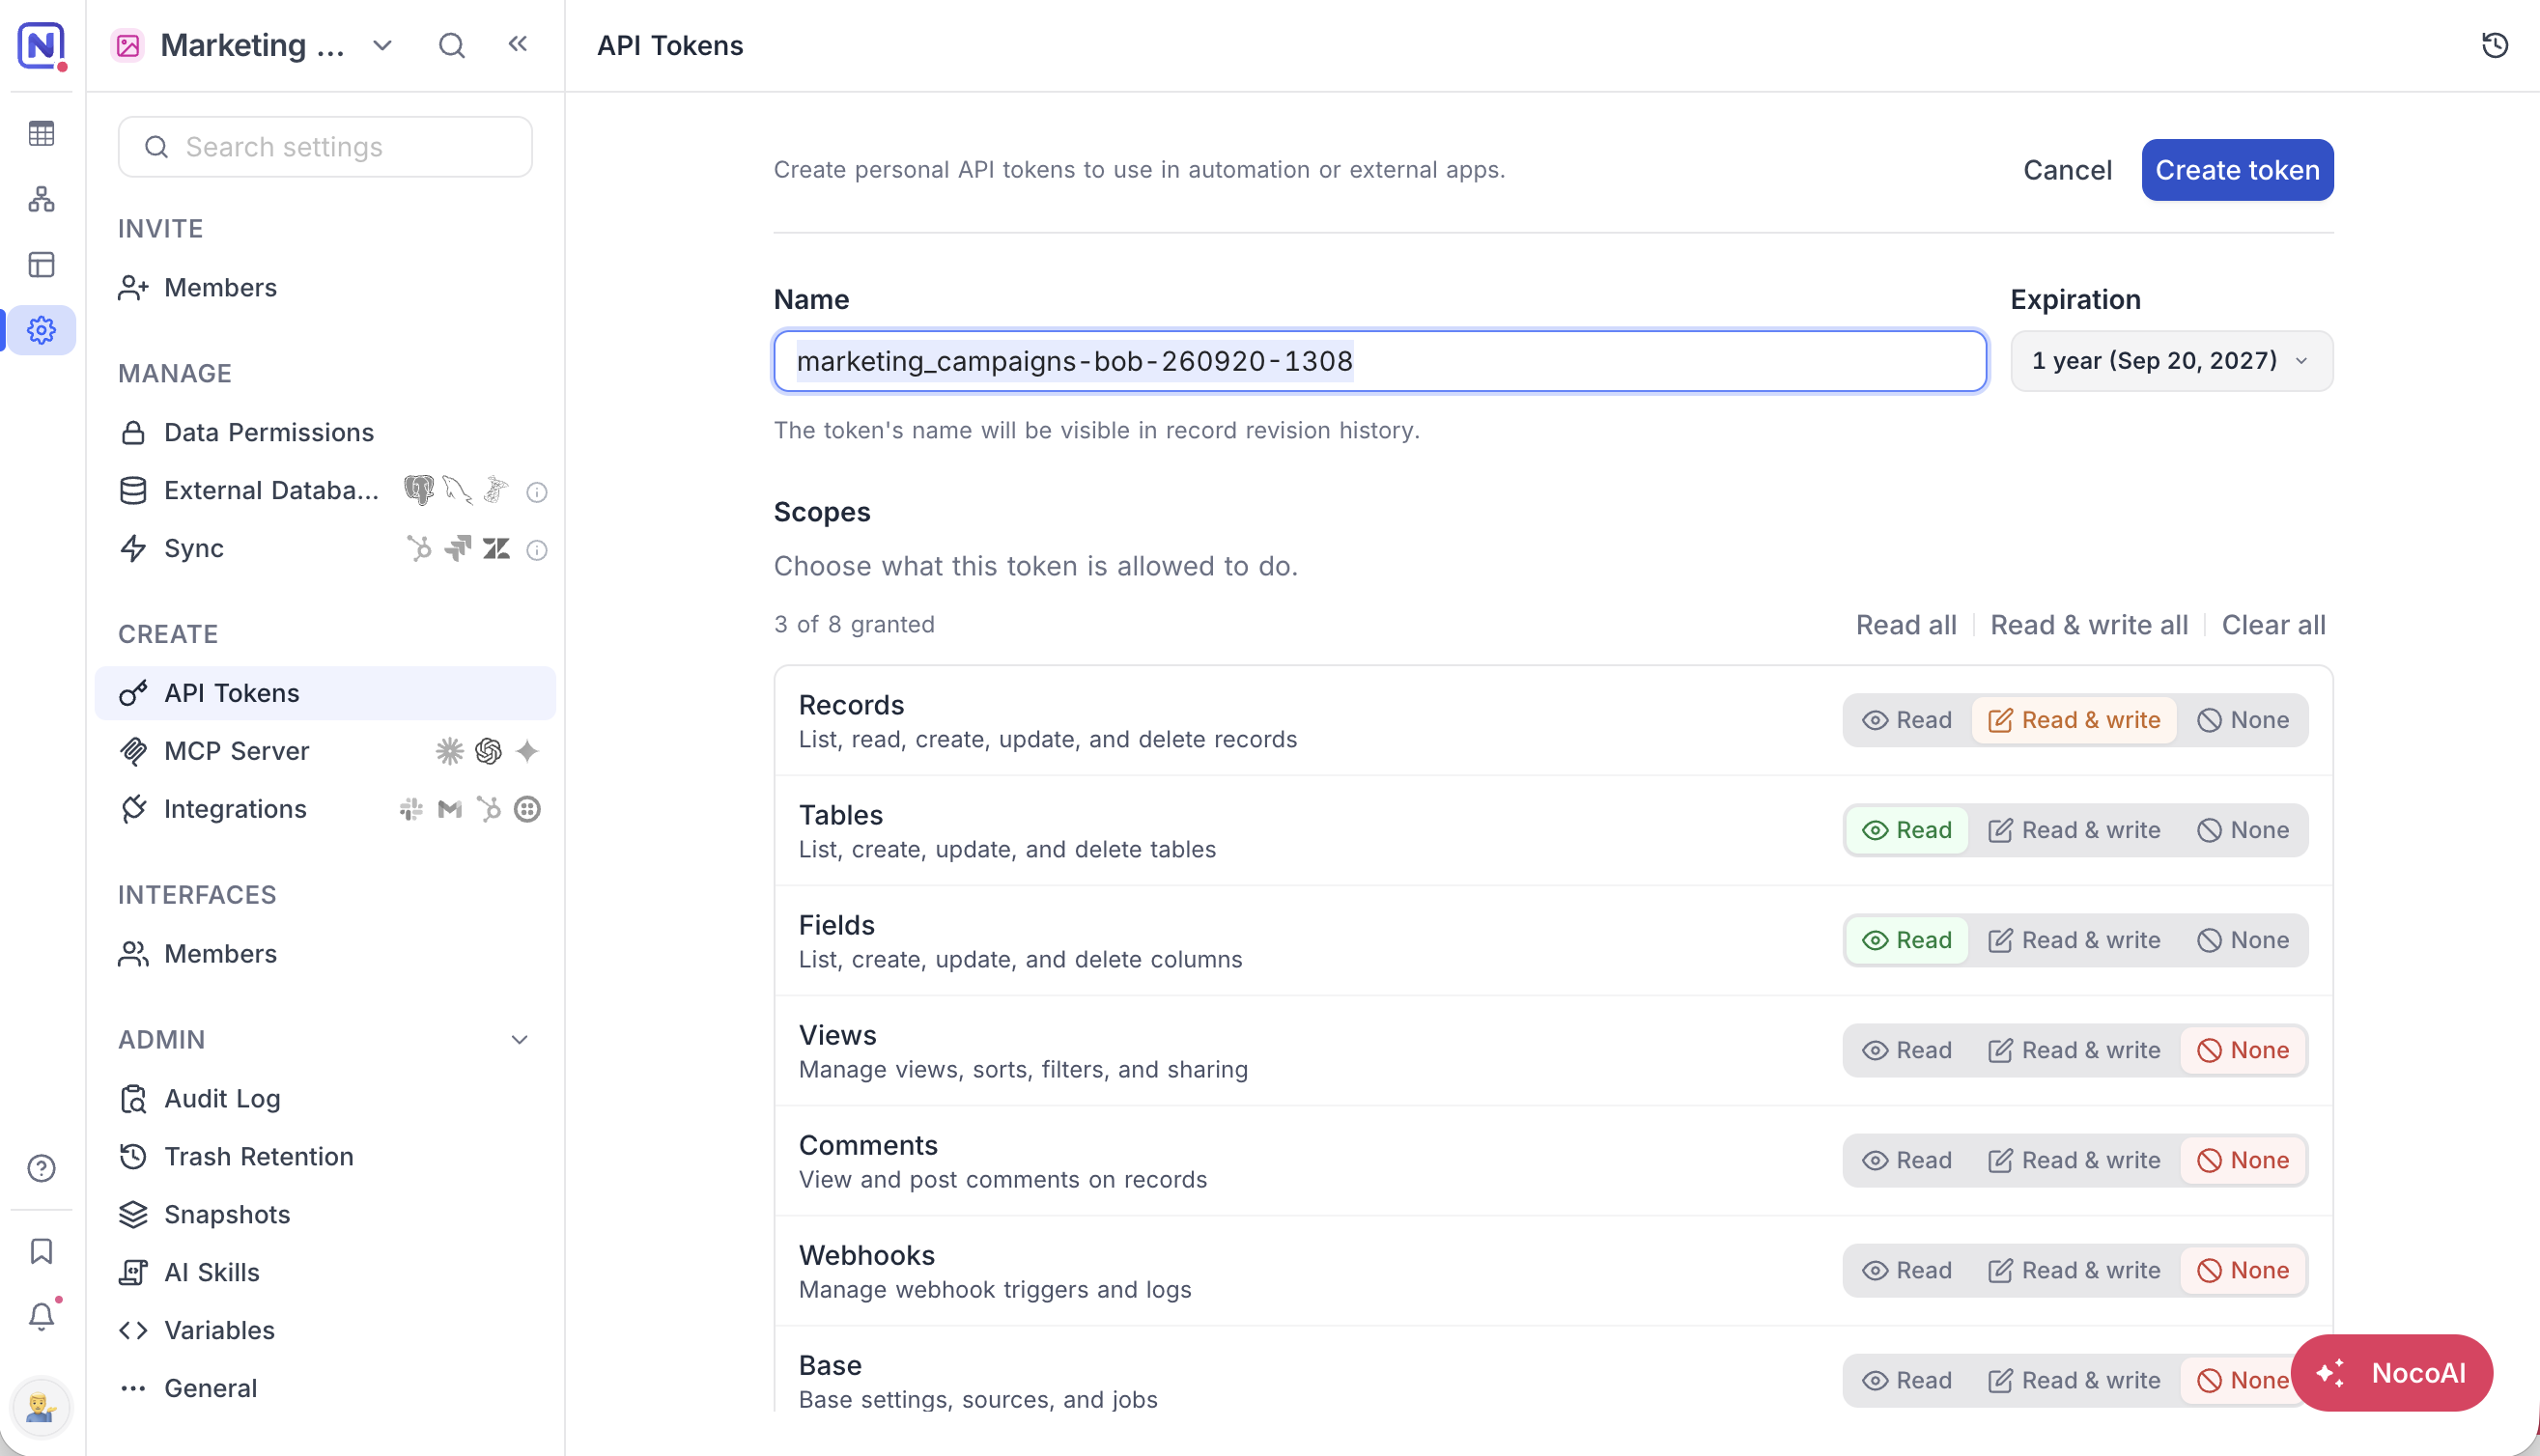
Navigate to Account Settings > API Tokens and click Create New API Token . This opens a dedicated create page with sections for name, expiration, access and scopes. Every section starts from a working default, so a token can be created without changing anything.
Name
Give your token a descriptive name that identifies its purpose (e.g., "CI/CD Pipeline", "Zapier Integration"). The name must be between 1 and 255 characters.
The field is pre-filled with a generated name in the form user-yymmdd-hhmm , prefixed with the base name when the token is created from within a base.
Scopes (Permissions)
Define what operations this token can perform. All eight permission categories are listed, each with its own access level:
- Read — Read-level access for that category
- Read & write — Full read and write access for that category
- None — No access for that category
New tokens start at Records: Read & write , Tables: Read and Fields: Read , with the remaining categories set to None . At least one category must be granted before the token can be created.
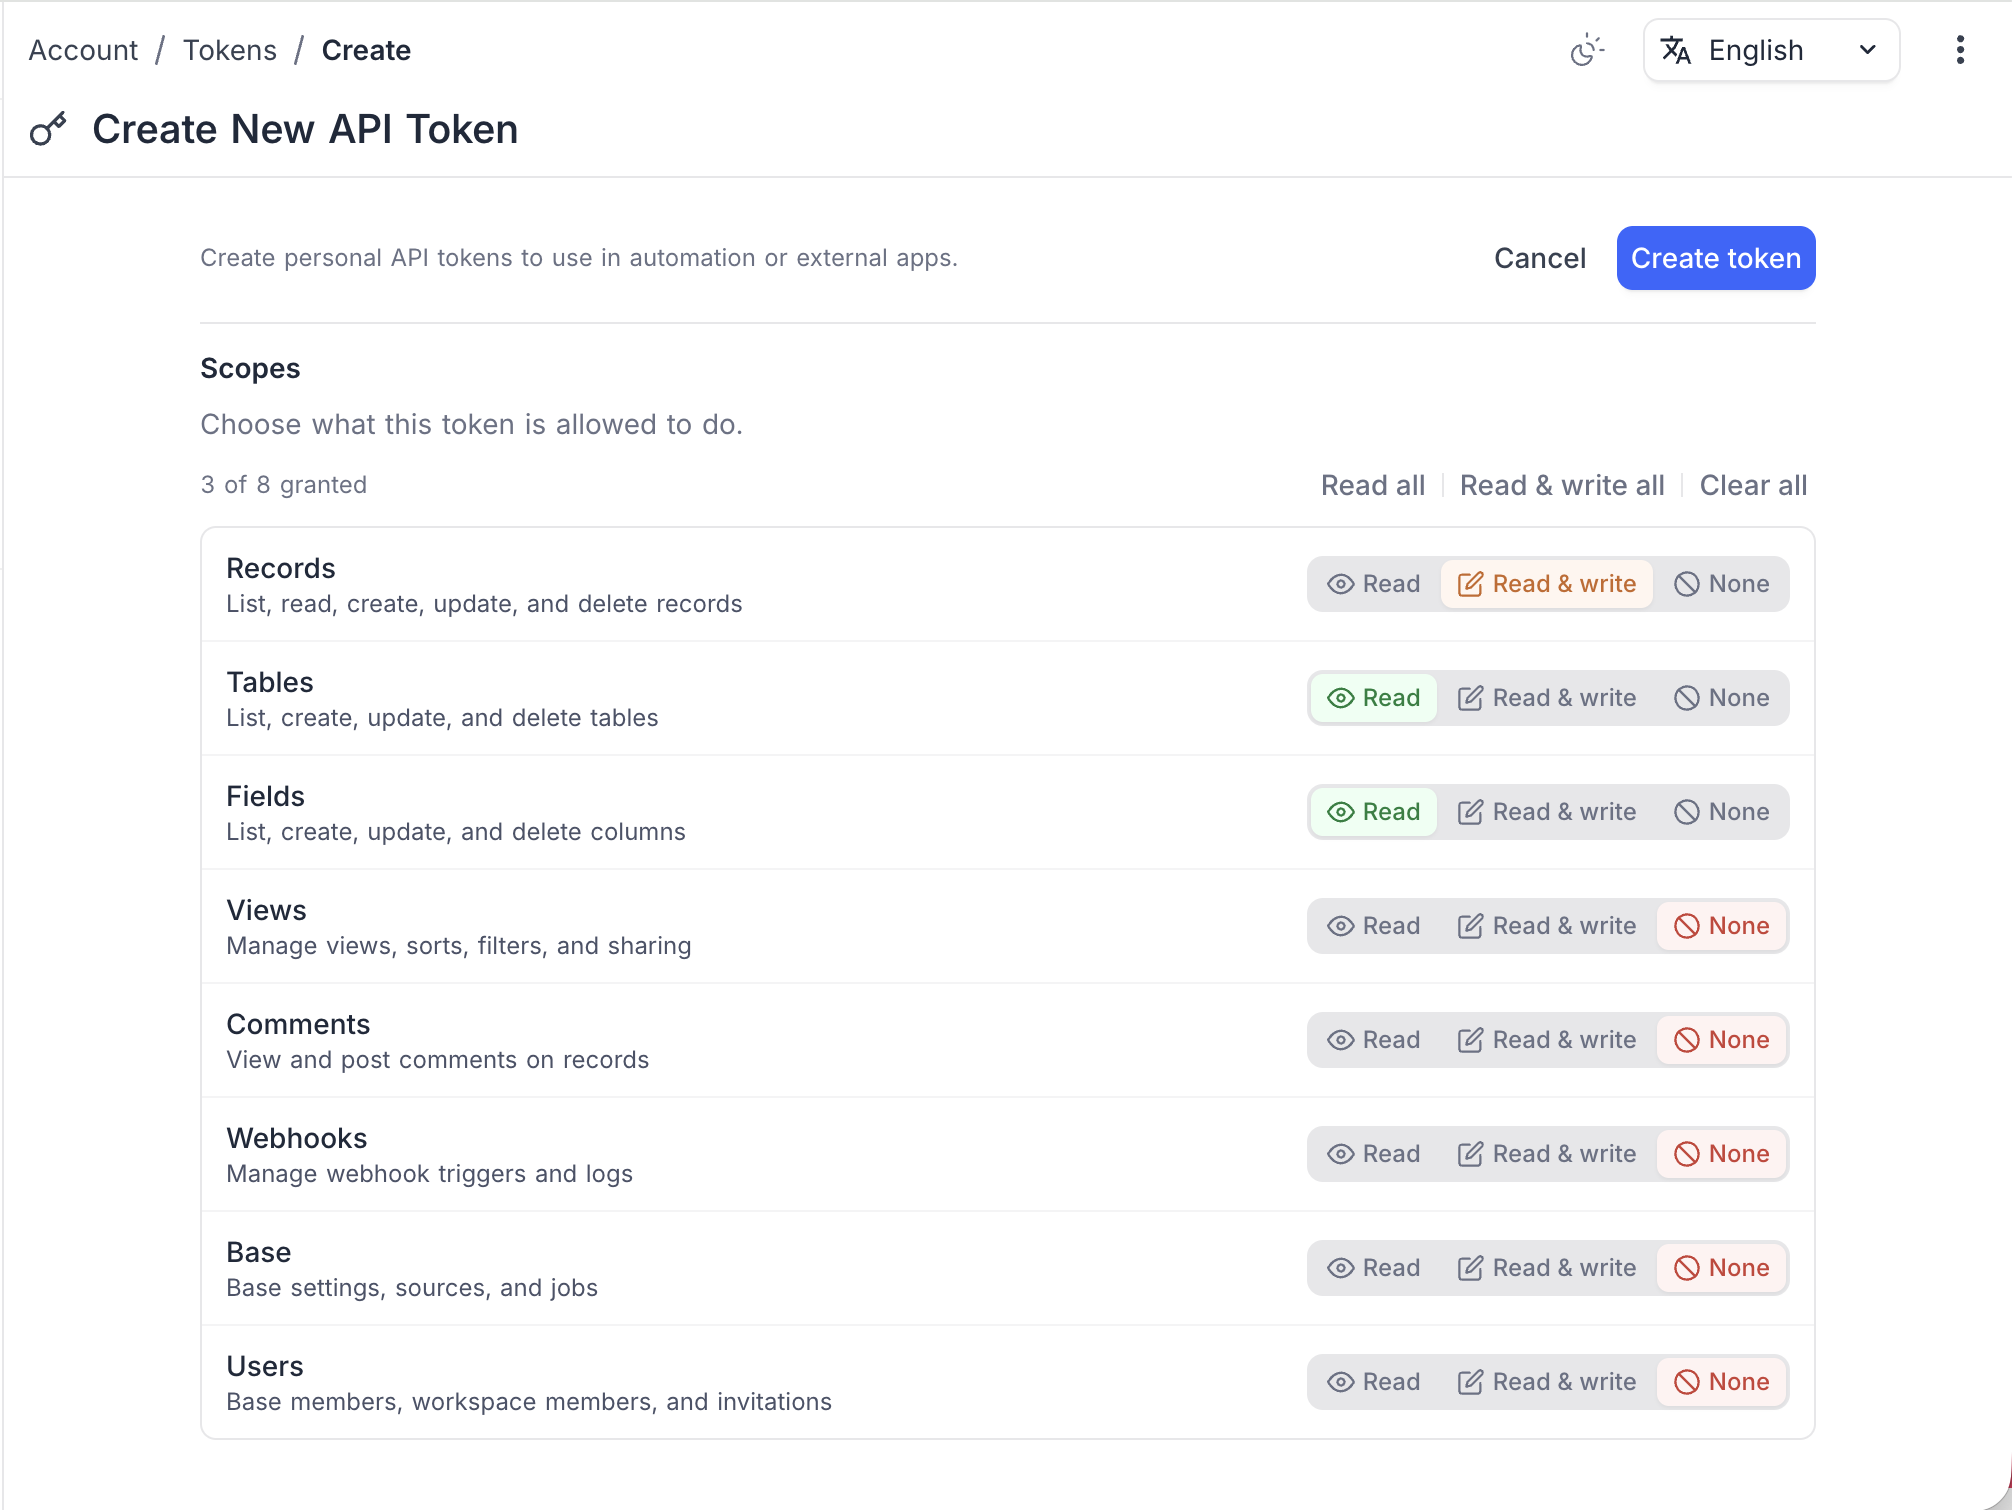
The eight permission categories are:
| Category | Read | Read & write |
|---|---|---|
| Records — record CRUD, data export, aggregation | List, read, export | Create, update, delete |
| Comments — record comments | View comments | Post, edit, delete |
| Tables — table management | List, read | Create, update, delete |
| Fields — column/field management | List columns | Create, update, delete |
| Views — views, sorts, filters, sharing | List views and config | Create, update, delete |
| Webhooks — webhook triggers and logs | List, view logs | Create, update, delete, test |
| Base — base settings, sources, jobs | View info, swagger, jobs | Create sources, delete base |
| Users — base and workspace members | List members | Invite, update roles, remove |
Access (Resource Scope)
Define which resources this token can access. New tokens start with all resources selected. Two options are available:
- Add all resources — Token can access all current and future bases across all workspaces.
- Add a base — Opens a searchable dropdown with bases grouped by workspace. Select individual bases to grant access.
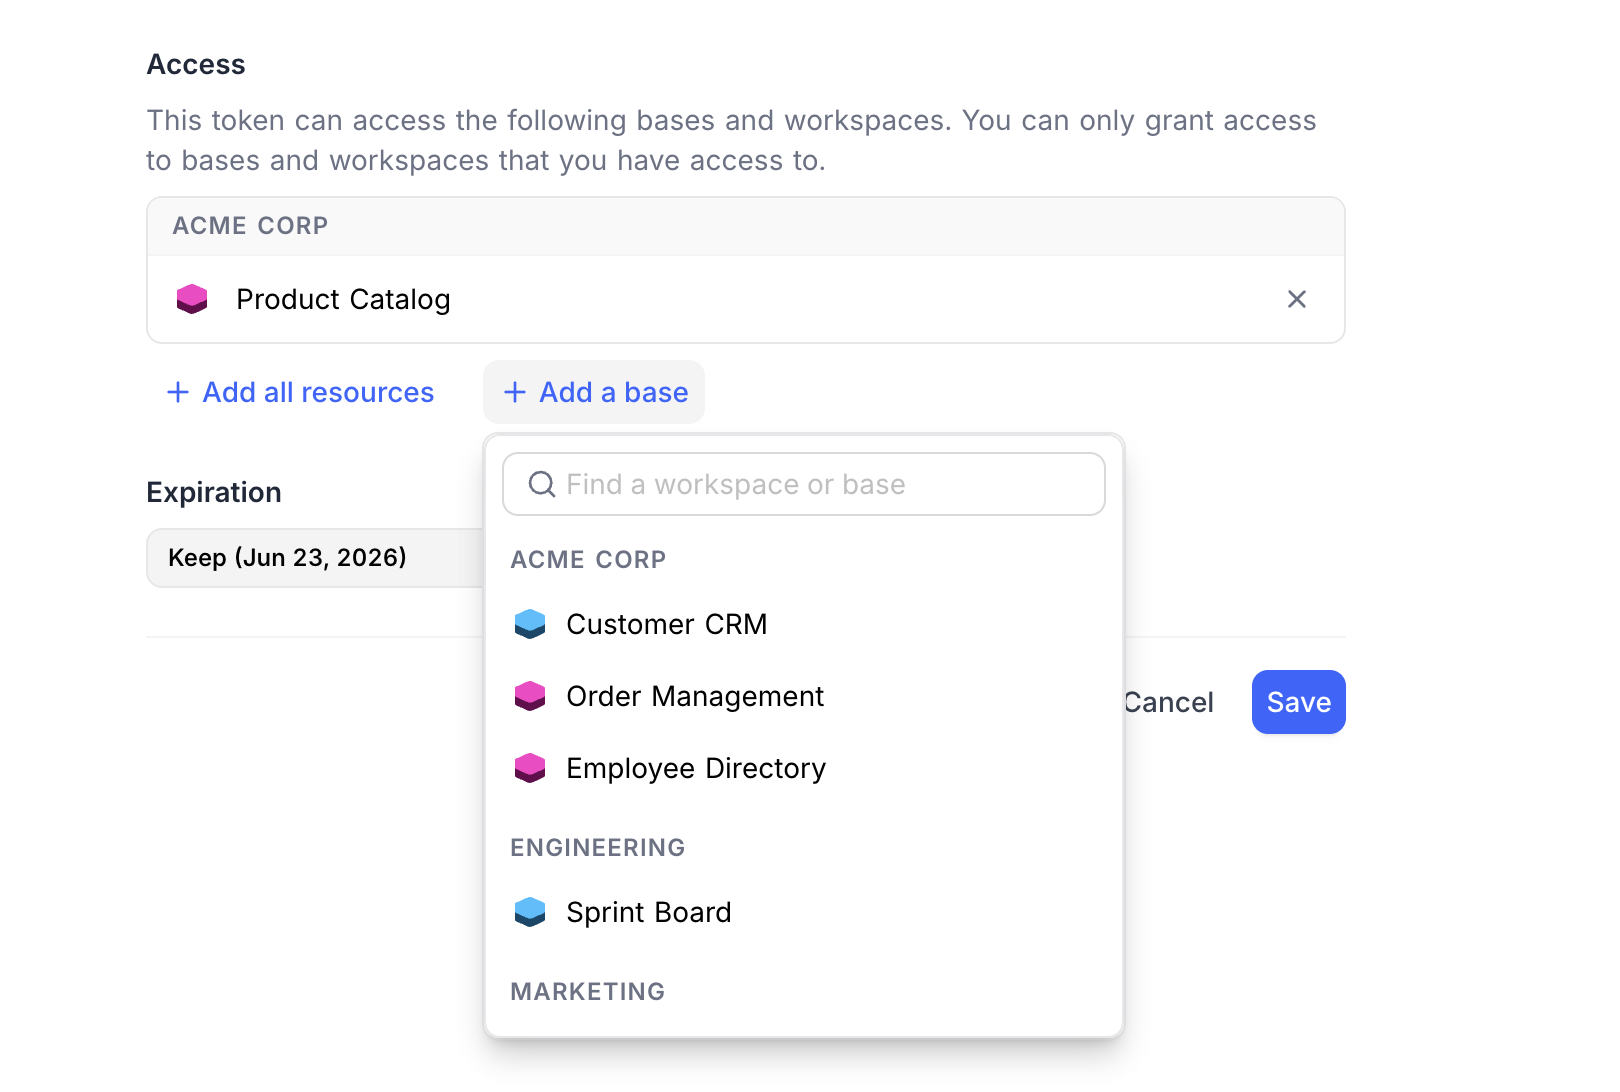
You can add multiple bases. Selected resources appear in a bordered list where each item can be removed with the × button. If you add "All resources", any previously selected individual bases are cleared.
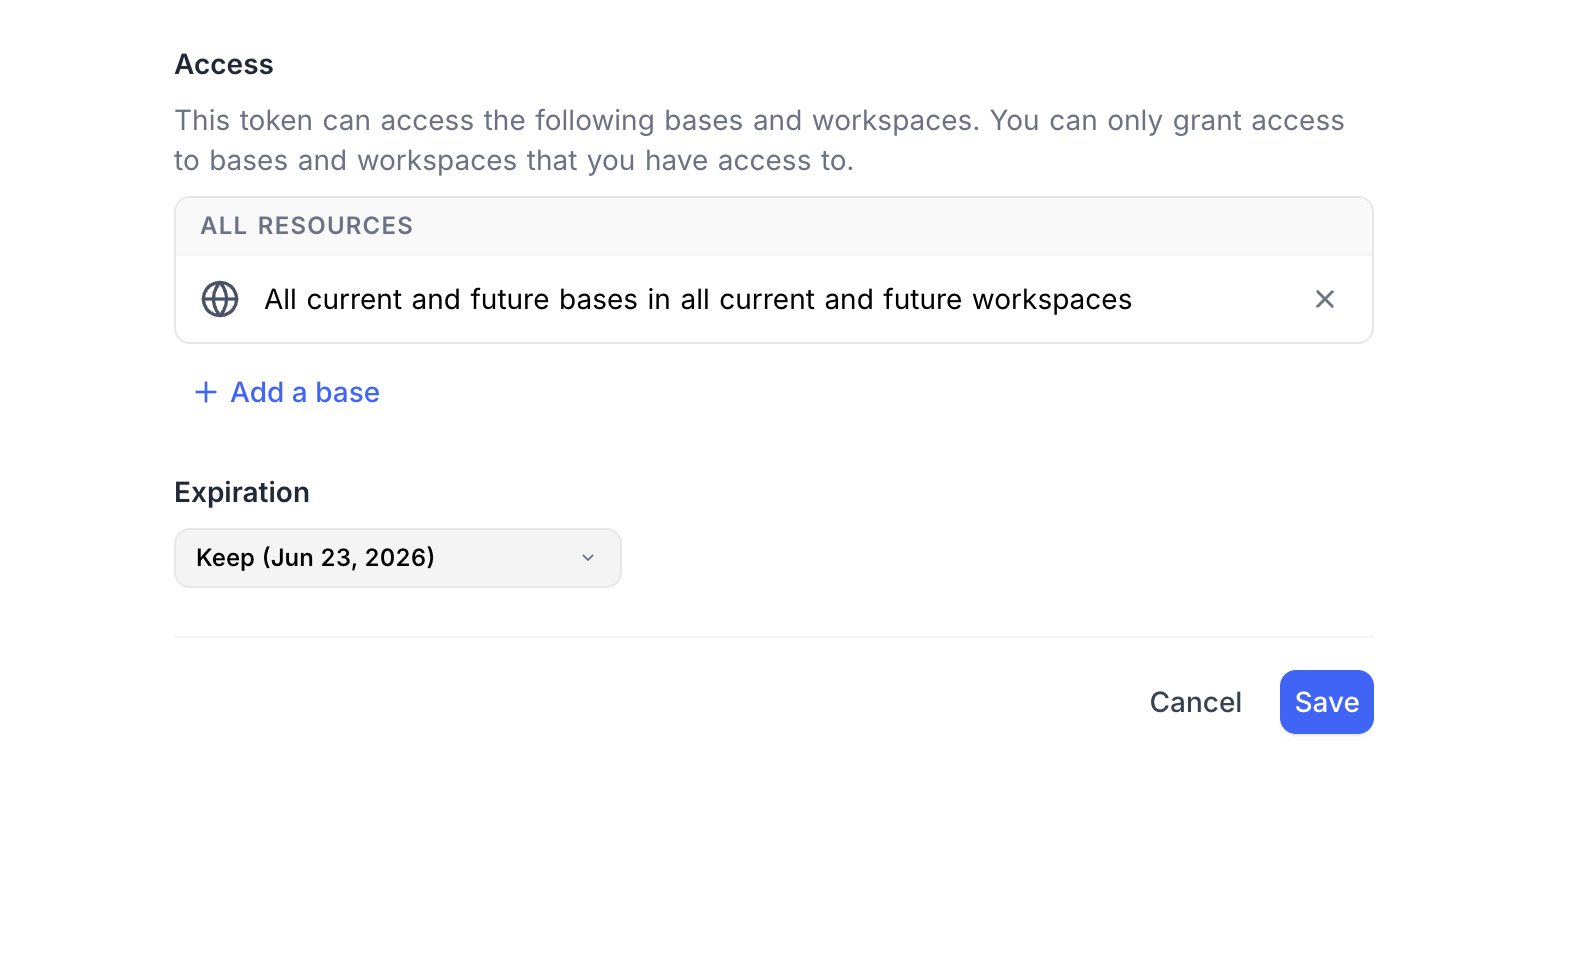
หมายเหตุ: At least one resource must be selected on all NocoDB Cloud plans and licensed self-hosted deployments (Business plan and above). Use Add all resources for org-wide access, or Add a base to restrict to specific bases. On Community Edition and unlicensed self-hosted deployments, tokens automatically have all-resources access.
Expiration
Choose an expiration period from the dropdown:
- 7 days , 30 days , 60 days , 90 days , 1 year (default) — preset options
- Custom — pick a specific date
- No expiration — the token never expires
On Community Edition and unlicensed self-hosted deployments the expiration control is hidden and tokens never expire.
หมายเหตุ: We recommend setting an expiration for better security. Expired tokens are automatically rejected.
Click Create token to generate the token.
Copy Your Token
After creation, the form is replaced in place by the token string, displayed once . Copy it immediately and store it securely.
The token format is nc_pat_ followed by 40 random characters:
nc_pat_V1StGXR8_Z5jdHi2B-xoMwDqE3G4n5p6q7r8s
Click the token field, or the Copy token button, to copy it. The button then becomes Back , which returns you to the token list.
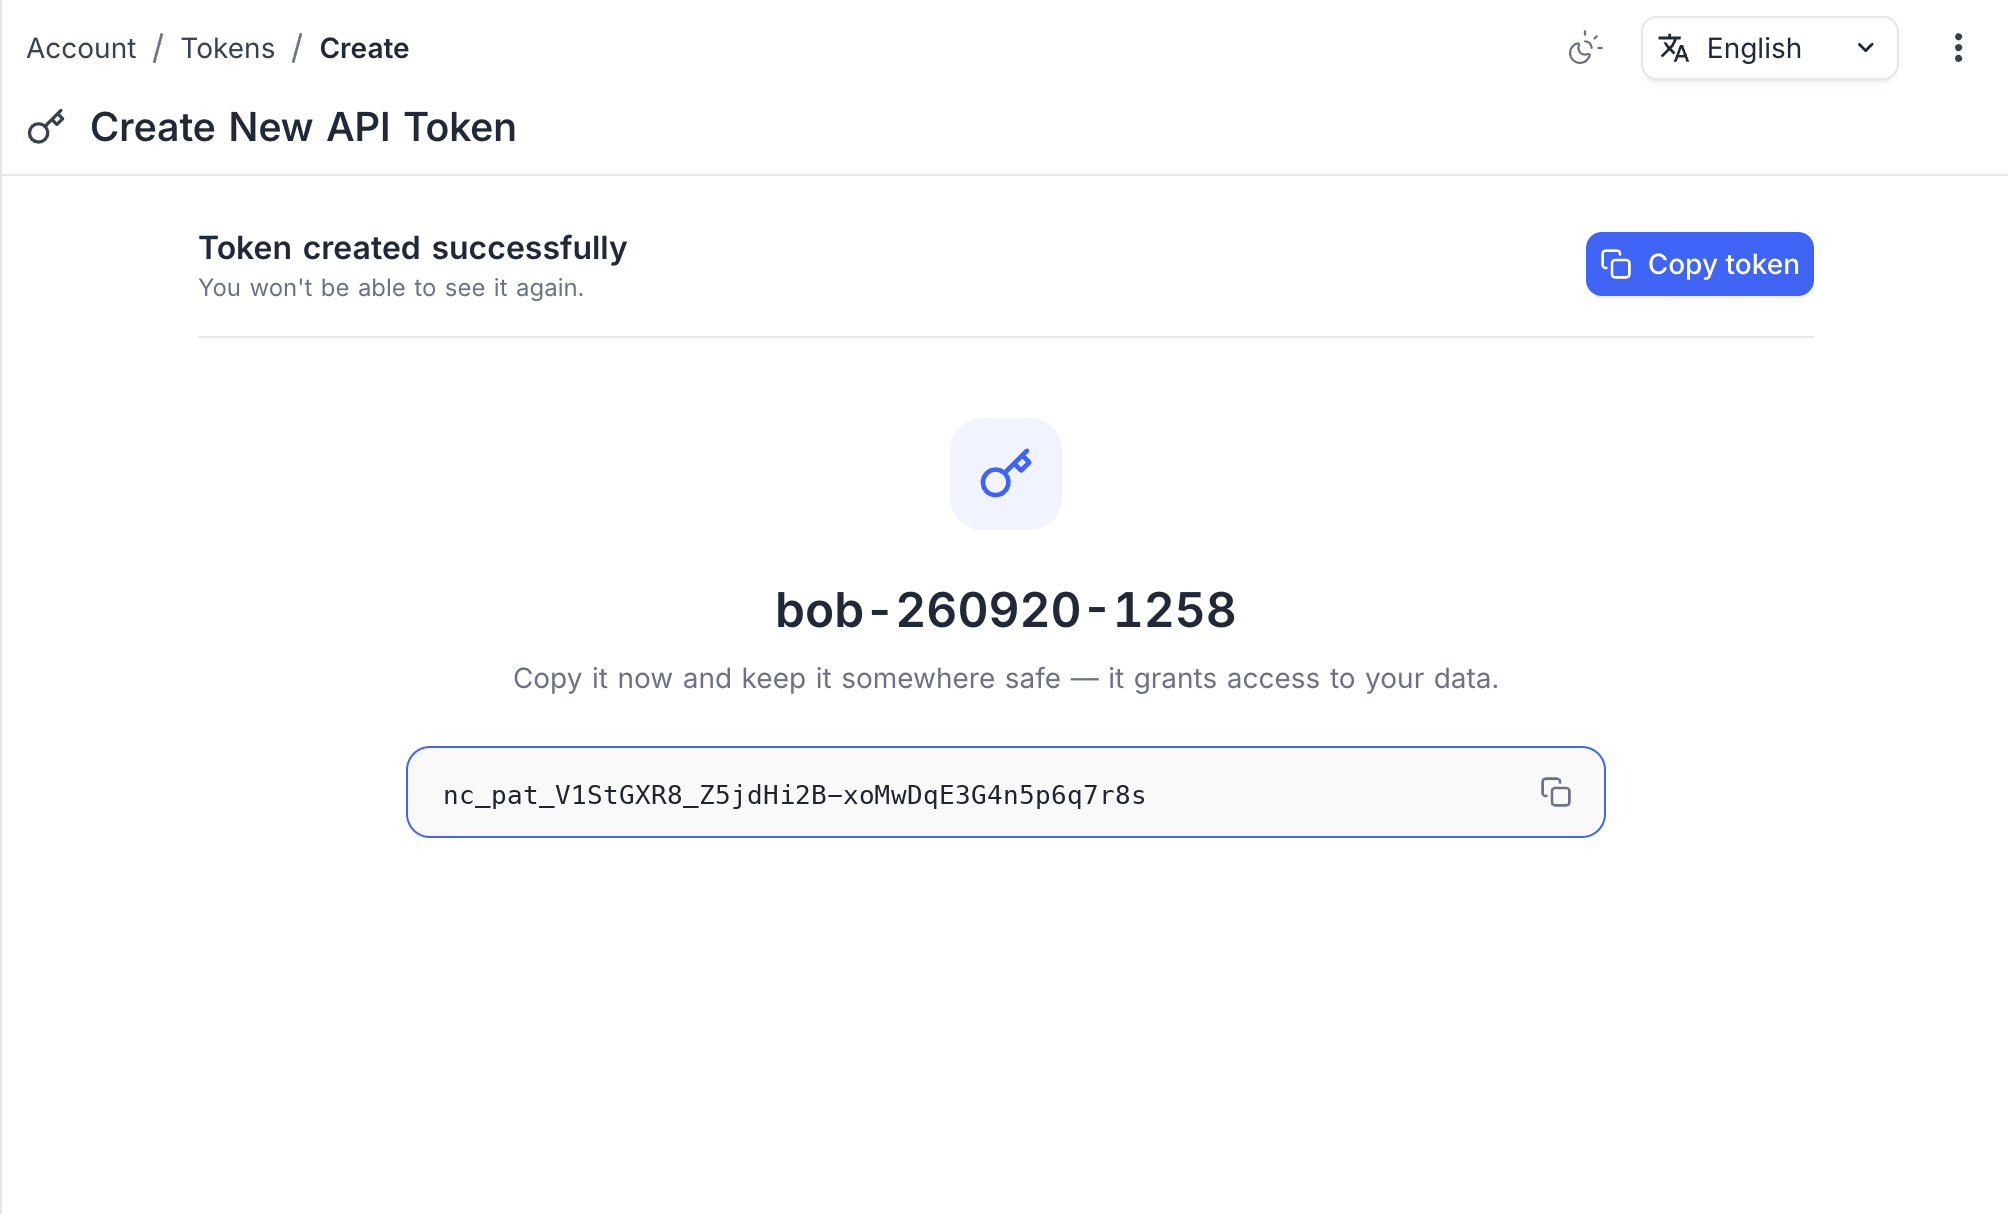
หมายเหตุ: This token will not be displayed again after you leave this screen. If you lose it, you must delete the token and create a new one.
Create a Token From Within a Base
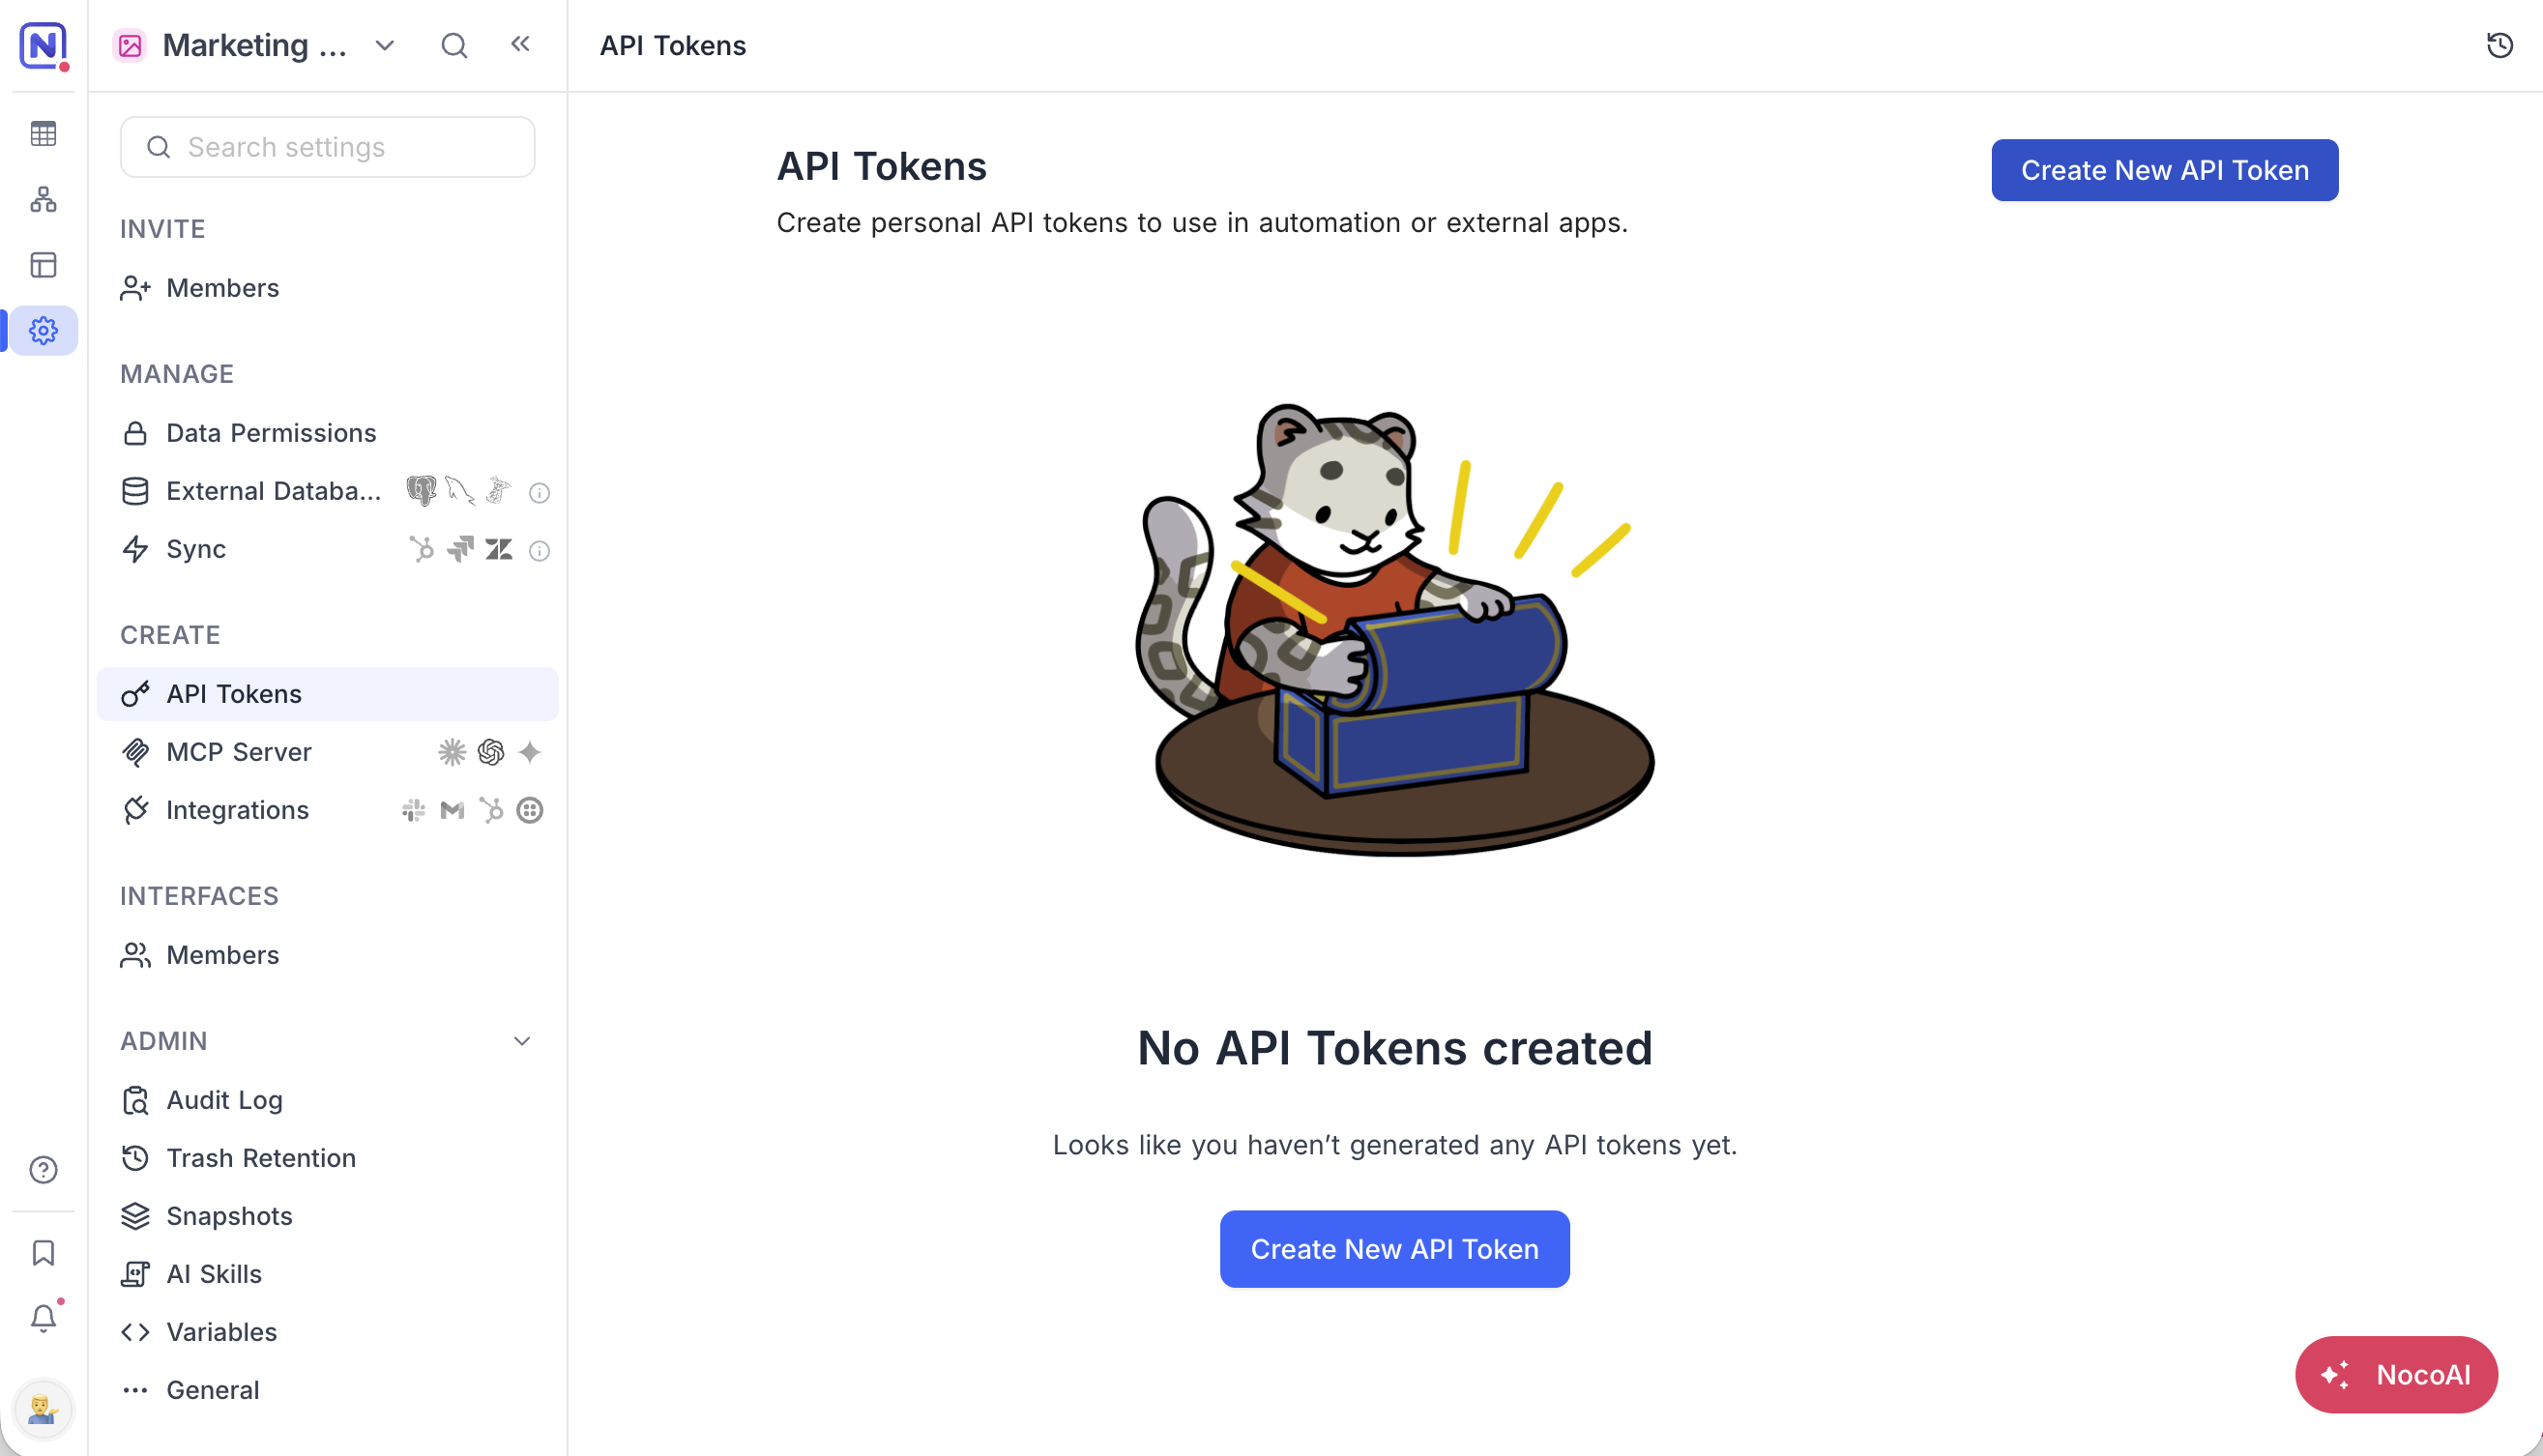
Tokens can also be created from a base, without leaving it. Open the base and go to Base Settings → Create → API Tokens .
The page works the same way as Account Settings > API Tokens , with two differences: the token is pinned to the current base, so the Access section is not shown, and the generated name is prefixed with the base name. The list shows your tokens scoped to that base.
Manage Tokens
The token list shows all your API tokens with columns: Token Name , Created (as a relative time, for example "14m ago"), Expires (as the days remaining, for example "365 days left"), Active (toggle), and Actions . A Creator column is shown only to super admins, whose list spans every user's tokens.
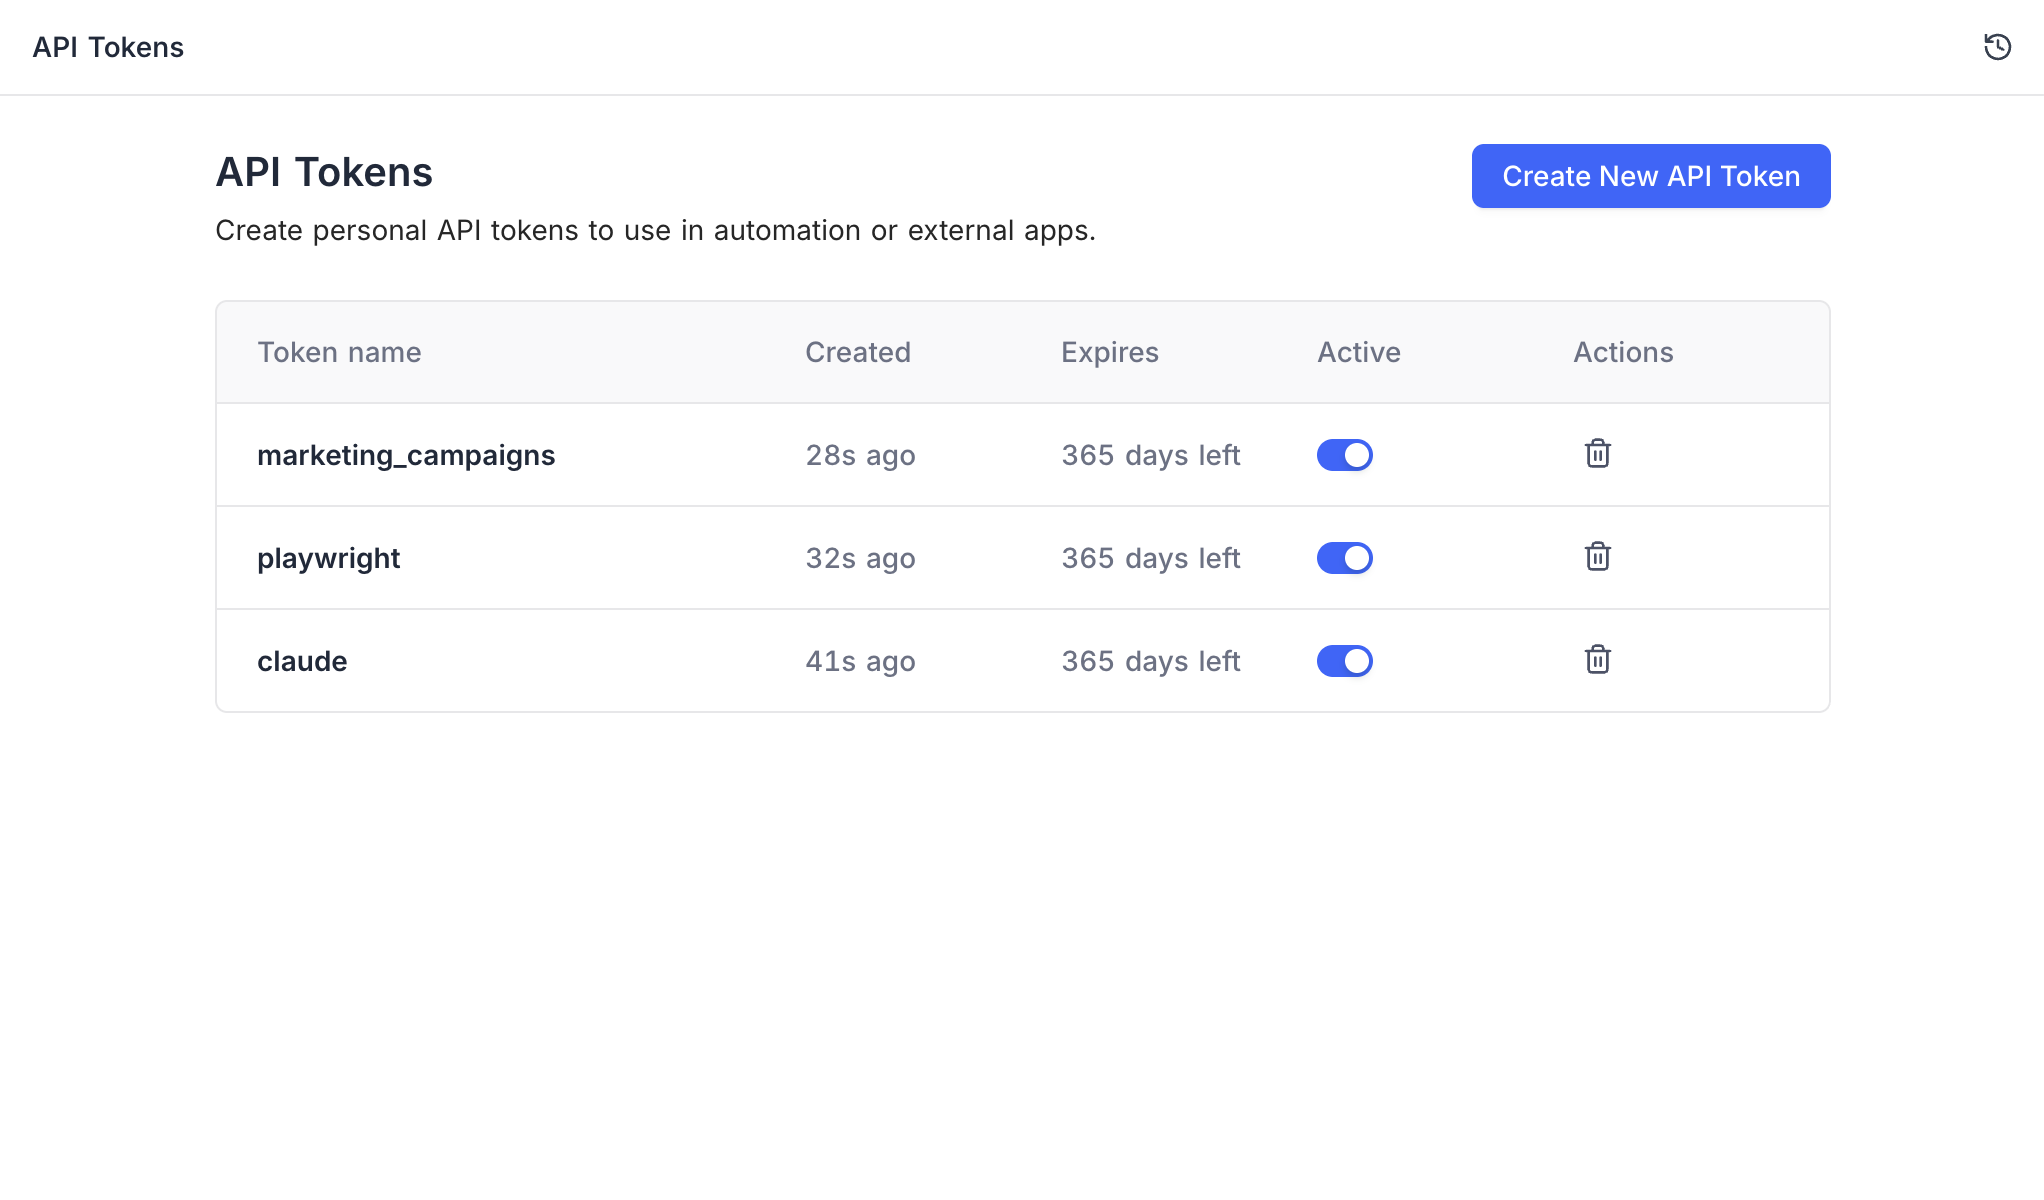
Fine-grained tokens display an Expired badge (red) when past their expiry date, and an SSO badge (orange) if created through SSO authentication.
Token Actions
- Edit — Click anywhere on the token row to open the edit form, replacing the list view.
- Delete (trash icon) — Click the trash icon to confirm deletion in the row itself.
Edit a Token
Clicking a row opens the same form used for creation , pre-filled with the token's current values. You can update:
- Token name — Change the descriptive name
- Scopes (Permissions) — Add, remove, or change permission categories and their access levels
- Access (Resource Scope) — Add or remove bases, or switch to all resources
- Expiration — Extend or set a new expiry date. A Keep option preserves the current expiry.
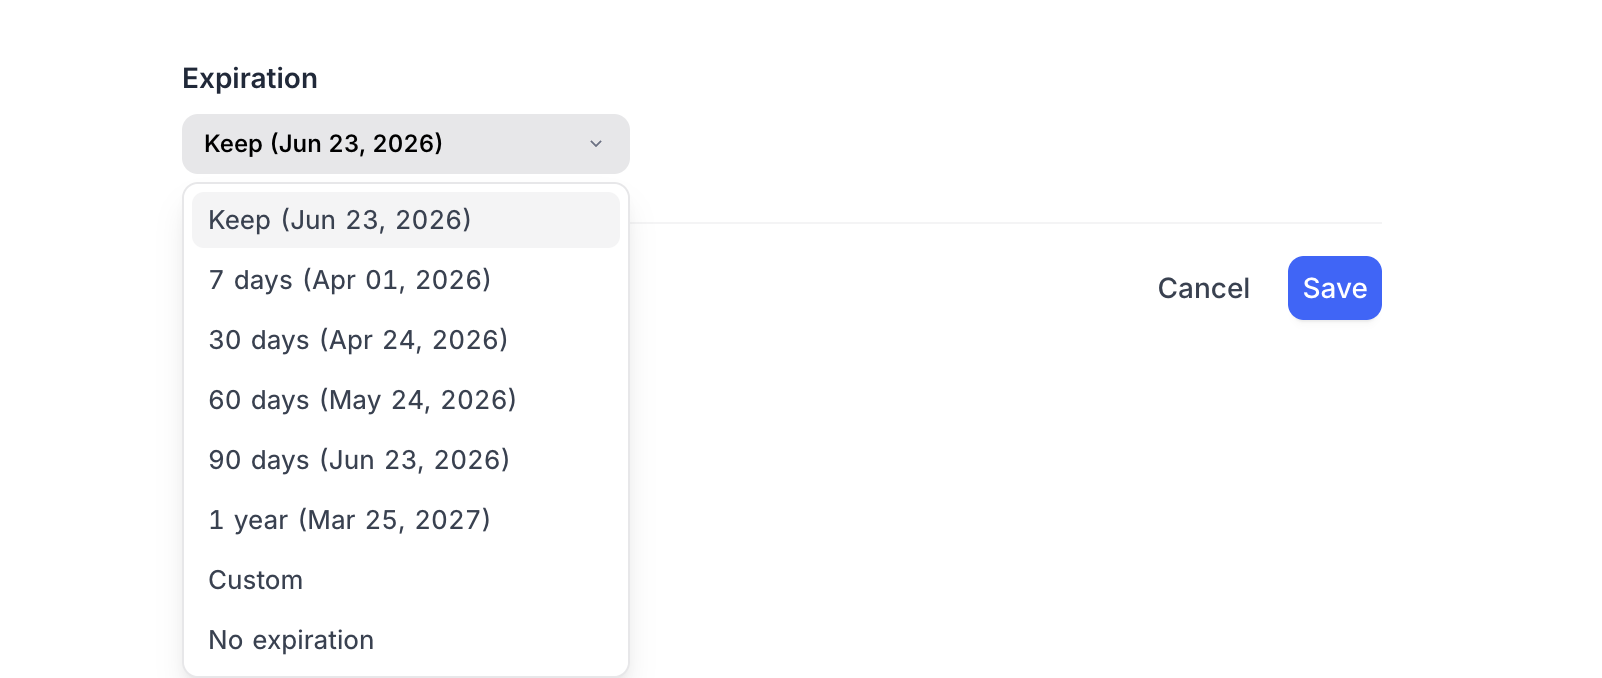
Click Save to apply changes, or Cancel to return to the token list.
Enable / Disable a Token
Use the Active toggle on any token row to enable or disable it. A disabled token receives 401 Unauthorized on all requests. Re-enable it at any time to restore access. This is useful for:
- Investigating suspicious activity without permanently revoking access
- Temporarily pausing an integration during maintenance
Permission Enforcement
For each API request, the system checks:
- Is the token valid? — exists, not expired, enabled
- Does the scope match? — if base-scoped, the requested base must be in the token's scope. Listing the bases of a workspace is the one exception: a base-scoped token may call it and gets back only the bases in its scope.
- Does the user's role allow this operation? — standard role-based ACL check
- Does the token's permission level allow this operation? — operation mapped to a category and checked against the token's level
All four checks must pass. The effective permission is the intersection of the user's role and the token's granted permissions.
| Scenario | HTTP Status |
|---|---|
| Token is valid and has sufficient permissions | 200 |
| Token is expired | 401 |
| Token is disabled | 401 |
| Token does not exist or is malformed | 401 |
| Token scope does not match the requested base | 401 |
| Token permission level is insufficient | 403 |
Legacy API Tokens
หมายเหตุ: Legacy token creation is no longer available in the UI. As of v2026.08.1, creating legacy tokens through the API is also blocked on NocoDB Cloud and licensed self-hosted deployments. On Community Edition and unlicensed self-hosted deployments, the V1 API still supports creating them for backward compatibility. Existing legacy tokens continue to work everywhere. Use fine-grained tokens for all new integrations.
Legacy tokens are org-scoped and inherit the creator's full role permissions. They remain functional for backward compatibility but we recommend migrating to fine-grained tokens for better security and control.
Self-hosted administrators who need a transition window on a licensed instance can set NC_ALLOW_LEGACY_API_TOKENS=true to temporarily re-enable legacy token creation through the API. See Environment variables .
Create a Legacy Token (Deprecated)
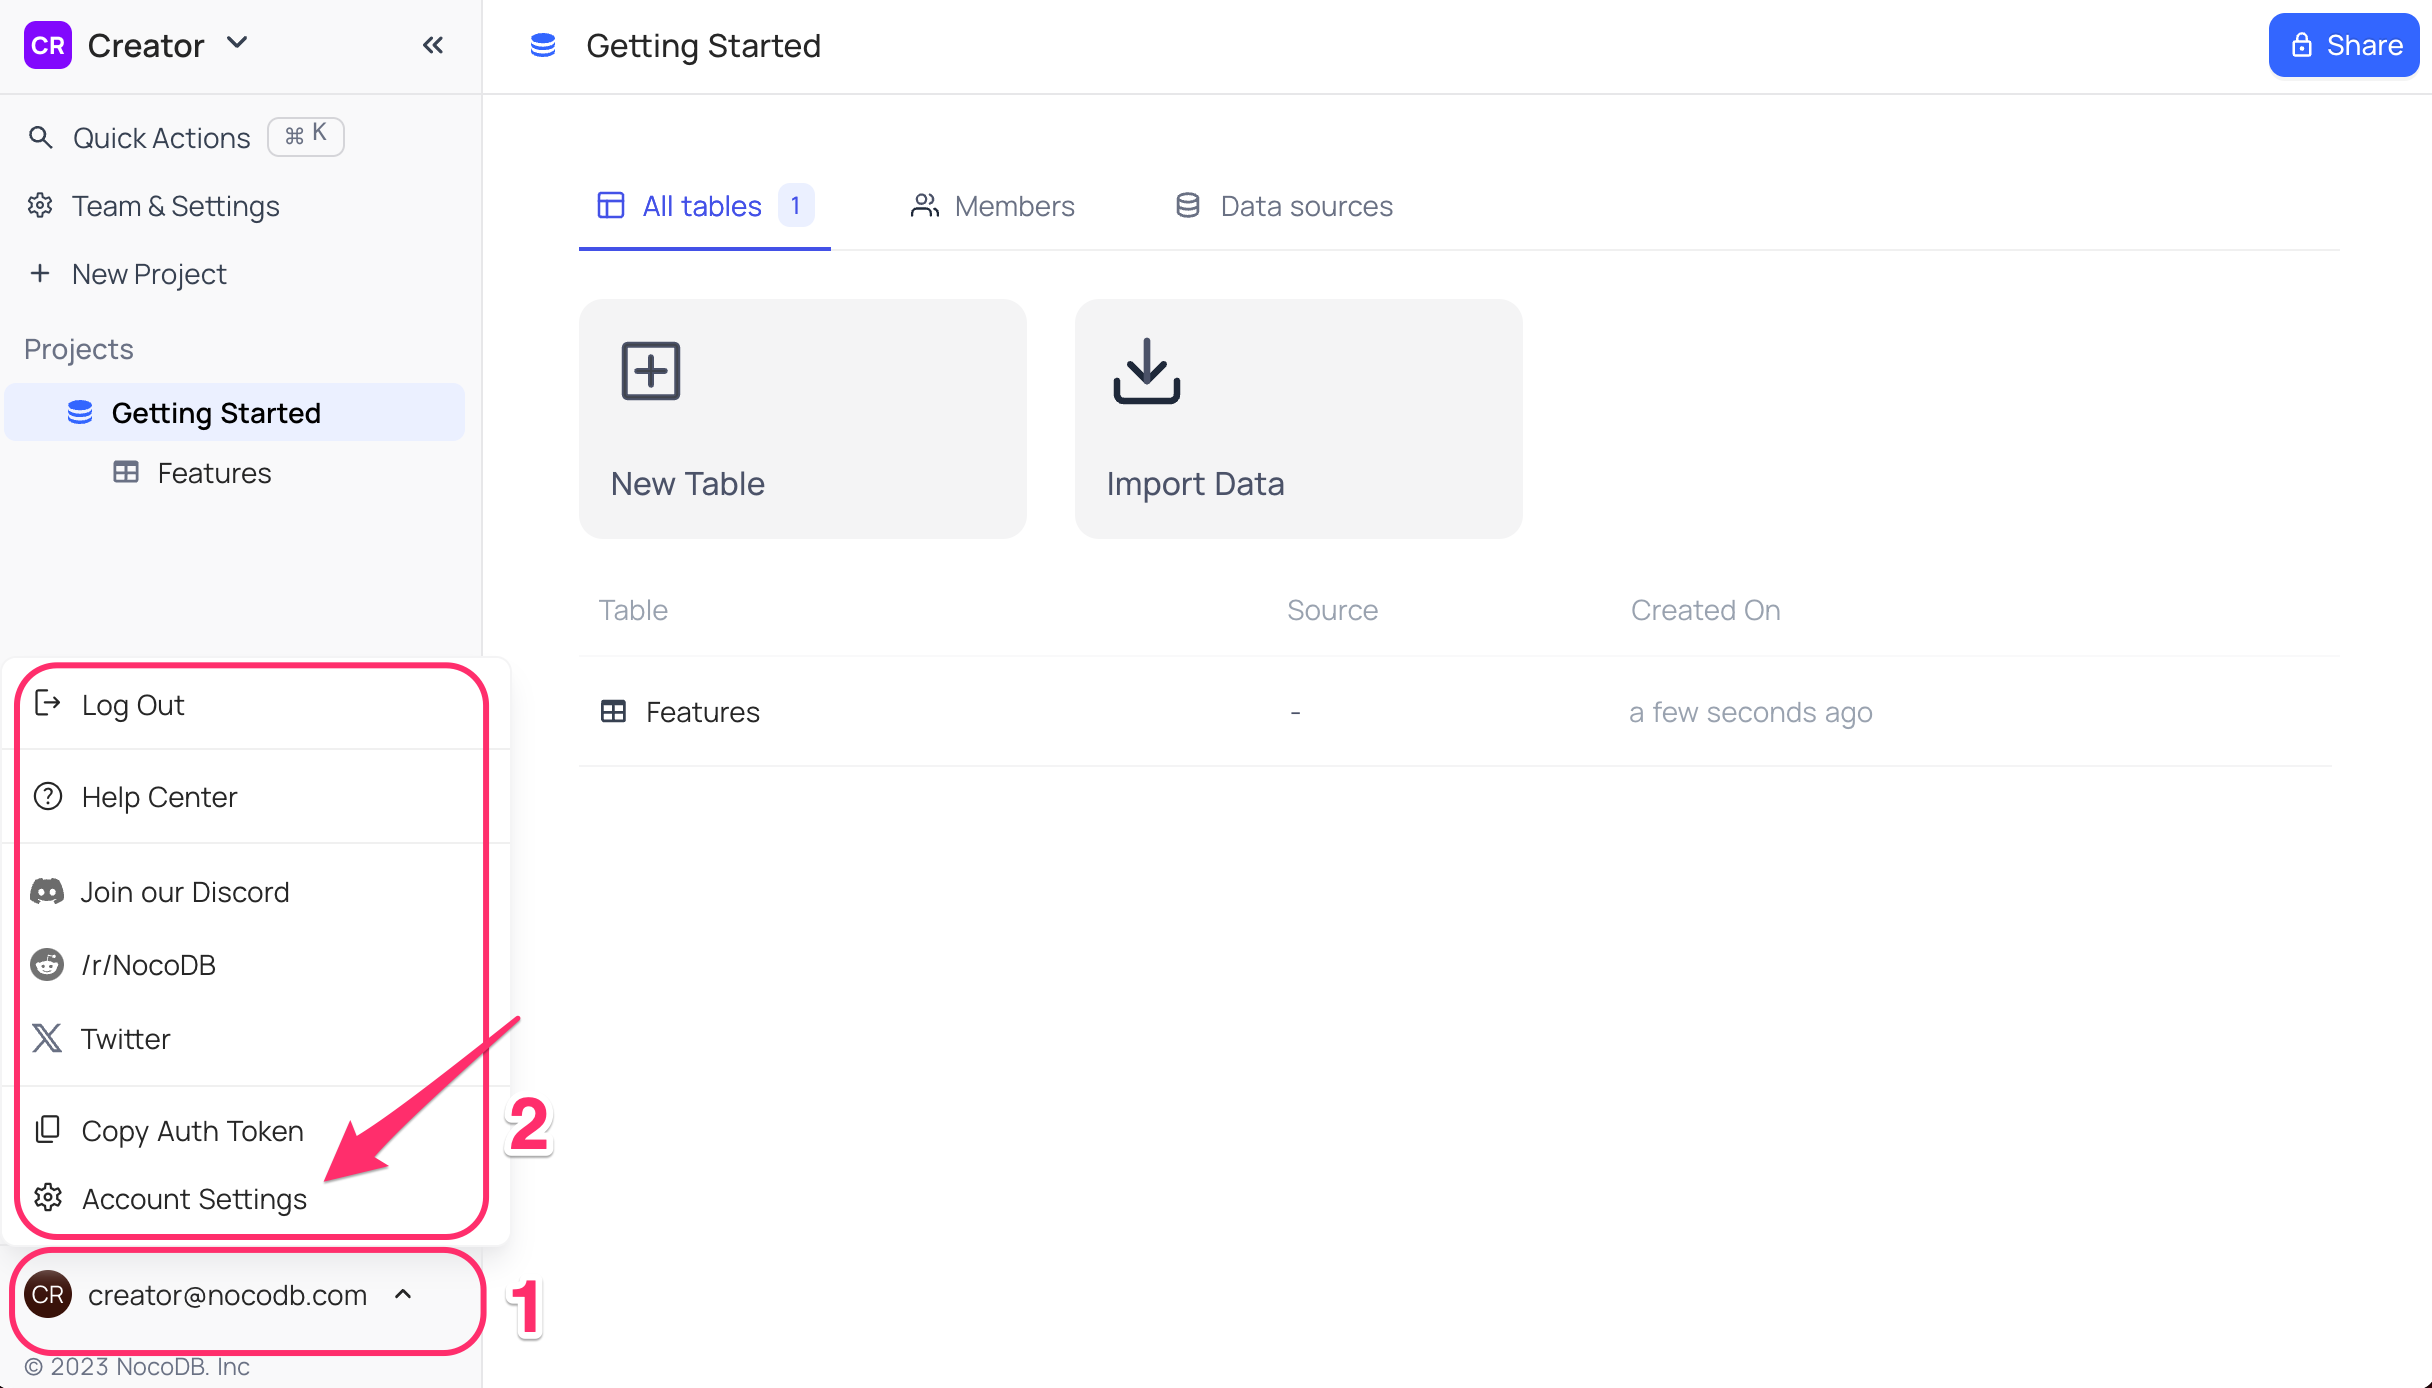
- Click on
User menuin the bottom left corner of the sidebar - Select
Account Settingsfrom the dropdown
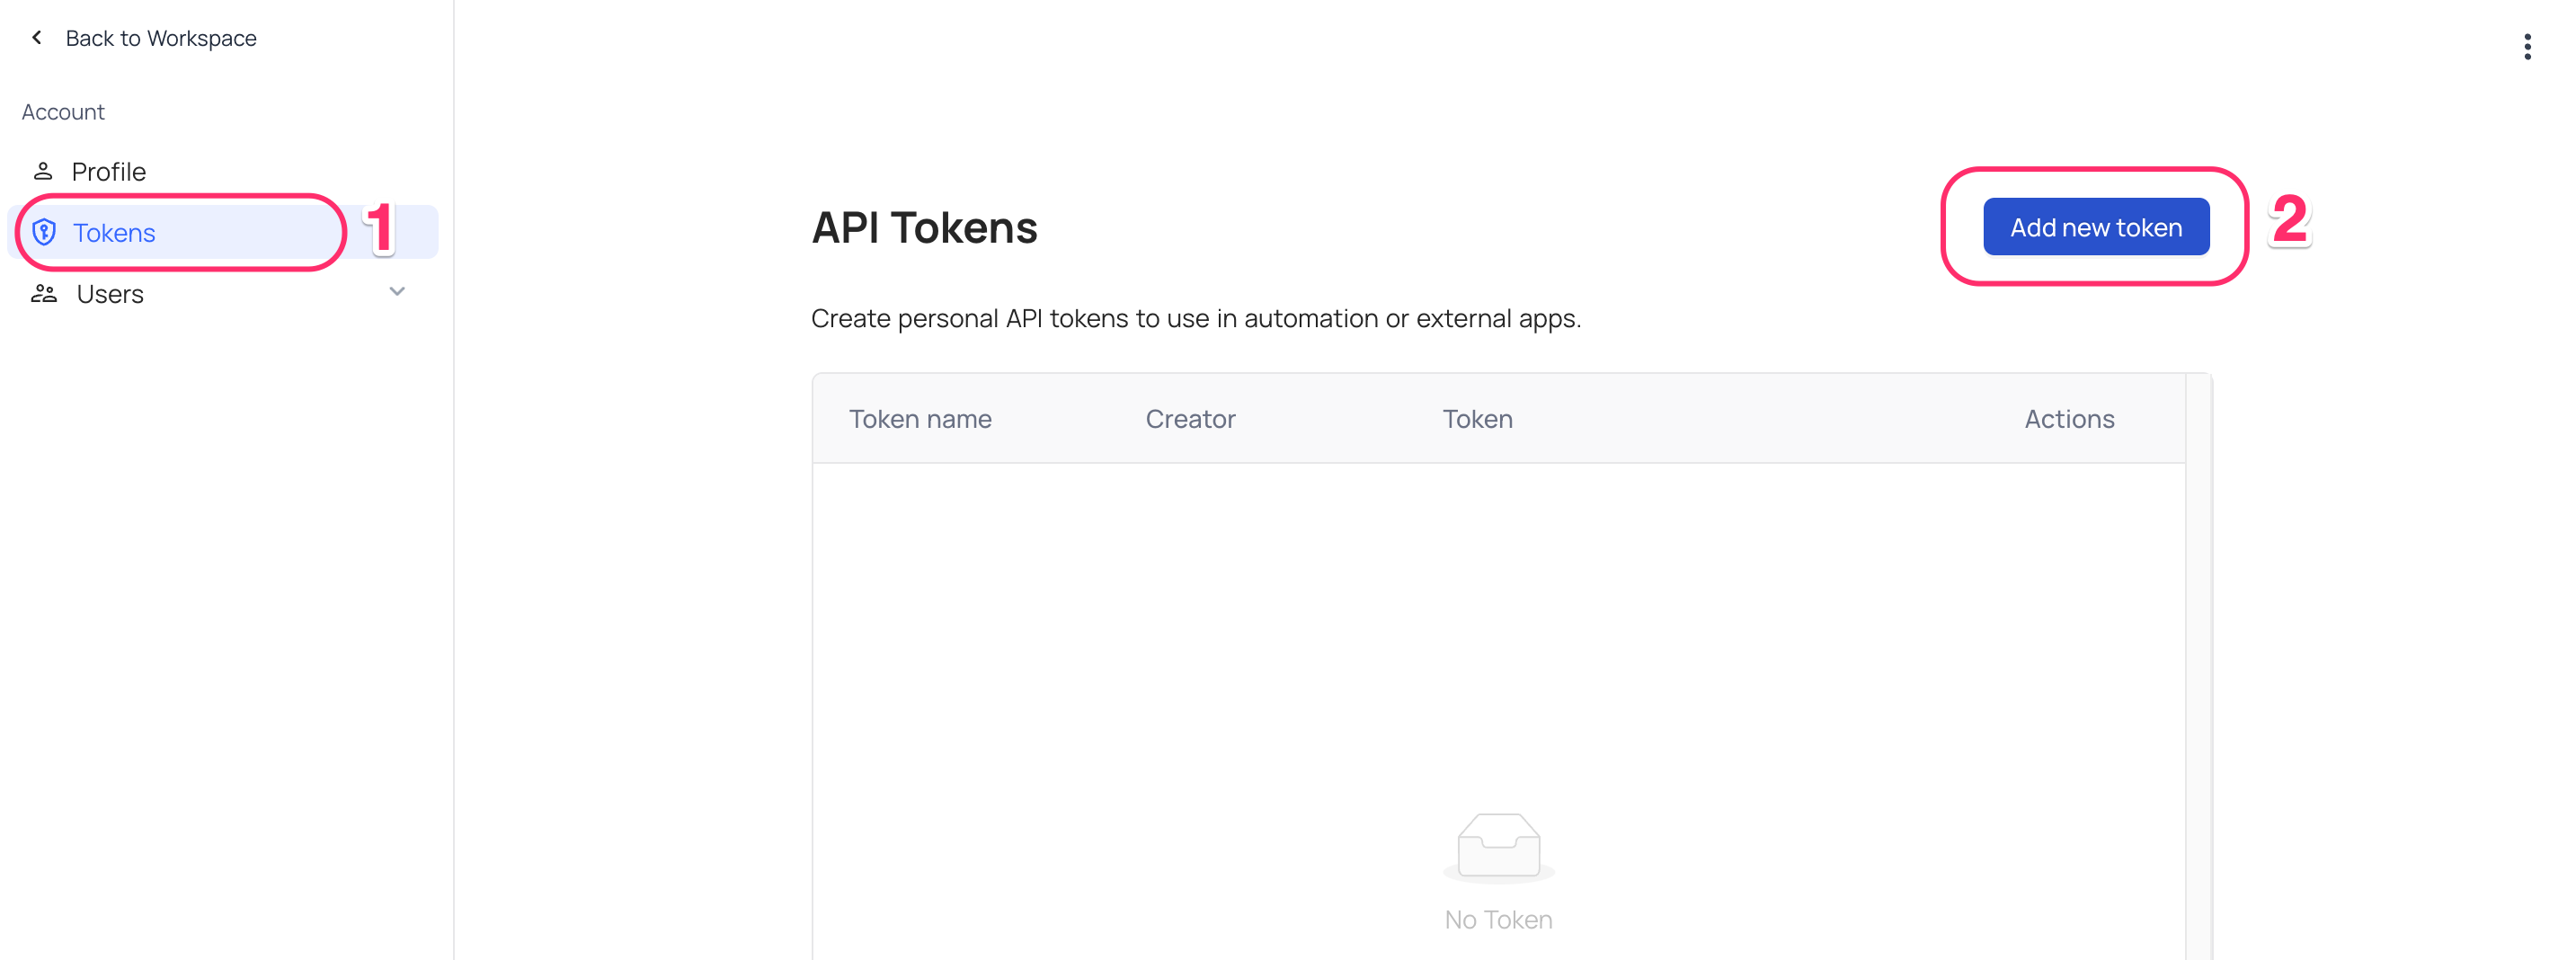
- Click on
Tokenstab in theAccount Settingspage - Click on
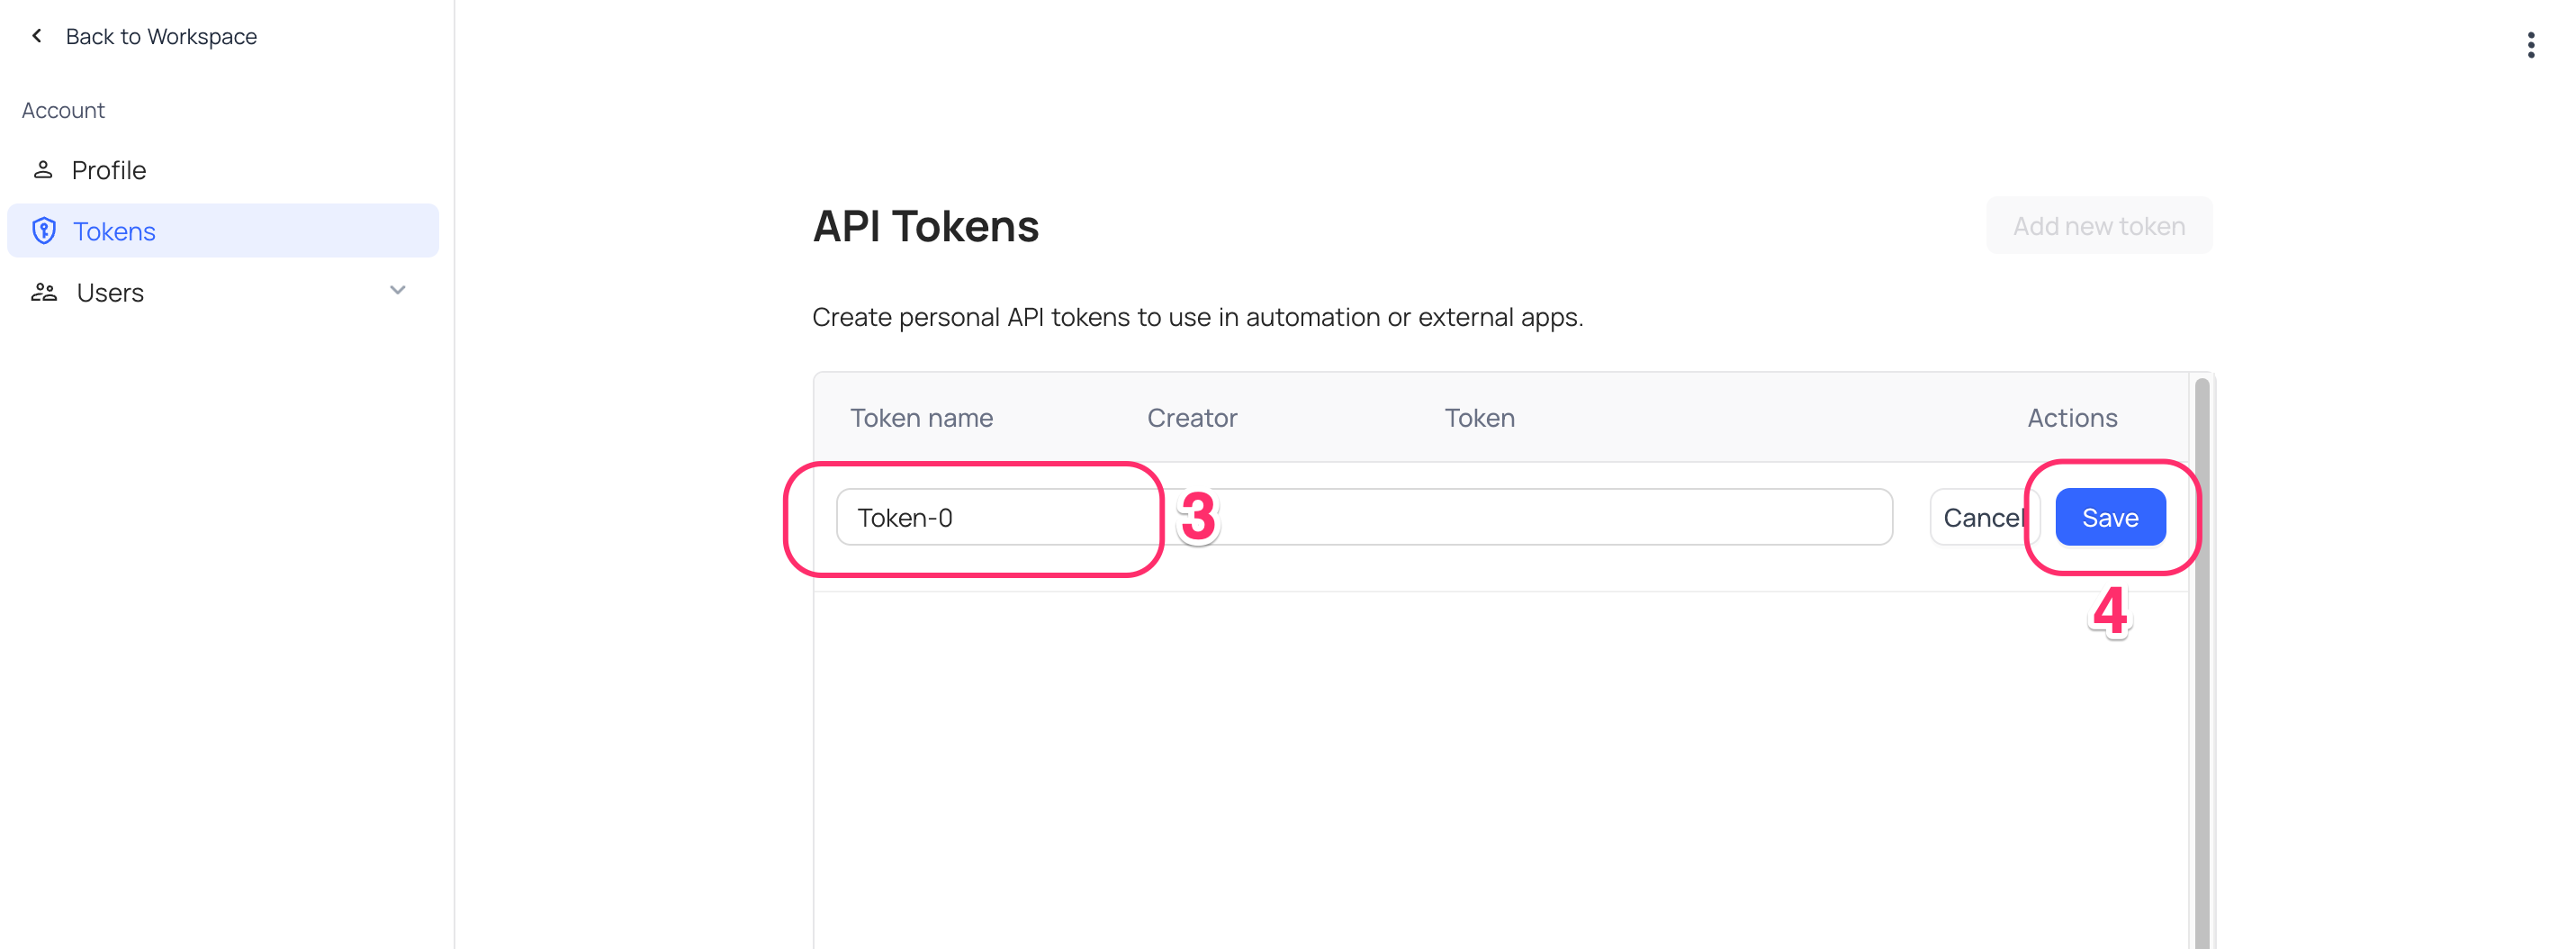
Add New API Token - Enter the name for the API Token
- Click on
Savebutton to save the changes - Copy the API Token by clicking on
Copybutton displayed underActionsmenu
หมายเหตุ: Legacy API tokens do not expire, but can be deleted anytime.
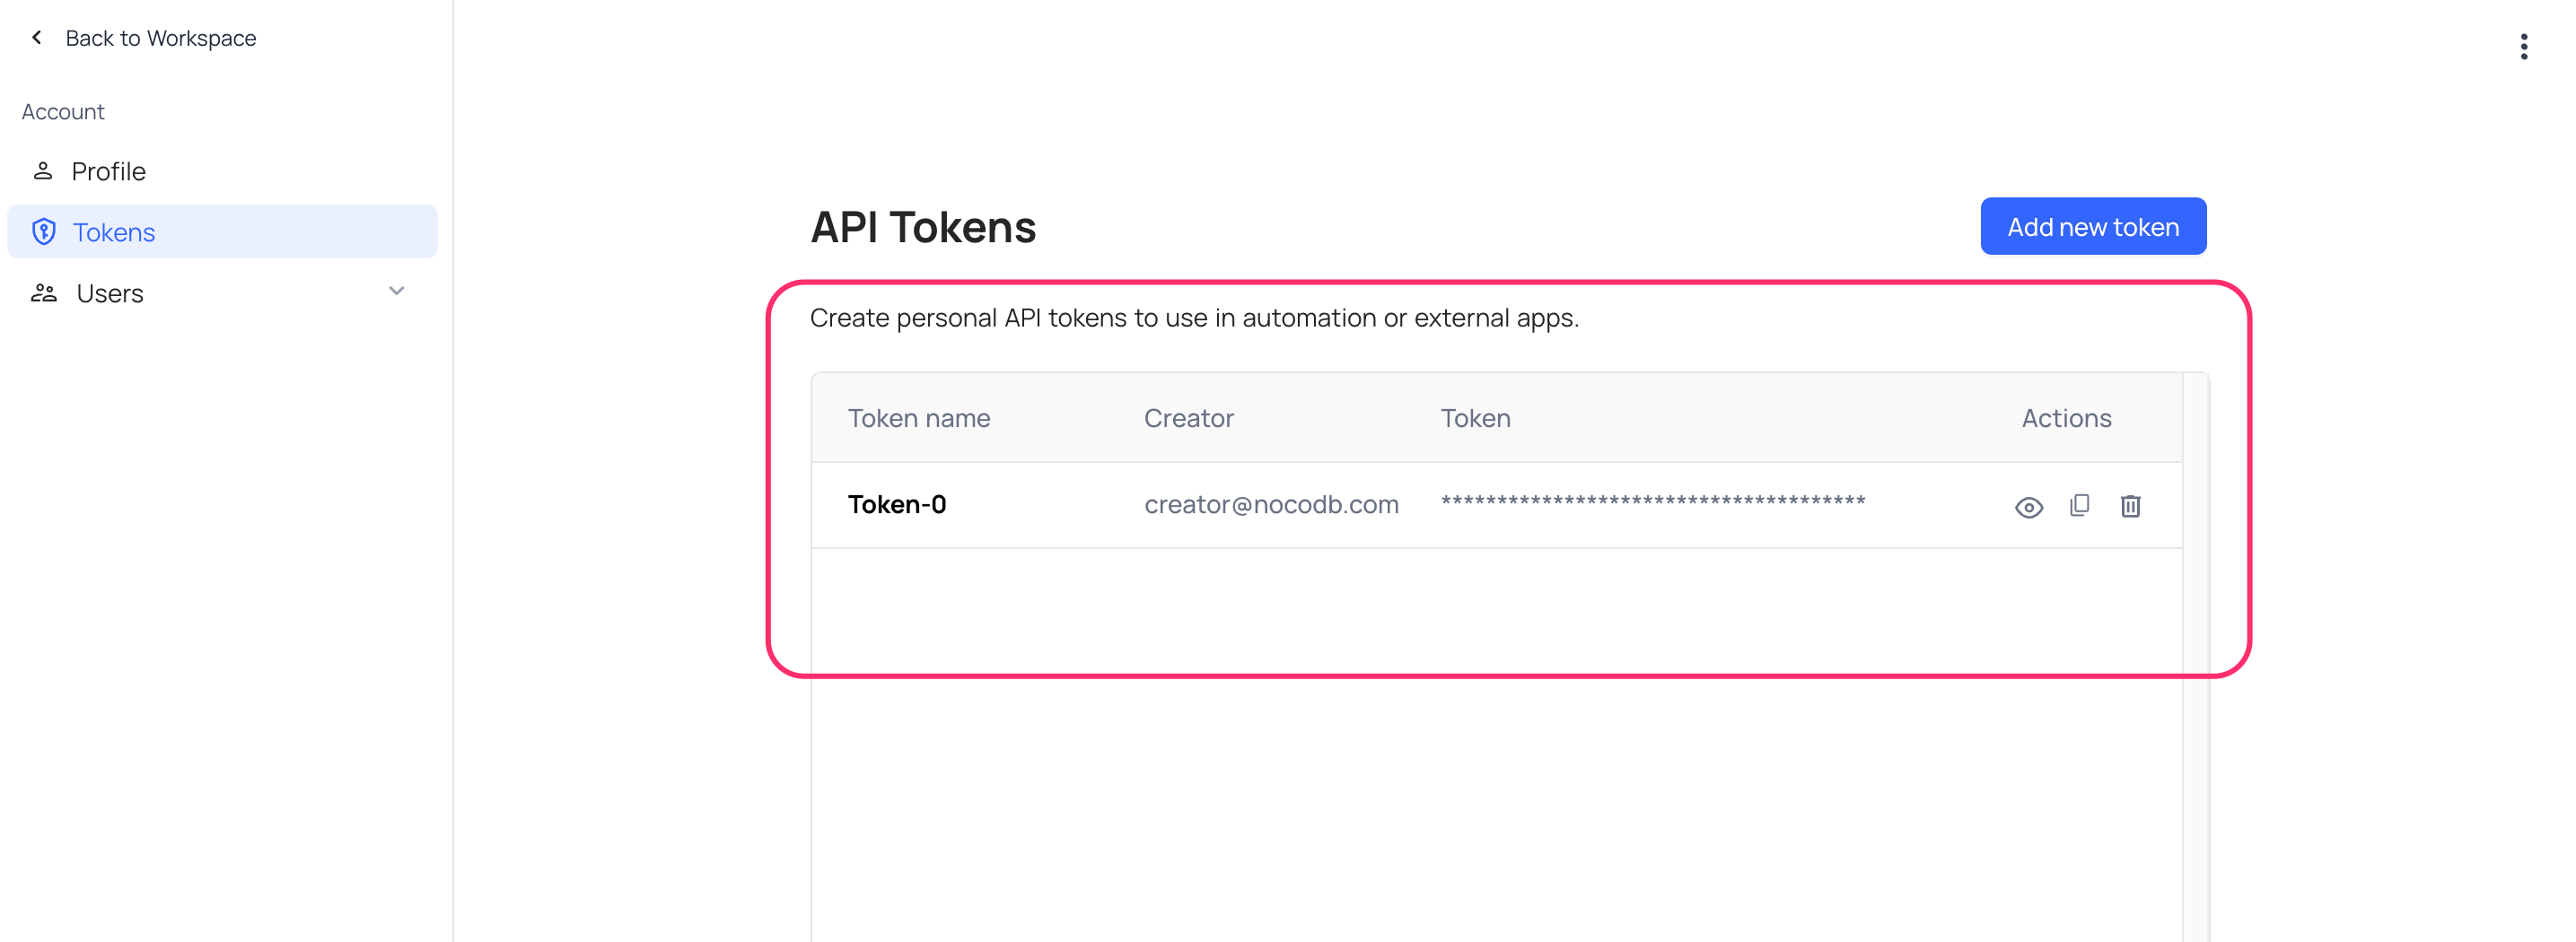
API Token created will get added to the list. Copy API token by clicking on Copy button displayed under Actions menu.
Delete a Token
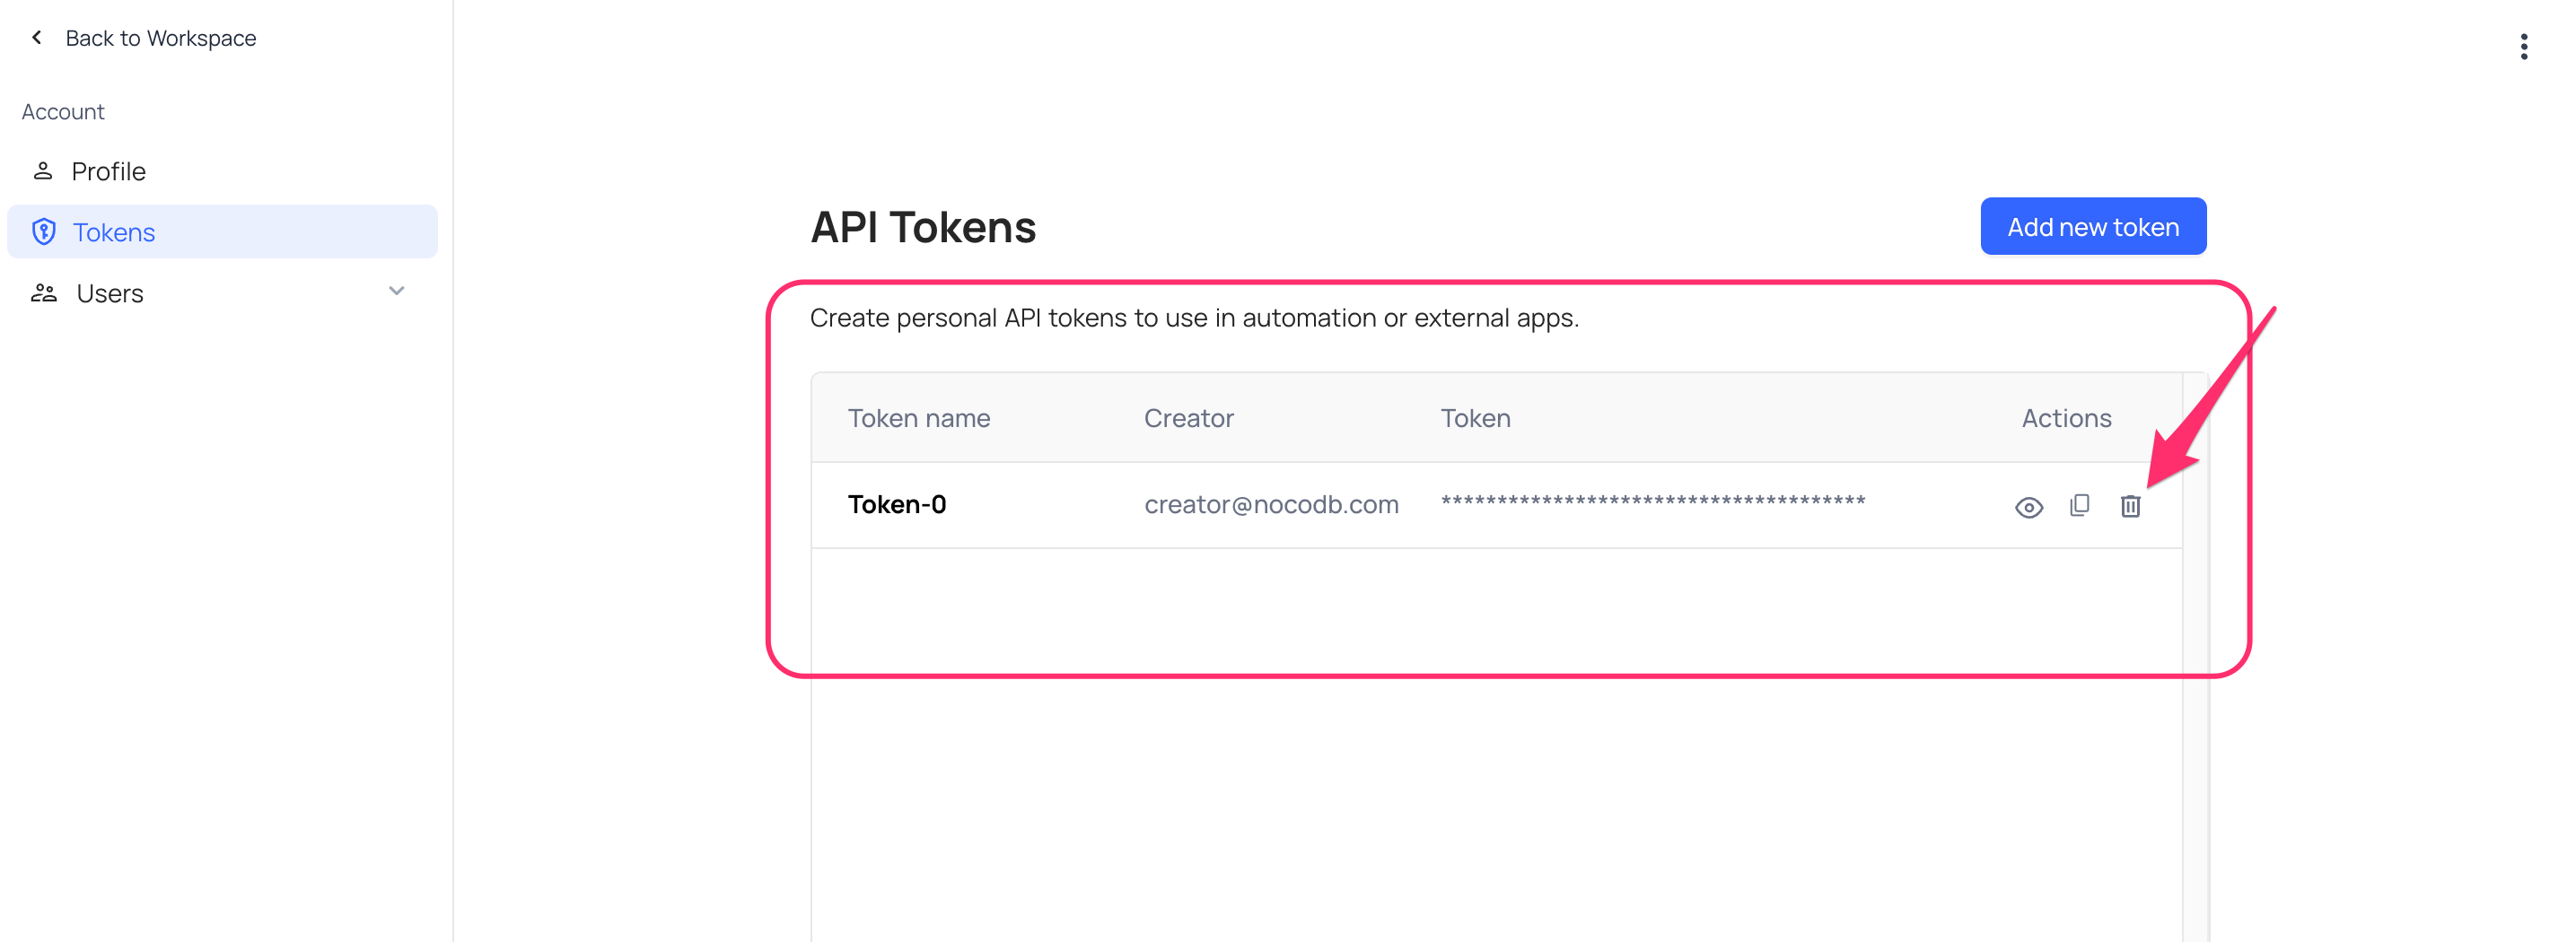
หมายเหตุ: All services using the API token will stop working once the token is deleted.
- Click on
User menuin the bottom left corner of the sidebar - Select
Account Settingsfrom the dropdown - Click on
Tokenstab in theAccount Settingspage - From the
Actionsmenu, click onDeletebutton associated with the API token to be deleted
Authentication
Both fine-grained and legacy tokens support two authentication methods:
Method 1: xc-token Header
curl -H "xc-token: nc_pat_..." https://your-nocodb.com/api/v3/...
Method 2: Authorization Header
curl -H "Authorization: Bearer nc_pat_..." https://your-nocodb.com/api/v3/...
Both methods are equivalent. Choose the one that best fits your application's authentication patterns.
Security Best Practices
- Set an expiration — Use the shortest expiry that meets your needs. 90 days is a good default.
- Use the least permissions necessary — A read-only dashboard only needs
Records: Read. - Scope to specific bases — Avoid "All resources" when the integration only needs access to one base.
- Rotate tokens regularly — Create a new token, update your integration, then delete the old one.
- Disable before deleting — If you suspect a token is compromised, disable it immediately via the Active toggle to investigate before deleting.
- Store tokens securely — Use environment variables or a secrets manager. Never hardcode tokens in source code.
- Audit your tokens — Periodically review your token list. Delete tokens that are no longer needed.
API Token Access with SSO-Enabled Workspaces
If a workspace is configured to enforce Single Sign-On (SSO), API access to that workspace is restricted to tokens that are created after authenticating via SSO .
หมายเหตุ: Tokens created before SSO was enabled do not have the necessary identity context and will not work for SSO-enforced workspaces.
To access an SSO-enforced workspace via API, users must:
- Sign in using SSO.
- Generate a new API token from their authenticated session.
หมายเหตุ: Tokens created before SSO enforcement may still work for other workspaces that do not require SSO.
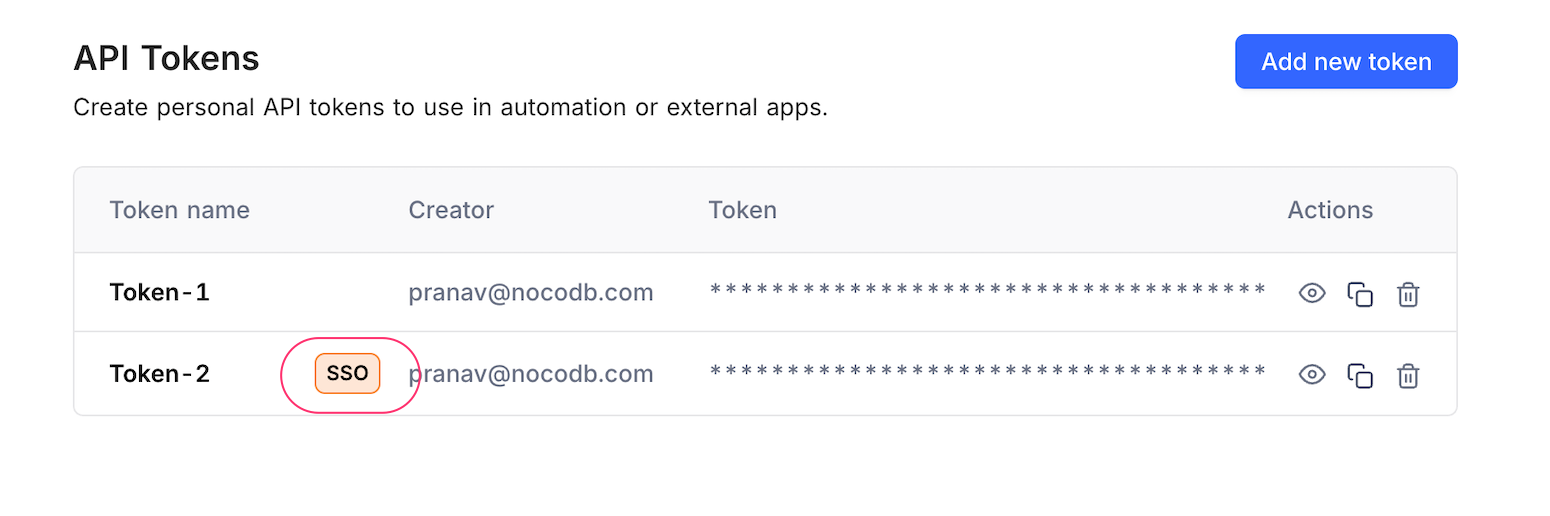
For ease of identification, tokens created after SSO is enabled will have a badge indicating they were generated through SSO authentication.
What Happens When SSO is Disabled?
If SSO is later disabled for a workspace:
- API tokens that were created via SSO authentication will continue to work as long as the user is still active and has the required permissions.
- Tokens created prior to enabling SSO will continue to function & can now access the workspace without SSO authentication.
- No tokens are automatically revoked when SSO is disabled.
Related pages
- Profile Page : This article explains how to manage your profile page.
- Language Settings : This article explains how to change the language settings in NocoDB.
- Appearance : This article explains how to customize the appearance of the NocoDB interface, including switching between Light, Dark and System modes.
- Experimental Features : Learn how to enable or disable experimental features in NocoDB to try out new capabilities before they are generally available.
- In Community Edition : This article explains Account settings specifics in Community Edition NocoDB.